Dreamy Biscoff Truffles Recipe: Bite-Sized Spiced Happiness
Sweet memories often collide with biscoff truffles when childhood comfort meets elegant dessert crafting.
Delicate cookie crumbs promise rich indulgence ahead.
Crunchy caramelized specks blend seamlessly into smooth chocolate foundations.
Creamy textures melt across your palate with unexpected depth.
Simple ingredients dance together, creating magic in mere minutes.
Each bite whispers sophisticated yet approachable decadence.
Truffles That Use Biscoff to Build No-Bake Indulgence
Biscoff Truffles Ingredient List
Base Ingredients:Coating Ingredients:Optional Garnish Ingredients:Rolling Biscoff Truffles for a No-Bake Delight
Step 1: Prepare Workspace
Set up a parchment-lined baking sheet to catch your delicious creations. This will help you manage the truffles easily during the preparation process.
Step 2: Transform Cookies Into Crumbs
Toss Biscoff cookies into a food processor and pulse until they become fine, sandy crumbs. The goal is to create a smooth, consistent texture that will blend perfectly with other ingredients.
Step 3: Create Creamy Dough
Warm cookie butter briefly in the microwave. Pour the softened butter into the food processor with cream cheese and cookie crumbs. Pulse until a rich, thick dough forms that holds together beautifully.
Step 4: Shape Delightful Balls
Gently roll the dough into bite-sized spheres, each about one inch in diameter. Place these little treasures on the prepared baking sheet. Chill them in the refrigerator for an hour or quickly freeze for 20 minutes to firm up.
Step 5: Melt Chocolate Coating
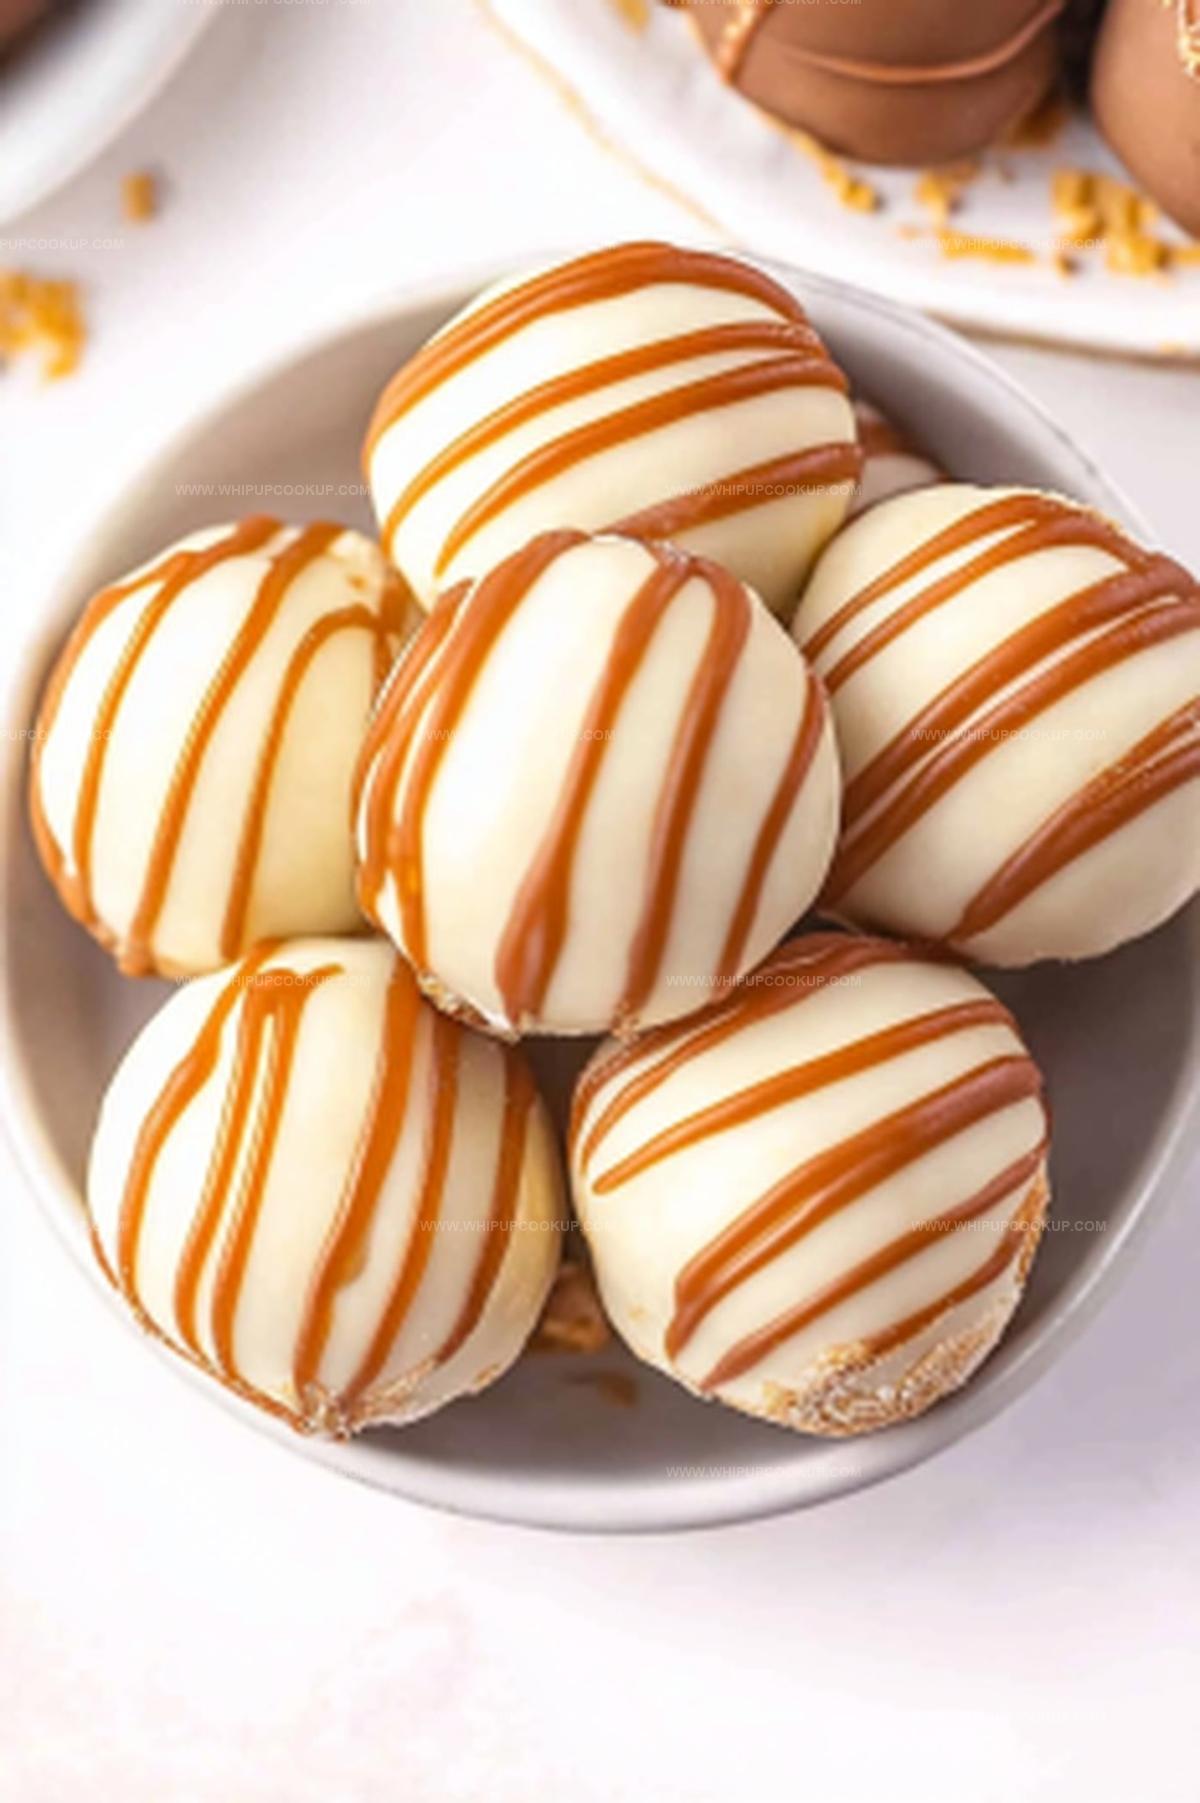
Carefully melt white chocolate in the microwave, stirring between 30-second intervals. Continue until the chocolate becomes silky smooth and glossy.
Step 6: Dip and Decorate
Use a fork or dipping tool to carefully submerge each chilled truffle into the melted white chocolate. Allow excess chocolate to drip off, creating a perfect, elegant coating. Return the dipped truffles to the baking sheet.
Step 7: Add Luxurious Drizzle
Warm additional cookie butter and gracefully drizzle over the chocolate-covered truffles for an extra layer of decadent flavor.
Step 8: Final Chill and Storage
Refrigerate the truffles until the chocolate sets completely. Keep chilled until you’re ready to serve these heavenly treats.
Truffle Tips That Make Biscoff Treats a No-Bake Hit
Chill and Serve Biscoff Truffles Later Without Cracking
Biscoff Truffles Snack Pairings
Biscoff Truffle No-Bake Options
FAQs
Biscoff Truffles are made with ground Biscoff cookies, cream cheese, cookie butter, and white chocolate coating. The main ingredients create a rich, creamy texture with intense cookie flavor.
You’ll need a food processor to finely grind the cookies and mix the dough. A microwave for melting chocolate and cookie butter, and a baking sheet with parchment paper are also essential.
You can make Biscoff Truffles up to 3-4 days ahead of time. Keep them refrigerated in an airtight container, and they’ll maintain their delicious texture and taste.
No, these truffles are surprisingly easy! They’re a no-bake dessert that requires simple steps like grinding cookies, mixing ingredients, rolling balls, and coating with chocolate. Even beginner bakers can successfully make them.
Print
Biscoff Truffles Recipe
- Total Time: 25 minutes
- Yield: 12 1x
Description
Sweet Biscoff truffles blend creamy cookies with rich chocolate for an irresistible dessert. Indulgent Belgian-inspired treats melt smoothly, offering pure comfort in each delectable bite.
Ingredients
main ingredients:
- 8 ounces (226 grams) cream cheese, softened
- 10–12 ounces (280–340 grams) white chocolate, finely chopped
- 8.8 ounces (250 grams) Biscoff cookies (approximately 32 cookies)
additional ingredients:
- 2 tablespoons Biscoff cookie butter (optional, for drizzling)
Instructions
- Prepare a parchment-lined baking sheet to create a clean workspace for crafting delectable Biscoff truffles.
- Transform Biscoff cookies into fine crumbs using a food processor, ensuring a smooth, uniform texture.
- Gently warm the cookie butter to enhance its spreadability, then incorporate it with cream cheese in the food processor until a cohesive, rich dough forms.
- Carefully shape the mixture into petite, uniform spheres, arranging them methodically on the prepared surface.
- Refrigerate the nascent truffles to firm their structure, allowing them to solidify and maintain their delicate shape.
- Melt white chocolate using precise microwave intervals, stirring to achieve a silky, glossy consistency.
- Delicately immerse each chilled truffle into the molten white chocolate, allowing excess to cascade off for an elegant coating.
- Optional: Drizzle warmed cookie butter across the chocolate-enrobed truffles for an additional layer of indulgent flavor.
- Return the truffles to the refrigerator, permitting them to set completely and develop a pristine, glossy finish.
- Store the finished confections in a cool environment until the moment of delightful consumption.
Notes
- Enhance cookie texture by crushing Biscoff cookies manually for slightly chunky truffles, adding delightful rustic character.
- Control sweetness by adjusting cream cheese quantity, allowing personalized flavor intensity for different palates.
- Prevent chocolate cracking during coating by ensuring truffles are thoroughly chilled and white chocolate remains smooth at consistent warm temperature.
- Transform recipe into gluten-free version by substituting regular Biscoff cookies with gluten-free alternatives, maintaining identical delectable taste profile.
- Prep Time: 25 minutes
- Cook Time: 0 minutes
- Category: Desserts, Snacks
- Method: Rolling
- Cuisine: American
Nutrition
- Serving Size: 12
- Calories: 232
- Sugar: 18 g
- Sodium: 170 mg
- Fat: 14 g
- Saturated Fat: 8 g
- Unsaturated Fat: 6 g
- Trans Fat: 0 g
- Carbohydrates: 25 g
- Fiber: 1 g
- Protein: 2 g
- Cholesterol: 28 mg
Marcus Hale
Founder & Recipe Storyteller
Expertise
Education
Holyoke Community College – HCC-MGM Culinary Arts Institute
Marcus grew up surrounded by maple trees, farm stands, and the smell of Sunday stew simmering on the stove. After earning his Culinary Arts Certificate from the HCC-MGM Culinary Arts Institute, he knew he didn’t want to work in fancy kitchens, he wanted to cook for real people.
At Whip Up Cook Up, Marcus is the guy turning memories into meals. His recipes are fast, full of flavor, and built for home cooks who want big taste without the drama.