
Rustic Cherry Cobbler Recipe: Sweet Summer Magic in a Dish
Crafting a delightful cherry cobbler brings pure joy to any kitchen adventure.
Ripe, juicy cherries burst with summer sweetness and create magic on your plate.
Summer’s most delicious dessert promises comfort in every warm, crumbly bite.
Sweet-tart flavors dance between tender fruit and buttery crust, creating pure deliciousness.
Baking this classic treat connects us to cherished memories and simple pleasures.
Seasonal ingredients transform into a rustic dessert that welcomes everyone around the table.
What You’ll Love About This Cherry Cobbler

Cherry Cobbler Ingredients
Main Ingredients:Optional Toppings:Baking Essentials:Cherry Cobbler How to Make
Step 1: Warm Up the Oven
Crank the oven to a cozy 350°F. Grab your trusty 9×13-inch baking dish and pop in a stick of butter, letting it melt and create a golden pool while the oven heats up.
Step 2: Whip Up the Magical Batter
In a mixing bowl, blend together:Stir until the mixture becomes silky smooth and free of lumps.
Step 3: Create the Cobbler Base
Gently pour the batter right over the melted butter in the baking dish. Don’t touch or stir – let the magic happen naturally.
Step 4: Sprinkle Cherry Goodness
Lovingly scatter fresh or canned cherries across the batter, making sure to include all that delicious syrup.
Step 5: Bake to Perfection
Slide the dish into the preheated oven and bake for 35-45 minutes. You’ll know it’s ready when the top turns a gorgeous golden brown and the edges start bubbling with excitement.
Step 6: Serve with Joy
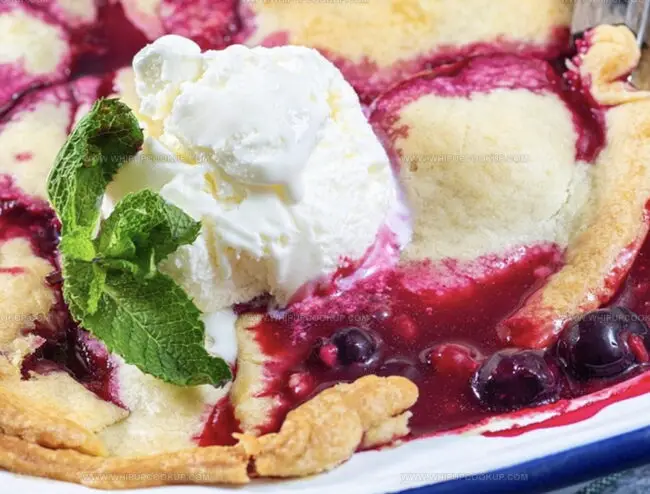
Allow the cobbler to rest and cool for 10 minutes. Serve warm with a generous scoop of vanilla ice cream or a dollop of fluffy whipped cream. Enjoy every single bite of this heavenly dessert!
Cherry Cobbler Tips for That Sweet, Jammy Finish
Keep Cherry Cobbler Tasting Fresh
Pairings for Cherry Cobbler
Cherry Cobbler Style Spins
FAQs
You can use all-purpose flour by adding 1½ teaspoons of baking powder and ¼ teaspoon of salt per cup of flour to create the same rising effect as self-rising flour.
Both fresh and frozen cherries work well. If using fresh cherries, pit them first. For frozen cherries, do not thaw before adding to the recipe to prevent excess liquid.
Look for a golden brown top and bubbly edges. The batter will rise and create a cake-like layer over the cherries. A toothpick inserted in the center should come out clean.
This technique creates a unique texture where the batter rises through the butter, creating a crispy, golden crust while the cherries sink to the bottom, forming a delicious fruity layer.
Print
Cherry Cobbler Recipe
- Total Time: 1 hour
- Yield: 8 1x
Description
Irresistible Southern cherry cobbler brings sweet nostalgia straight from grandma’s kitchen to your table. Warm, golden-crusted dessert offers comfort with juicy cherries nestled beneath buttery, crumbly topping that melts in your mouth.
Ingredients
Fruits:
- 2 cans (14 ounces/397 grams each) cherries in heavy syrup
Dry Ingredients:
- 1 cup self-rising flour
- 1 cup sugar
Wet Ingredients:
- 1 stick (1/2 cup/113 grams) unsalted butter
- 1 cup whole milk
Instructions
- Position the oven rack in the center and heat to 350°F, creating an ideal environment for baking the cobbler.
- Place butter in a 9×13-inch baking dish and slide into the warming oven, allowing it to melt completely and coat the bottom of the pan.
- Whisk sugar, self-rising flour, and milk in a mixing bowl until the mixture transforms into a silky, lump-free batter.
- Carefully pour the prepared batter directly over the melted butter, maintaining distinct layers without stirring or mixing.
- Distribute cherries and their accompanying syrup evenly across the surface of the batter, ensuring a generous and consistent coverage.
- Transfer the baking dish to the preheated oven and bake for 40-45 minutes, watching for a golden-brown top and bubbling edges that signal perfect doneness.
- Remove from the oven and allow the cobbler to rest and settle for 10 minutes, which helps the texture become more cohesive and easier to serve.
- Present the warm cobbler alongside a scoop of creamy vanilla ice cream or a dollop of fluffy whipped cream, creating a delightful contrast of temperatures and textures.
Notes
- Use fresh or frozen cherries for the best flavor, ensuring they are pitted and free from stems.
- Swap self-rising flour with all-purpose flour by adding 1½ teaspoons of baking powder and ½ teaspoon of salt per cup of flour.
- For a gluten-free version, replace self-rising flour with a gluten-free blend and add appropriate leavening agents.
- Adjust sweetness by using tart cherries for a less sweet dessert or adding a sprinkle of cinnamon for extra warmth.
- Prep Time: 15 minutes
- Cook Time: 45 minutes
- Category: Desserts
- Method: Baking
- Cuisine: American
Nutrition
- Serving Size: 8
- Calories: 300
- Sugar: 22 g
- Sodium: 200 mg
- Fat: 12 g
- Saturated Fat: 7 g
- Unsaturated Fat: 4 g
- Trans Fat: 0 g
- Carbohydrates: 43 g
- Fiber: 1 g
- Protein: 3 g
- Cholesterol: 30 mg
Marcus Hale
Founder & Recipe Storyteller
Expertise
Education
Holyoke Community College – HCC-MGM Culinary Arts Institute
Marcus grew up surrounded by maple trees, farm stands, and the smell of Sunday stew simmering on the stove. After earning his Culinary Arts Certificate from the HCC-MGM Culinary Arts Institute, he knew he didn’t want to work in fancy kitchens, he wanted to cook for real people.
At Whip Up Cook Up, Marcus is the guy turning memories into meals. His recipes are fast, full of flavor, and built for home cooks who want big taste without the drama.