
Indulge in our Sweet & Chewy Homemade Sea Salted Caramels Recipe
Sweet memories collide with irresistible sea salted caramels that melt softly across your tongue, promising pure indulgence.
Crafting these delectable treats requires patience and a few simple ingredients.
Rich buttery notes dance with delicate salt crystals, creating a symphony of flavor.
Soft golden squares promise moments of pure bliss with each tender bite.
Kitchen novices and seasoned bakers alike can master this delightful confection.
Unexpected bursts of flavor will surprise you at first taste.
Ready to transform ordinary ingredients into an extraordinary treat that sparks joy?
What Makes Sea Salted Caramels Stand Out
Keto Coconut Fudge Truffles Pantry Guide
Caramel Base:Dairy Components:Finishing Elements:Additional Components:Wrapping:Keto Snowball Coconut Fudge Truffles: Preparation Steps

Step 1: Prepare Sugar Syrup
Grab a medium saucepan and combine sugar, corn syrup, and water. Stir gently until ingredients are mixed, then stop stirring completely. Attach a candy thermometer to the side of the pot to track temperature accurately.
Step 2: Create Golden Caramel Base
Heat the sugar mixture over medium-high heat. Watch carefully as the syrup transforms into a beautiful golden color. If the color appears uneven, gently swirl the pan to distribute heat evenly.
Step 3: Add Creamy Richness
When the sugar reaches a deep golden color and hits 300°F, reduce heat and carefully whisk in:Be prepared for the mixture to bubble and sizzle dramatically when these ingredients meet.
Step 4: Cook to Perfect Consistency
Continue cooking the caramel over medium-high heat until it reaches 250°F, which is the hardball stage for ideal chewy texture.
Step 5: Pour and Salt
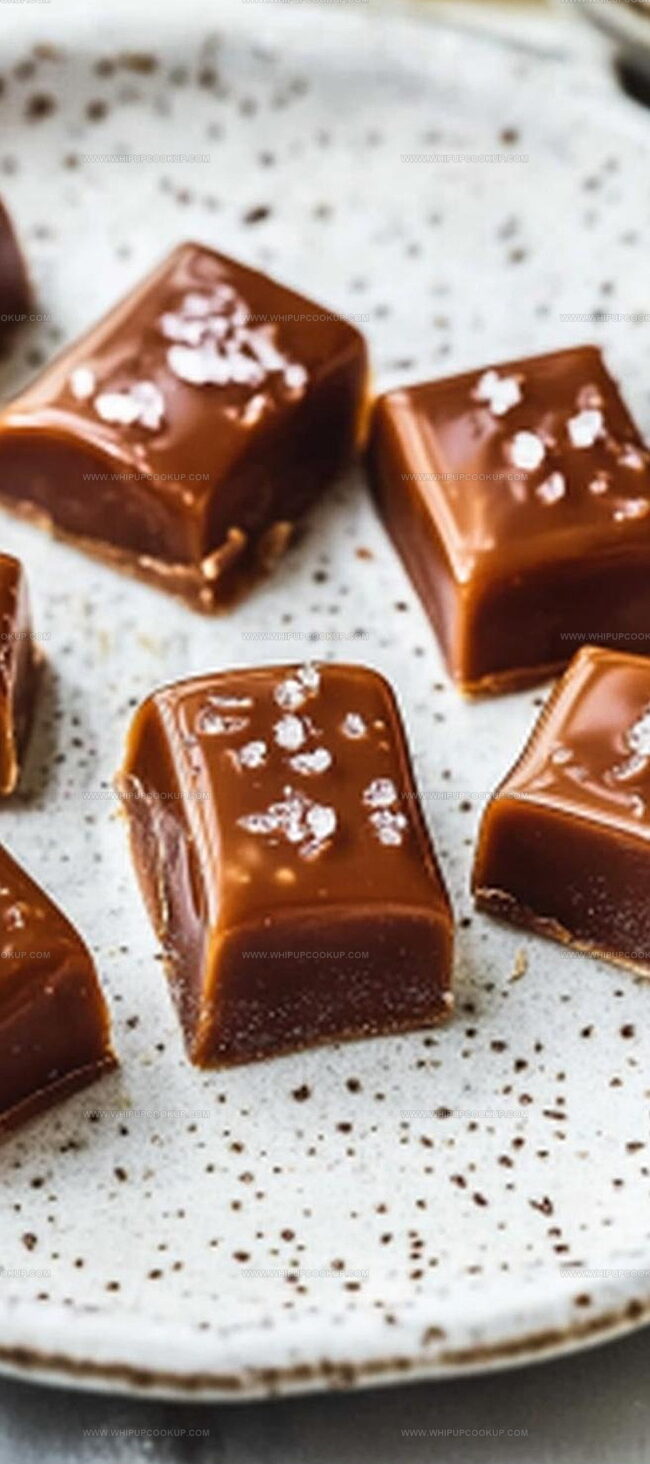
Transfer the molten caramel into an 8×8 inch pan lined with parchment paper and lightly coated with cooking spray. Immediately sprinkle flaky sea salt across the surface. Allow the caramel to cool completely at room temperature.
Step 6: Cut and Wrap
Once fully set, slice the caramel into bite-sized pieces. Optional: Sprinkle additional sea salt on each piece for extra flavor. Wrap individual caramels in wax paper for a classic, homemade touch.
Truffle Tips That Make Coconut Snowballs Shine
Tips to Store and Enjoy Coconut Fudge Truffles Again
Pairing Picks for Coconut Fudge Truffles
Sea Salted Caramel Takes
FAQs
Corn syrup prevents sugar from crystallizing, ensuring a smooth, creamy texture and preventing graininess in your caramels.
Look for a deep golden color and watch for slight smoking. The caramel should be rich amber but not dark brown, which indicates burning.
Flaky sea salt is recommended because it provides a crunchy texture and more intense salt flavor. Table salt will dissolve and won’t give the same textural contrast.
Use a sharp, clean knife and wipe the blade with a warm, slightly oiled cloth between cuts to prevent sticking and ensure clean, smooth edges.
Print
Chewy Homemade Sea Salted Caramels Recipe
- Total Time: 45 minutes
- Yield: 24 1x
Description
Homemade sea salted caramels melt with luxurious richness, revealing complex layers of sweet and salty perfection. Creamy, golden confections promise pure indulgence that will delight your senses with each delectable bite.
Ingredients
Main Ingredients:
- 1.5 cups (354 ml) granulated sugar
- 1/4 cup (60 ml) light corn syrup
- 1/4 cup (60 ml) water
- 1 cup (240 ml) heavy cream
- 4 tablespoons (56 g) unsalted butter
- 1 teaspoon (5 ml) salt
Finishing Ingredients:
- Flaky sea salt (e.g., Maldon or Fleur de Sel) for sprinkling
Preparation Ingredients:
- Cooking spray
- Wax paper for wrapping
Instructions
- Prepare a culinary workspace by lining an 8×8 inch pan with parchment paper, ensuring complete coverage and lightly greasing the surface to prevent sticking.
- In a sturdy medium saucepan, blend sugar, corn syrup, and water until uniformly mixed, avoiding excessive stirring. Securely attach a precise candy thermometer to monitor temperature changes.
- Gradually heat the sugar mixture over medium-high flame, allowing the liquid to transform into a rich golden hue without disturbing its natural caramelization process. Periodically rotate the pan to ensure even coloration.
- When the syrup reaches a deep golden shade and precisely hits 300°F, carefully reduce heat and introduce heavy cream and butter. Anticipate an intense bubbling reaction as ingredients merge.
- Continue cooking the caramel mixture at medium-high temperature, vigilantly tracking its progression until the thermometer registers 250°F, indicating the hardball stage of caramelization.
- Gently transfer the molten caramel into the prepared pan, using a silicone spatula to spread evenly and eliminate air pockets.
- Immediately sprinkle flaky sea salt across the surface, creating a delicate balance of sweet and salty flavors. Allow the caramel to cool completely at room temperature.
- Once fully set, lift the caramel slab from the pan using parchment edges and slice into uniform rectangular pieces using a sharp knife.
- Optional: Dust additional sea salt crystals over cut caramels for enhanced flavor intensity. Wrap individual pieces in wax paper for elegant presentation and preservation.
Notes
- Use a heavy-bottomed saucepan to prevent burning and ensure even heat distribution.
- Monitor the temperature closely with a reliable candy thermometer for precise caramel consistency.
- Avoid stirring the sugar syrup after initial mixing to prevent crystallization and ensure smooth caramel.
- Allow caramels to cool completely before cutting to achieve clean, neat edges.
- For a gluten-free version, double-check that all ingredients are certified gluten-free.
- Store wrapped caramels in an airtight container at room temperature for up to two weeks.
- Experiment with different salt varieties like Maldon or Himalayan pink salt for unique flavor profiles.
- Prep Time: 15 minutes
- Cook Time: 30 minutes
- Category: Desserts, Snacks
- Method: Boiling
- Cuisine: American
Nutrition
- Serving Size: 24
- Calories: 100
- Sugar: 10 g
- Sodium: 50 mg
- Fat: 3 g
- Saturated Fat: 2 g
- Unsaturated Fat: 1 g
- Trans Fat: 0 g
- Carbohydrates: 17 g
- Fiber: 0 g
- Protein: 0 g
- Cholesterol: 10 mg
Marcus Hale
Founder & Recipe Storyteller
Expertise
Education
Holyoke Community College – HCC-MGM Culinary Arts Institute
Marcus grew up surrounded by maple trees, farm stands, and the smell of Sunday stew simmering on the stove. After earning his Culinary Arts Certificate from the HCC-MGM Culinary Arts Institute, he knew he didn’t want to work in fancy kitchens, he wanted to cook for real people.
At Whip Up Cook Up, Marcus is the guy turning memories into meals. His recipes are fast, full of flavor, and built for home cooks who want big taste without the drama.