Sweet Fusion: Chocolate Chip Cheesecake Cookies Recipe
Sweet, buttery dough meets creamy chocolate chip cheesecake cookies in this irresistible dessert.
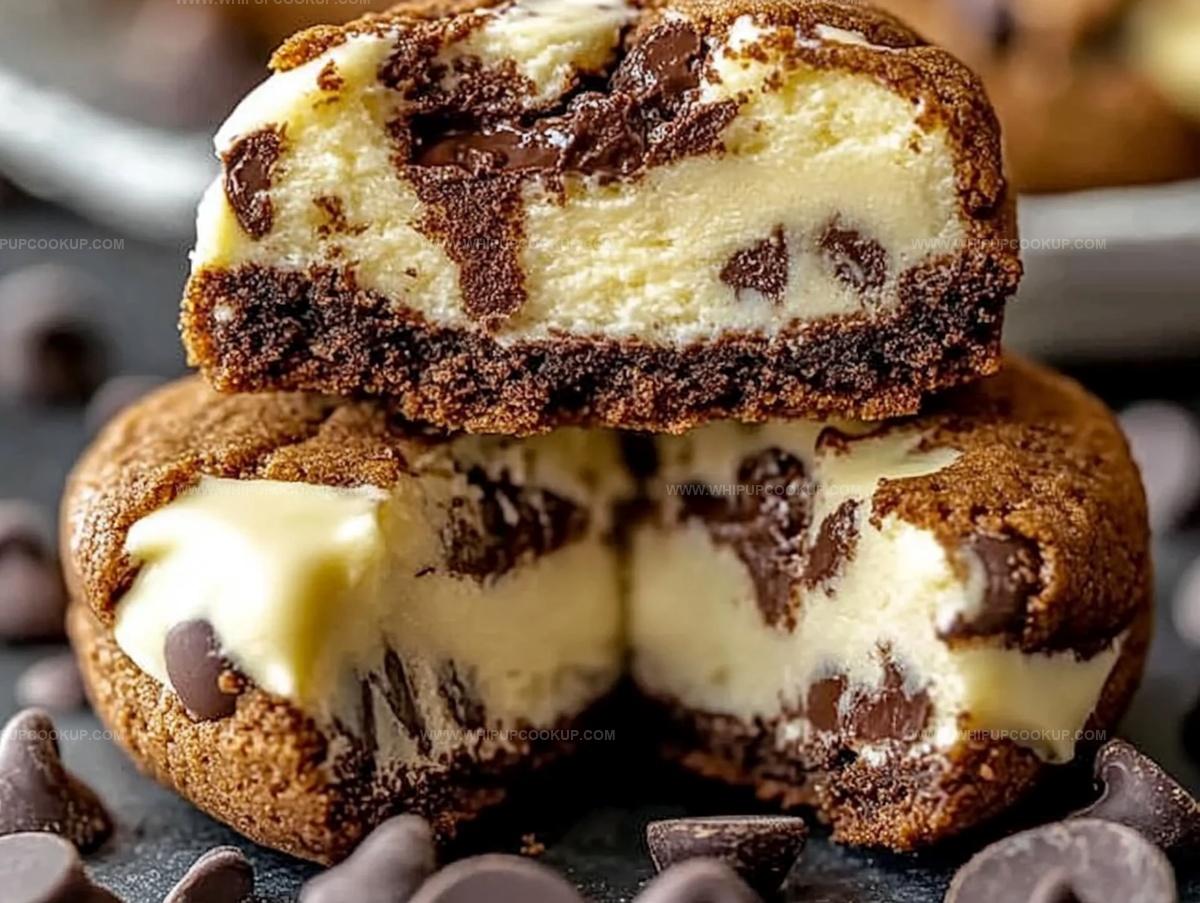
These delectable treats combine the best of two beloved classics into one mouthwatering bite.
Soft, rich, and utterly decadent, they promise to become your new favorite indulgence.
Each cookie delivers a perfect balance of tangy cheesecake and rich chocolate chip flavors.
Crumbly edges give way to a tender center that melts in your mouth.
The recipe is straightforward, requiring minimal baking expertise.
Why You’ll Keep Coming Back to Cheesecake Cookies
What Goes Into Chocolate Chip Cheesecake Cookies
Core Ingredients:Chocolate Additions:Baking Preparation:How to Bake Chocolate Chip Cheesecake Cookies
Step 1: Prepare Baking Station
Warm up your oven to 350°F.
Cover a baking sheet with parchment paper to prevent sticking and make cleanup super easy.
Step 2: Whip Creamy Base
Grab a large mixing bowl and blend cream cheese, butter, and sugar until the mixture becomes wonderfully light and fluffy.
Use an electric mixer to get that perfect smooth texture.
Step 3: Incorporate Liquid Ingredients
Pour in the egg and vanilla extract.
Mix thoroughly until the batter looks completely smooth and well combined.
Step 4: Create Dry Mixture
In a separate bowl, whisk together:Slowly add this dry blend into the creamy mixture, stirring gently until everything is just incorporated.
Step 5: Add Chocolate Magic
Carefully fold semi-sweet chocolate chips into the dough using a spatula.
Ensure the chips are evenly distributed for maximum chocolate goodness in every bite.
Step 6: Shape Cookie Drops
Use a spoon to drop cookie dough onto the prepared baking sheet.
Space each cookie about 2 inches apart to give them room to spread while baking.
Step 7: Bake to Perfection
Slide the baking sheet into the preheated oven.
Bake for 10-12 minutes until the edges turn a lovely golden color while keeping the centers soft and tender.
Step 8: Cool and Serve
Let the cookies rest on the baking sheet for a few minutes.
Transfer to a wire rack to cool completely.
Enjoy these delectable treats warm or store in an airtight container for later snacking.
Tips for Rich and Creamy Cookie Centers
Storage and Reheating for Cheesecake Cookies
Treats That Go Well With These Cookies
Unique Styles to Try With Cheesecake Cookies
FAQs
Cream cheese adds a rich, tangy flavor and creates a uniquely soft, tender texture that makes these cookies incredibly moist and different from traditional chocolate chip cookies.
Absolutely! While semi-sweet chocolate chips work great, you can easily swap them with milk chocolate, dark chocolate, or even white chocolate chips to customize the flavor and match your preference.
Make sure your butter and cream cheese are softened but not melted, chill the dough for 30 minutes before baking, and ensure your baking sheet is at room temperature to help maintain the cookie’s shape during baking.
Yes! The cream cheese helps balance the sweetness, creating a more sophisticated cookie that’s not overly sugary, making it perfect for those who prefer a subtle, less intense sweet treat.
Print
Chocolate Chip Cheesecake Cookies Recipe
- Total Time: 25 minutes
- Yield: 24 1x
Description
Sweet meets creamy in these chocolate chip cheesecake cookies, merging classic American dessert flavors into one irresistible treat. Crisp edges, tangy cream cheese swirls, and rich chocolate chunks make these cookies an indulgent experience you’ll crave again and again.
Ingredients
Main Ingredients:
- 1 1/2 cups semi-sweet chocolate chips
- 1 cup granulated sugar
- 1 1/4 cups all-purpose flour
- 8 ounces (226 grams) cream cheese, softened
- 1/2 cup unsalted butter, softened
Wet Ingredients:
- 1 large egg
- 1 teaspoon vanilla extract
Dry Ingredients:
- 1/2 teaspoon baking powder
- 1/4 teaspoon salt
Instructions
- Prepare the baking workspace by lining a baking sheet with parchment paper and heating the oven to 350°F (175°C).
- Create a creamy base by whipping softened cream cheese, butter, and granulated sugar together until the mixture becomes light and airy.
- Enhance the mixture by incorporating egg and vanilla extract, blending until the texture is smooth and uniform.
- Separately combine flour, baking powder, and salt, then gradually integrate these dry ingredients into the cream cheese mixture, stirring until just combined.
- Gently introduce semi-sweet chocolate chips into the dough, ensuring even distribution throughout the mixture.
- Carefully portion the cookie dough onto the prepared baking sheet, maintaining approximately 2 inches of space between each dollop to allow for spreading during baking.
- Position the baking sheet in the preheated oven and bake for 10-12 minutes, watching for lightly golden edges while maintaining soft centers.
- After removing from the oven, let the cookies rest briefly on the baking sheet before transferring to a wire rack for complete cooling.
- Serve warm for maximum enjoyment or store in an airtight container to preserve freshness and texture.
Notes
- Achieve the perfect texture by ensuring cream cheese and butter are at room temperature before mixing, which helps create a smooth, creamy base for the cookies.
- Prevent overmixing the dough after adding dry ingredients to keep the cookies tender and soft, stopping just when the ingredients are combined.
- For a gluten-free version, swap all-purpose flour with a 1:1 gluten-free baking blend, maintaining the same measurements and mixing technique.
- Experiment with different chocolate variations like dark chocolate chips, milk chocolate chunks, or even white chocolate for unique flavor profiles and personalized treats.
- Prep Time: 15 minutes
- Cook Time: 10 minutes
- Category: Snacks, Desserts
- Method: Baking
- Cuisine: American
Nutrition
- Serving Size: 24
- Calories: 147
- Sugar: 8 g
- Sodium: 50 mg
- Fat: 7 g
- Saturated Fat: 4 g
- Unsaturated Fat: 2 g
- Trans Fat: 0 g
- Carbohydrates: 20 g
- Fiber: 1 g
- Protein: 2 g
- Cholesterol: 15 mg
Marcus Hale
Founder & Recipe Storyteller
Expertise
Education
Holyoke Community College – HCC-MGM Culinary Arts Institute
Marcus grew up surrounded by maple trees, farm stands, and the smell of Sunday stew simmering on the stove. After earning his Culinary Arts Certificate from the HCC-MGM Culinary Arts Institute, he knew he didn’t want to work in fancy kitchens, he wanted to cook for real people.
At Whip Up Cook Up, Marcus is the guy turning memories into meals. His recipes are fast, full of flavor, and built for home cooks who want big taste without the drama.