Homemade Chocolate Covered Pretzels Recipe: Sweet & Salty Magic
Crafting delectable chocolate covered pretzels sparks pure culinary joy for snack enthusiasts everywhere.
Salty meets sweet in a delightful dance of flavors that tingles taste buds.
Crisp pretzels become irresistible when draped in smooth, melted chocolate.
Making these treats requires minimal ingredients and surprisingly simple techniques.
Professional or amateur bakers can master this delightful recipe with ease.
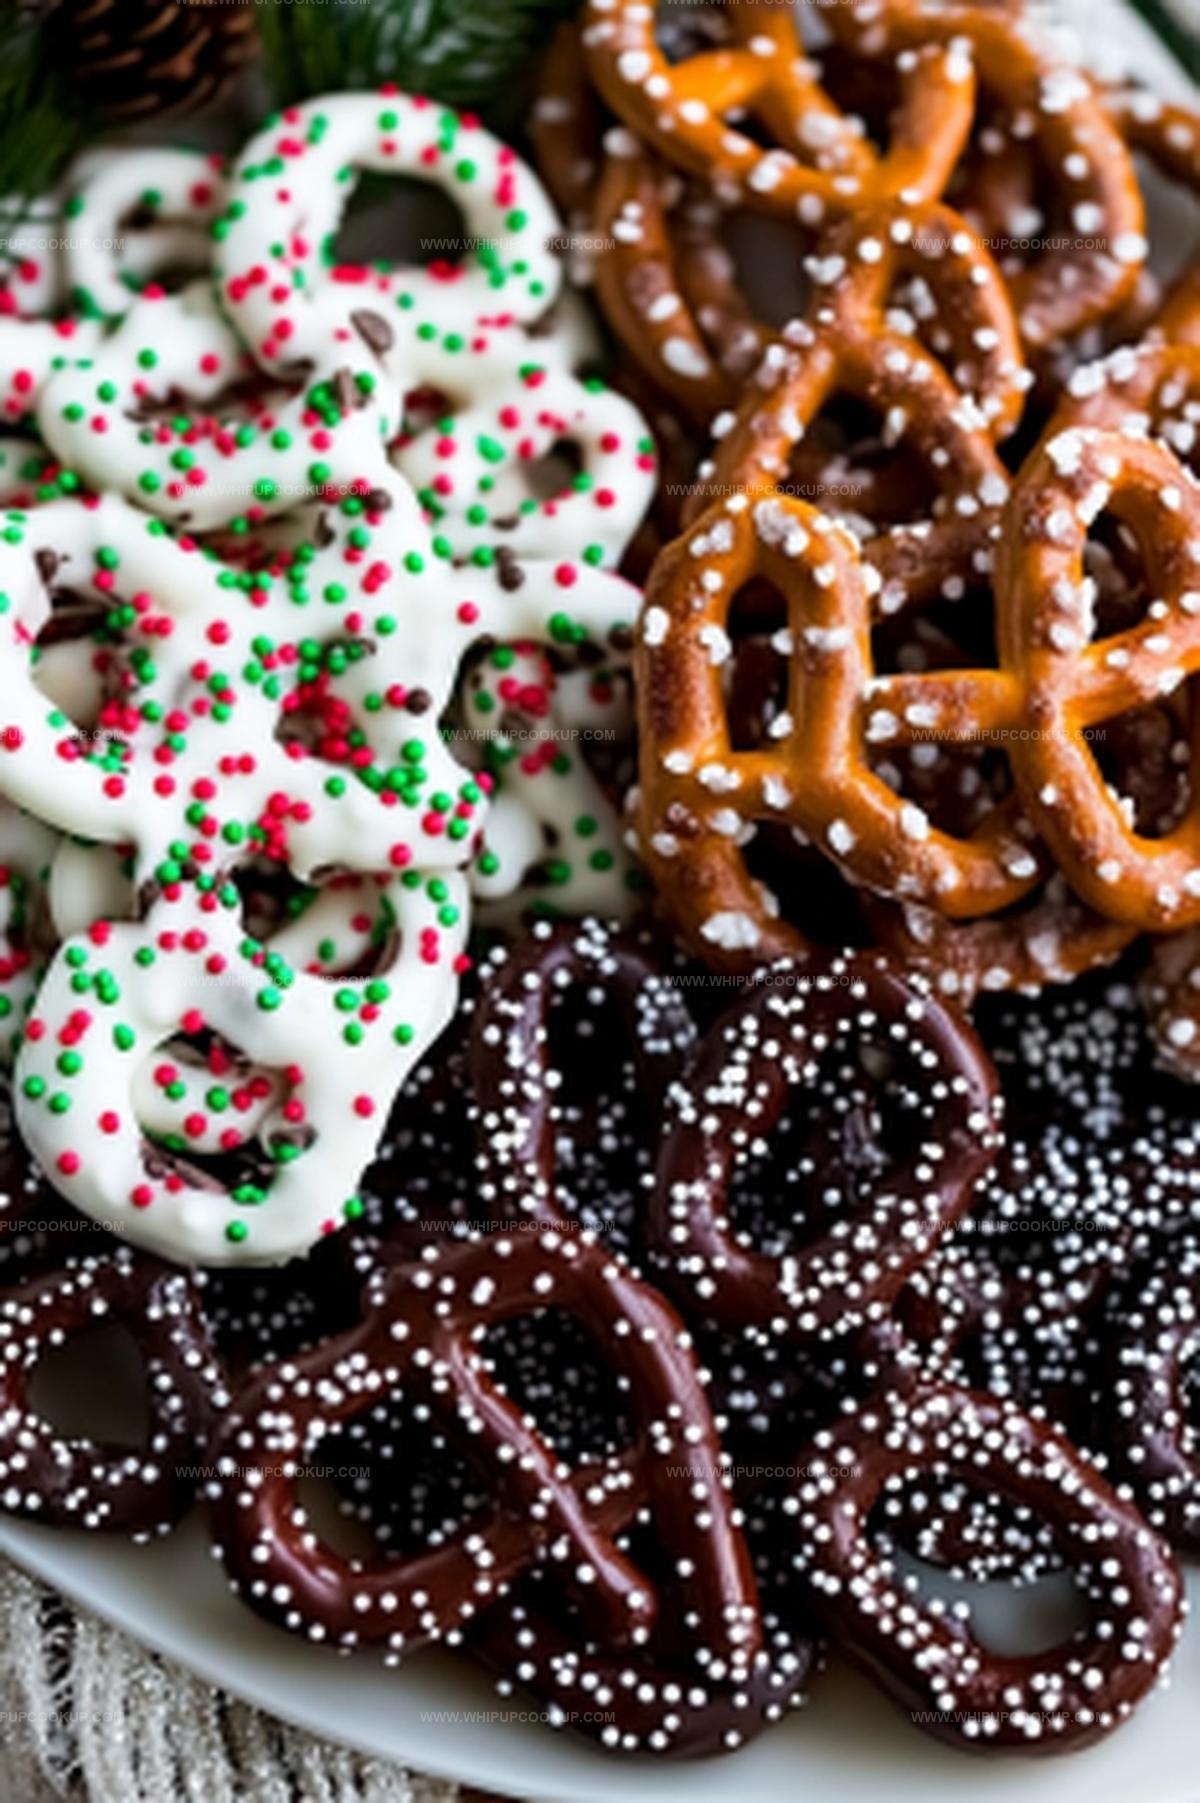
Drizzle extra chocolate or sprinkle fun toppings to personalize your creation.
You’ll wow friends and family with these addictive, crunchy confections that disappear in moments.
Pretzels Dipped in Chocolate for Sweet, Salty Balance
Gingerbread Crinkle Cookies Ingredient List
Main Ingredients:Coating and Texture Enhancers:Optional Finishing Touches:Making Chocolate Covered Pretzels at Home
Step 1: Melt the Chocolate
Choose chocolate chips or candy melts and place them in a microwave-safe bowl. If using chocolate chips, add a small amount of shortening to help create a smooth, glossy coating. This trick ensures your chocolate melts evenly and gives a professional-looking finish.
Step 2: Create the Perfect Chocolate Bath
Microwave the chocolate in short 30-second bursts, stirring thoroughly between each interval. This gentle approach prevents burning and helps the chocolate melt smoothly. Continue until the chocolate is completely melted and has a silky, liquid consistency.
Step 3: Prepare for Dipping Pretzel Rods
For pretzel rods, pour the melted chocolate into a tall glass for easy dipping. Grasp each rod and submerge it halfway into the chocolate, twirling gently to ensure even coverage. Tap the rod against the glass’s edge to remove excess chocolate.
Step 4: Decorate with Flair
While the chocolate is still wet, sprinkle your favorite toppings over the dipped pretzels. Consider using:Step 5: Dip Pretzel Twists with Precision
For pretzel twists, use a fork to fully coat each pretzel in chocolate. Gently tap the fork on the bowl’s edge to remove extra chocolate. Use a toothpick to carefully transfer the chocolate-covered pretzel onto parchment paper.
Step 6: Let Chocolate Set
Allow the chocolate-covered pretzels to rest at room temperature. Give them time to completely set and harden, which typically takes about 30 minutes to an hour depending on room temperature and humidity.
Step 7: Store and Serve
Once fully set, transfer pretzels to an airtight container. They’ll stay fresh at room temperature for up to a week. Enjoy as a quick snack, party treat, or homemade gift that’s sure to impress!
Pretzel Tips That Keep Chocolate Coating Smooth
Keep Chocolate Pretzels Crunchy After Making
Brie Crostini Appetizer Matches
Gingerbread Crinkle Cookie Holiday Options
FAQs
Use a clean, dry bowl and utensils. Avoid introducing any water to the chocolate, as even a small amount can cause it to become grainy and clump together.
Absolutely! You can use milk, dark, or white chocolate. Just ensure you choose high-quality chocolate that melts smoothly and tastes great.
Shortening helps thin out the chocolate, making it easier to dip and creating a smoother, more even coating on the pretzels. It also helps the chocolate set with a nice shine.
Use dry sprinkles that will stick easily to wet chocolate. Nonpareils, jimmies, or sanding sugar work great and add a fun, colorful touch to your chocolate-covered pretzels.
Print
Chocolate Covered Pretzels Recipe
- Total Time: 35 minutes
- Yield: 24 1x
Description
Salty meets sweet in these irresistible Chocolate Covered Pretzels that blend crunchy pretzel twists with rich, melted chocolate. Perfect for snacking or gifting, these treats promise a delightful contrast of flavors you’ll savor with every delectable bite.
Ingredients
Chocolate
- 12 ounces (340 grams) chocolate chips or candy melts (milk, white, dark, or a mix)
- 1 tablespoon (15 milliliters) shortening (only if using chocolate chips)
Pretzels
- 50 miniature pretzel twists or 24 pretzel rods
Decorations
- 1/2 cup (75 grams) sprinkles (any type you love)
Instructions
- Prepare a microwave-safe bowl and melt chocolate chips or candy melts, incorporating shortening for smoother consistency.
- Use 30-second microwave intervals, stirring thoroughly between each heating cycle to ensure uniform melting and prevent scorching.
- For pretzel rods, transfer melted chocolate into a tall glass for easy dipping, submerging each rod halfway and gently tapping to remove excess chocolate.
- Immediately roll chocolate-coated rod in sprinkles, ensuring even coverage and decorative appearance.
- When working with pretzel twists, use a fork to fully immerse each piece in melted chocolate, carefully tapping the fork’s edge against the bowl to remove dripping excess.
- Transfer chocolate-coated twists onto parchment paper using a toothpick, maintaining a clean and precise placement.
- Sprinkle decorative toppings immediately after coating to ensure they adhere properly to the melted chocolate surface.
- Allow pretzels to set and solidify completely at room temperature, which typically takes 15-20 minutes depending on ambient conditions.
- Once fully set, arrange pretzels on a serving platter or store in an airtight container to maintain their crisp texture and flavor.
Notes
- Melt chocolate gently to prevent burning by using short microwave intervals and stirring frequently.
- Add a tiny amount of coconut oil or shortening to create smoother, shinier chocolate coating that won’t crack.
- Choose high-quality chocolate or candy melts for better flavor and more professional-looking results.
- Customize by using different chocolate varieties like dark, milk, or white chocolate to match personal preferences or event themes.
- Prep Time: 10 minutes
- Cook Time: 25 minutes
- Category: Snacks, Desserts
- Method: Melting
- Cuisine: American
Nutrition
- Serving Size: 24
- Calories: 100
- Sugar: 8g
- Sodium: 150mg
- Fat: 4g
- Saturated Fat: 2g
- Unsaturated Fat: 2g
- Trans Fat: 0g
- Carbohydrates: 14g
- Fiber: 0g
- Protein: 1g
- Cholesterol: 0mg
Marcus Hale
Founder & Recipe Storyteller
Expertise
Education
Holyoke Community College – HCC-MGM Culinary Arts Institute
Marcus grew up surrounded by maple trees, farm stands, and the smell of Sunday stew simmering on the stove. After earning his Culinary Arts Certificate from the HCC-MGM Culinary Arts Institute, he knew he didn’t want to work in fancy kitchens, he wanted to cook for real people.
At Whip Up Cook Up, Marcus is the guy turning memories into meals. His recipes are fast, full of flavor, and built for home cooks who want big taste without the drama.