
Indulge in Sweet Magic: Chocolate Crinkle Cookies Recipe
Chocolate lovers unite over these irresistible chocolate crinkle cookies that melt in your mouth with rich, decadent flavor.
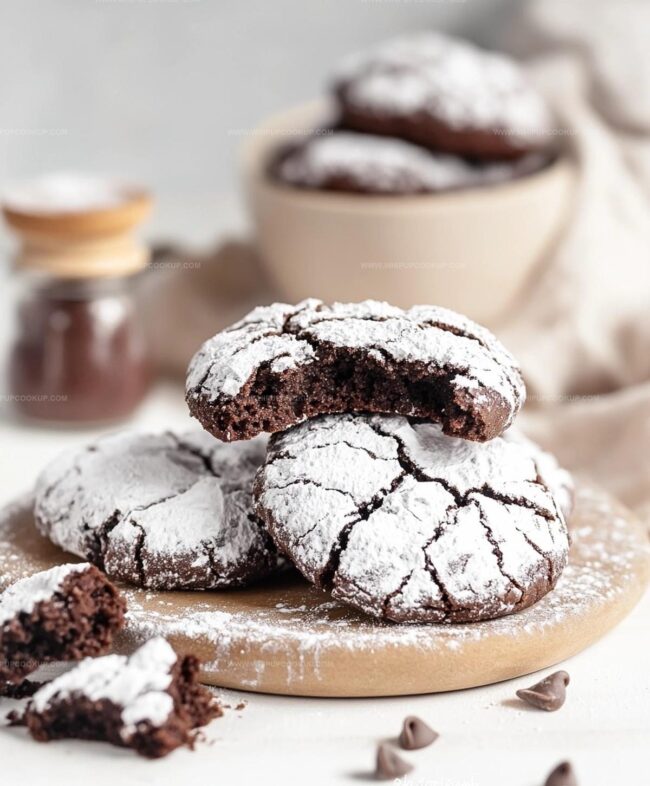
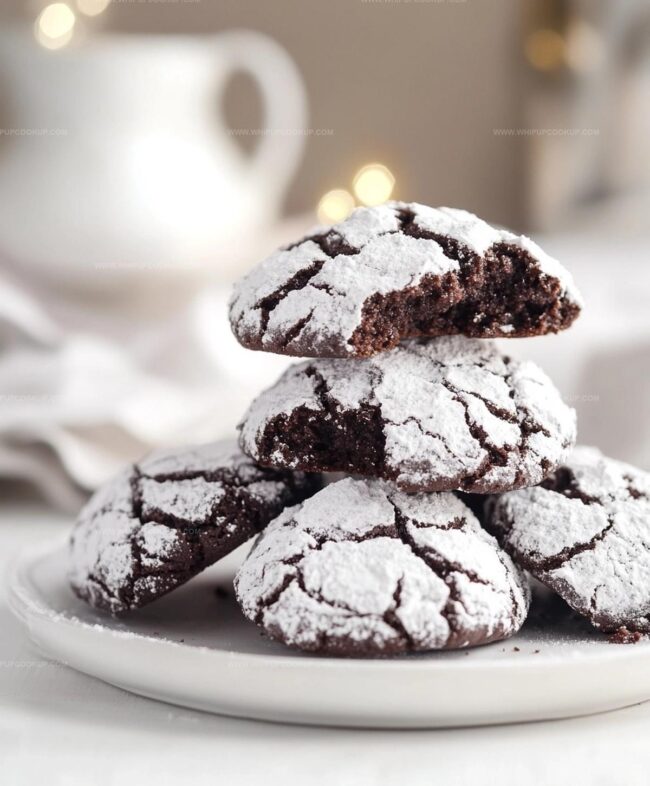
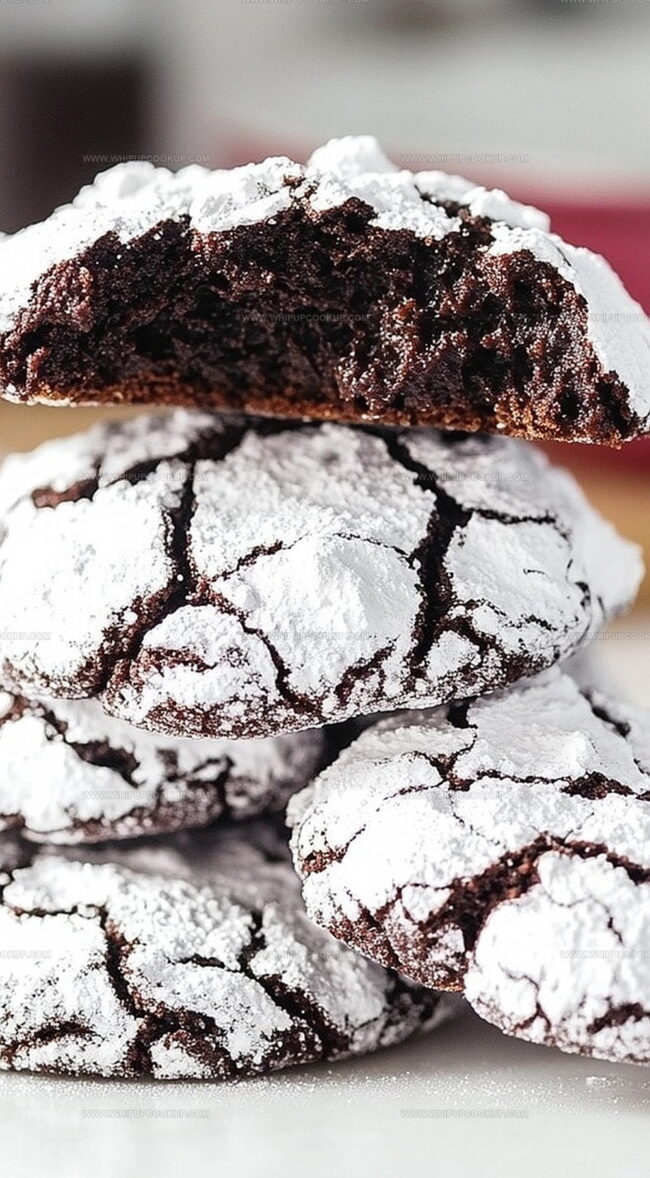
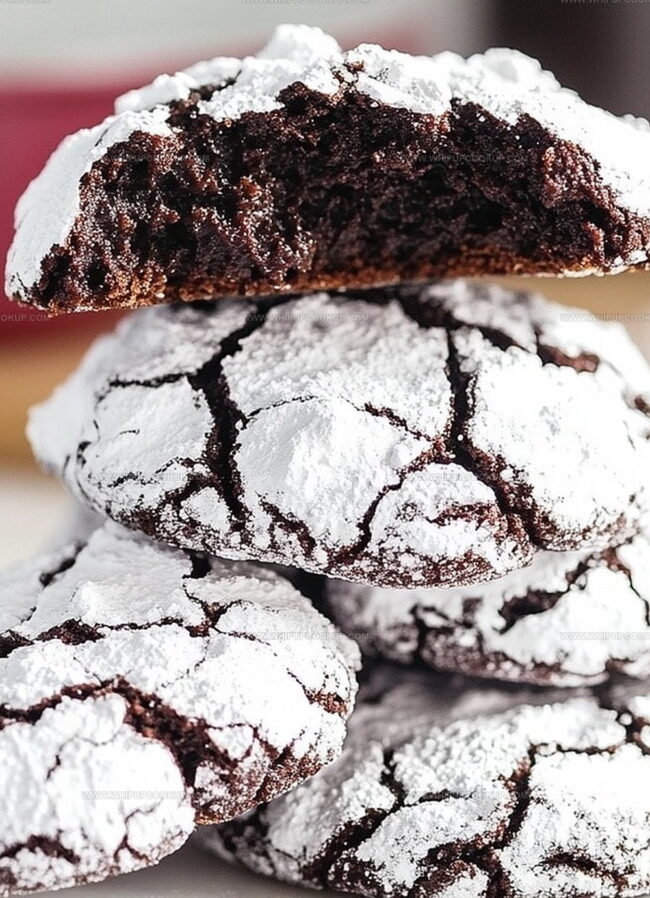
Dusted with powdered sugar, these delightful treats create a stunning visual contrast against their deep, dark chocolate base.
Each bite promises a delicate crackled exterior that gives way to a soft, fudgy center.
The recipe blends simple ingredients into an extraordinary dessert that looks as impressive as it tastes.
Perfectly balanced between elegant and comforting, these cookies work magic for any occasion.
Baking these will transform your kitchen into a haven of sweet, chocolatey bliss.
Prepare to dazzle everyone with this classic crowd-pleaser that never fails to bring smiles.
Why Chocolate Crinkle Cookies Are a Classic
What You Need for Crinkle Cookies
Dry Ingredients:Wet and Sweet Ingredients:Coating Ingredient:How to Make Chocolate Crinkle Cookies
Step 1: Prepare Baking Setup
Preheat the oven to 350°F.
Line a baking sheet with a silicone mat or parchment paper for smooth cookie removal and even baking.
Step 2: Create Dry Ingredient Blend
Whisk together flour, baking powder, and salt in a small bowl.
This ensures even distribution of ingredients throughout the cookie dough.
Step 3: Combine Wet Ingredients
In a medium bowl, mix:Beat in eggs one at a time until the mixture becomes glossy.
Stir in vanilla extract for enhanced flavor depth.
Step 4: Merge Ingredient Mixtures
Gradually incorporate dry ingredient mixture into wet ingredients.
Add in batches to prevent overmixing, which can result in tough cookies.
The dough will feel sticky – this is exactly right.
Step 5: Refrigerate Dough
Cover the dough with plastic wrap and chill in the refrigerator for at least 30 minutes.
Cooling firms up the dough, making it easier to shape and helps cookies maintain their structure during baking.
Step 6: Shape and Coat Cookies
Using a cookie scoop, form dough into 1¼-inch balls.
Roll each ball completely in powdered sugar.
Arrange on prepared baking sheet with space between each cookie.
Step 7: Bake and Cool Cookies
Bake for 10-11 minutes.
Cookies should appear slightly underbaked when removed from the oven.
Let them rest on the baking sheet for 2 minutes, then transfer to a cooling rack to finish setting.
Tips for Crinkle Cookie Perfection
Storing and Reheating Crinkle Cookies
Pairings for Chocolate Crinkle Cookies
Fun Twists on Classic Crinkle Cookies
FAQs
Chilling helps solidify the fat in the dough, prevents spreading during baking, and allows flavors to develop more deeply. It also makes the dough easier to handle and roll into balls.
Absolutely! This recipe uses cocoa powder, which provides intense chocolate flavor and helps create the classic crinkle cookie texture. It’s actually preferable to melted chocolate for this specific cookie style.
Look for slightly cracked tops and soft edges. The cookies should appear slightly underbaked when you remove them from the oven, as they’ll continue to set while cooling. They’ll be soft and fudgy in the center.
When the cold dough balls are rolled in powdered sugar and then baked, the sugar creates a beautiful cracked surface as the cookies expand and rise in the oven. This creates the signature “crinkle” look that gives these cookies their name.
Print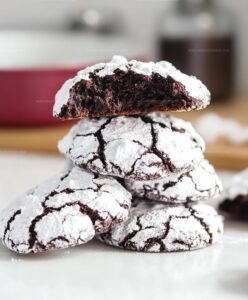
Chocolate Crinkle Cookies Recipe
- Total Time: 55 minutes
- Yield: 24 1x
Description
Chocolate crinkle cookies offer a delightful dance of rich cocoa and powdered sugar magic. Crisp edges, fudgy centers, and a mesmerizing snow-dusted appearance invite you to savor each irresistible bite of pure chocolate bliss.
Ingredients
Main Ingredients:
- 1 cup unsweetened Dutch-processed cocoa powder
- 4 large eggs
- 1 1/4 cups granulated sugar
- 1/2 cup brown sugar
- 2 1/2 cups all-purpose flour
Wet Ingredients:
- 1/2 cup vegetable oil or canola oil
- 1 teaspoon vanilla extract
Coating and Leavening Ingredients:
- 2/3 cup powdered sugar
- 2 1/2 teaspoons baking powder
- 1/2 teaspoon kosher salt
Instructions
- Preheat the oven to 350°F (180°C) and prepare a baking sheet with a silicone mat or parchment paper for uniform baking and easy cookie removal.
- In a small bowl, thoroughly whisk together flour, baking powder, and salt to ensure even distribution of leavening agents throughout the mixture.
- Create a rich chocolate base by combining cocoa powder, granulated sugar, brown sugar, and oil in a medium bowl until a smooth paste forms.
- Incorporate eggs one at a time into the chocolate mixture, beating until the batter becomes glossy and vibrant. Stir in vanilla extract to enhance the flavor profile.
- Gradually fold the flour mixture into the chocolate blend, adding in batches to prevent overmixing and maintain a delicate cookie texture.
- Refrigerate the dough for a minimum of 30 minutes, allowing it to firm up and make shaping easier while helping the cookies maintain their structure during baking.
- Using a cookie scoop, form uniform dough balls and generously coat each in powdered sugar, ensuring complete coverage.
- Arrange the sugar-coated dough balls on the prepared baking sheet, spacing them adequately to prevent merging during baking.
- Bake for 10-11 minutes, removing when cookies appear slightly underbaked. The cookies will continue to set as they cool.
- Allow cookies to rest on the baking sheet for 2 minutes before transferring to a cooling rack to complete the cooling process.
Notes
- Chill dough thoroughly to prevent spreading and create signature crackled exterior, ensuring cookies maintain perfect round shape during baking.
- Sift powdered sugar generously before rolling dough balls to achieve maximum snow-white crackle effect and prevent clumping.
- Use Dutch-processed cocoa for deeper, richer chocolate flavor and smoother texture compared to natural cocoa powder.
- Prep Time: 45 minutes
- Cook Time: 10 minutes
- Category: Desserts, Snacks
- Method: Baking
- Cuisine: American
Nutrition
- Serving Size: 24
- Calories: 150
- Sugar: 12 g
- Sodium: 100 mg
- Fat: 5 g
- Saturated Fat: 1 g
- Unsaturated Fat: 4 g
- Trans Fat: 0 g
- Carbohydrates: 22 g
- Fiber: 1 g
- Protein: 2 g
- Cholesterol: 25 mg
Olivia Bennett
Recipe Developer & Culinary Educator
Expertise
Education
Schoolcraft College
With an Associate Degree in Culinary Arts from Schoolcraft College and a natural knack for teaching, Olivia Bennett’s all about making home cooking feel possible, even on your busiest day.
Her thing? Recipes that are budget-friendly, season-forward, and full of Southern warmth. Whether it’s a roasted veggie bowl or a five-ingredient skillet bake, Olivia makes sure it’s simple, satisfying, and something you’ll want to make again tomorrow.
When she’s not shooting step-by-step videos or testing spice blends, she’s out foraging, flipping through old cookbooks, or throwing laid-back dinner parties with a BYO-mason-jar theme.