
Fluffy Pink Dream: Cotton Candy Fudge Recipe for Sweet Smiles
Sweet and whimsical cotton candy fudge brings childhood memories dancing across taste buds.
Sugar-spun magic transforms ordinary desserts into extraordinary treats.
This vibrant recipe captures the essence of carnival fun in every delectable bite.
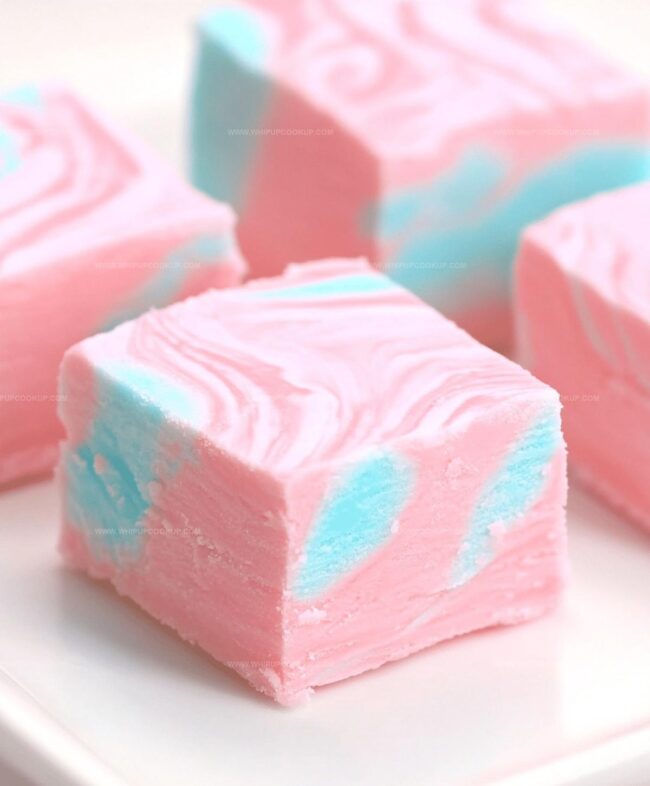
Soft, creamy textures blend with playful pink swirls that delight both kids and adults.
The simple ingredients create a nostalgic confection that sparks joy and excitement.
Rich, smooth fudge melts perfectly on your tongue, delivering a burst of sugary happiness.
Prepare to indulge in a confectionery adventure that promises pure culinary delight.
Great Pairings for Cotton Candy Fudge
Cotton Candy Fudge Variations to Explore
FAQs
No, you can skip it if unavailable. The flavoring enhances the cotton candy theme, but the fudge will still taste delicious without it.
Absolutely! Feel free to experiment with colors that match your theme or personal preference. Just ensure you use gel food coloring for vibrant results.
Choose high-quality white chocolate chips or baking chocolate. Avoid white chocolate candy melts, as they might not melt smoothly or provide the right texture.
The mixture should look smooth and glossy with no visible lumps. Stir constantly and keep heat at medium to prevent burning or seizing of the chocolate.
Why You’ll Love Cotton Candy Fudge
What Goes into Cotton Candy Fudge
Main Ingredients:
Chocolate Base:Flavor and Color Agents:Preparation Ingredient:How to Make Cotton Candy Fudge
Step 1: Prepare Baking Pan
Line an 8×8 inch pan with parchment paper, ensuring extra paper hangs over the sides for easy removal later.
Step 2: Create Chocolate Base
In a medium saucepan, combine:Heat over medium temperature, stirring continuously until the mixture becomes smooth and fully melted.
Watch carefully to prevent burning.
Step 3: Divide Chocolate Mixture
Separate the melted chocolate evenly into two separate mixing bowls.
Step 4: Infuse Magical Colors
In the first bowl, add:Stir until completely blended.
Repeat the same process with the second bowl using purple gel food coloring.
Step 5: Layer Colorful Fudge
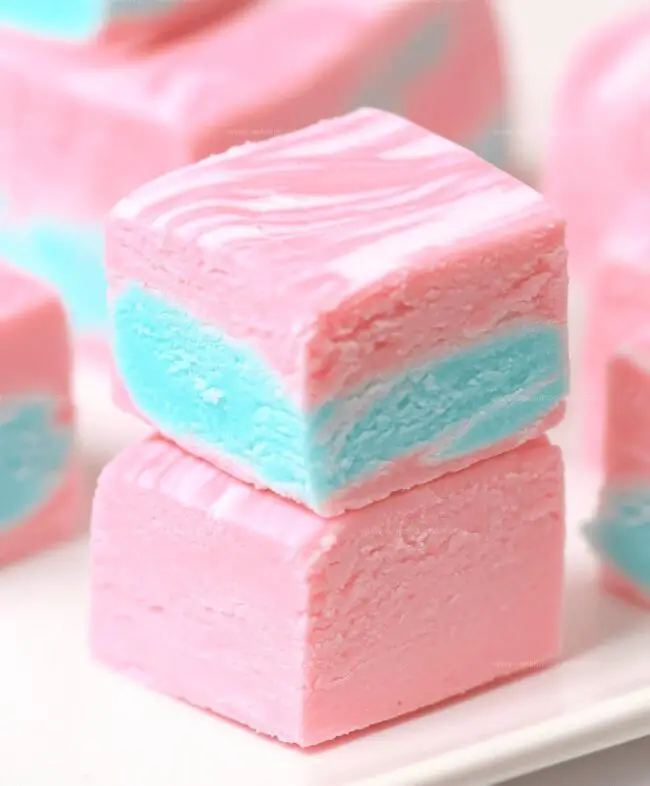
Randomly drop spoonfuls of pink and purple mixtures into the prepared pan, alternating between colors to create a playful pattern.
Step 6: Create Mesmerizing Swirls
Using a butter knife or offset spatula, gently swirl the colors together.
Aim for a beautiful marbled effect without over-mixing.
Step 7: Smooth and Chill
Cover the fudge with parchment paper and press gently to create an even surface.
Refrigerate for 2 hours or let sit at room temperature for 4 hours until completely set.
Step 8: Slice and Serve
Remove the fudge from the pan using the parchment paper overhang.
Cut into delightful bite-sized squares and enjoy the whimsical treat!
Pro Tips for Perfect Cotton Candy Fudge

Storing and Serving Cotton Candy Fudge
Print
Cotton Candy Fudge Recipe
- Total Time: 2 hours 10 minutes
- Yield: 20 1x
Description
Sweet cotton candy fudge delivers a whimsical carnival treat that transports dessert enthusiasts to nostalgic fairground memories. Pastel swirls of sugary delight melt smoothly, promising you a playful bite of childhood magic in every creamy square.
Ingredients
Main Ingredients:
- 22 ounces (624 grams) white chocolate chips (Ghirardelli brand)
- 14 ounces (397 grams) sweetened condensed milk
- 1/4 cup (57 grams) unsalted butter, room temperature
Flavoring and Color Ingredients:
- 2 teaspoons cotton candy flavoring (LorAnn Oils brand)
- 1/2–3/4 teaspoon pink gel food coloring (Americolor brand Pale Peony #183)
- 1/2–3/4 teaspoon purple gel food coloring (Americolor brand Lilac #169)
Instructions
- Prepare the baking vessel by lining an 8×8 inch pan with parchment paper, ensuring extended edges for effortless removal of the finished confection.
- Combine white chocolate chips, sweetened condensed milk, and butter in a medium saucepan. Apply medium heat, continuously stirring to prevent scorching. Maintain gentle movement until the mixture transforms into a velvety, uniform consistency, approximately 6-7 minutes.
- Evenly distribute the molten chocolate mixture into two separate mixing vessels.
- Enhance each portion with distinct character: introduce cotton candy flavoring and corresponding gel food colorings – pink for one bowl, purple for the other. Thoroughly integrate until colors appear uniform and vibrant.
- Artfully distribute dollops of pink and purple mixtures across the prepared pan, creating a random, playful pattern.
- Utilize a butter knife or offset spatula to delicately intertwine the colors, generating a mesmerizing marbled effect without over-blending.
- Cover the surface with parchment paper, gently smoothing the top. Refrigerate for 2 hours or allow to set at room temperature for 4 hours until completely solidified.
- Extract the fudge using parchment paper edges, then slice into delectable bite-sized cubes ready for immediate enjoyment.
Notes
- Choose high-quality white chocolate chips for smoother, creamier fudge that melts more evenly.
- Maintain low, consistent heat to prevent chocolate from burning or becoming grainy during melting process.
- Use gel food coloring instead of liquid for more vibrant colors without altering fudge’s texture.
- Store fudge in an airtight container in refrigerator for up to one week to maintain freshness and prevent hardening.
- Prep Time: 10 minutes
- Cook Time: 2 hours
- Category: Desserts, Snacks
- Method: Baking
- Cuisine: American
Nutrition
- Serving Size: 20
- Calories: 195
- Sugar: 24 g
- Sodium: 30 mg
- Fat: 10 g
- Saturated Fat: 6 g
- Unsaturated Fat: 4 g
- Trans Fat: 0 g
- Carbohydrates: 23 g
- Fiber: 0 g
- Protein: 1 g
- Cholesterol: 15 mg
Olivia Bennett
Recipe Developer & Culinary Educator
Expertise
Education
Schoolcraft College
With an Associate Degree in Culinary Arts from Schoolcraft College and a natural knack for teaching, Olivia Bennett’s all about making home cooking feel possible, even on your busiest day.
Her thing? Recipes that are budget-friendly, season-forward, and full of Southern warmth. Whether it’s a roasted veggie bowl or a five-ingredient skillet bake, Olivia makes sure it’s simple, satisfying, and something you’ll want to make again tomorrow.
When she’s not shooting step-by-step videos or testing spice blends, she’s out foraging, flipping through old cookbooks, or throwing laid-back dinner parties with a BYO-mason-jar theme.