
Dreamy Cotton Candy Ice Cream Recipe for Sweet Moments
Sweet summer memories swirl through this dreamy cotton candy ice cream that captures childhood nostalgia in every delightful bite.
Soft pastel colors hint at the whimsical flavor waiting to surprise you.
Pink and blue hues dance across a creamy canvas, promising pure delight.
Magical desserts like this transport us back to carnival days and carefree moments.
Smooth, airy textures melt gently on your tongue, revealing subtle sugary notes.
Simple ingredients combine to create an enchanting treat that sparkles with playful charm.
Whip up this confection and let each spoonful remind you of joyful, lighthearted adventures.
What Cotton Candy Ice Cream Delivers in Every Scoop

Cotton Candy Ice Cream Ingredients
Base Ingredients:Flavoring Ingredients:Color and Decoration Ingredients:Additional Ingredients:Cotton Candy Ice Cream Making Process

Step 1: Whip the Cream
Whip heavy cream in a large bowl until stiff peaks form.
Step 2: Blend Flavored Base
In another bowl, mix sweetened condensed milk with vanilla and cotton candy flavor until smooth.
Step 3: Combine Mixtures
Gently fold whipped cream into the condensed milk mixture for a light, airy texture.
Step 4: Add Colors
Divide mixture into two bowls. Add pink food gel to one and blue to the other for pastel colors.
Step 5: Swirl and Layer
In a loaf pan, spoon alternating pink and blue mixtures. Use a butter knife to swirl for a marbled effect.
Step 6: Add Sprinkles
Top with rainbow sprinkles for extra fun.
Step 7: Freeze
Cover tightly and freeze at least 6 hours until firm.
Step 8: Serve
Let sit 5 minutes at room temperature. Scoop into cones or bowls, topping with more sprinkles.
Ice Cream Tips That Bring Cotton Candy to Creamy Life
Store Cotton Candy Ice Cream Without Freezer Burn
Sweet Sips for Cotton Candy Ice Cream
Cotton Candy Ice Cream Styles
FAQs
The key ingredients are sweetened condensed milk and cotton candy flavoring, which create the signature sweet and nostalgic cotton candy taste.
Use gel food coloring in pink and blue, then alternate spoonfuls of each colored mixture in the pan and gently swirl with a butter knife to create a marbled appearance.
Yes, this is a no-churn ice cream recipe that doesn’t require an ice cream maker. The whipped cream and condensed milk create a creamy texture when frozen.
When stored in an airtight container, this homemade cotton candy ice cream will stay fresh for about 2 weeks in the freezer.
Print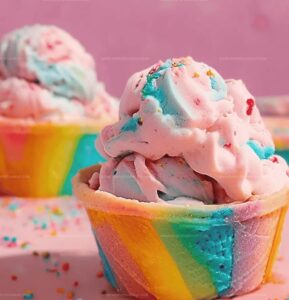
Cotton Candy Ice Cream Recipe
- Total Time: 20 minutes
- Yield: 4 1x
Description
Sweet summer memories swirl together in this Cotton Candy Ice Cream, blending childhood nostalgia with creamy indulgence. Delightful pink hues and whimsical flavors dance across each spoonful, promising pure delight for dessert enthusiasts seeking a playful frozen treat.
Ingredients
Main Ingredients:
- 2 cups heavy whipping cream
- 1 (14 ounces/396 grams) can sweetened condensed milk
Flavoring Ingredients:
- 1/2 teaspoon vanilla extract
- 1/2 teaspoon cotton candy flavoring
Decorative Ingredients:
- Pink gel food coloring
- Blue gel food coloring
- Rainbow sprinkles (optional, for garnish)
Instructions
- Whip the heavy cream in a spacious mixing vessel until it forms sturdy, vertical peaks that hold their shape.
- In a separate container, thoroughly blend the sweetened condensed milk with vanilla extract and cotton candy flavoring, ensuring a uniform mixture without lumps.
- Incorporate the whipped cream into the condensed milk base using a delicate folding technique, maintaining the airy texture while creating a smooth, homogeneous blend.
- Separate the ice cream mixture into two equal portions.
- Introduce soft pink and pastel blue hues to each portion using minimal amounts of gel food coloring, stirring gently to distribute the color evenly.
- Transfer the colorful mixtures into a loaf pan, alternating spoonfuls of pink and blue to create a visually appealing pattern.
- Create a marbled effect by drawing a butter knife through the layers in a gentle, sweeping motion, avoiding excessive mixing that could muddle the colors.
- Embellish the surface with a generous sprinkle of rainbow confetti for added whimsy and texture.
- Shield the pan completely with either plastic wrap or aluminum foil to prevent ice crystals from forming.
- Position the prepared dessert in the freezer’s coldest section for a minimum of 6 hours, or until the mixture achieves a firm, scoopable consistency.
- Prior to serving, allow the ice cream to rest at room temperature for approximately 5 minutes to soften slightly.
- Present the cotton candy ice cream in crisp waffle cones or decorative bowls, garnishing with an extra handful of colorful sprinkles for a playful final touch.
Notes
- Customize the flavor by experimenting with different extracts like almond or coconut to create unique twists.
- Swap cotton candy flavoring with natural fruit extracts for a healthier alternative that still delivers vibrant taste.
- Ensure cream is ultra-cold before whipping to achieve maximum volume and stability in the ice cream base.
- Use gel food coloring instead of liquid to prevent altering the ice cream’s texture and maintain smooth consistency.
- Prep Time: 20 minutes
- Cook Time: 0 minutes
- Category: Desserts, Snacks
- Method: Freezing
- Cuisine: American
Nutrition
- Serving Size: 4
- Calories: 422
- Sugar: 28 g
- Sodium: 50 mg
- Fat: 36 g
- Saturated Fat: 23 g
- Unsaturated Fat: 13 g
- Trans Fat: 0 g
- Carbohydrates: 32 g
- Fiber: 0 g
- Protein: 4 g
- Cholesterol: 120 mg
Marcus Hale
Founder & Recipe Storyteller
Expertise
Education
Holyoke Community College – HCC-MGM Culinary Arts Institute
Marcus grew up surrounded by maple trees, farm stands, and the smell of Sunday stew simmering on the stove. After earning his Culinary Arts Certificate from the HCC-MGM Culinary Arts Institute, he knew he didn’t want to work in fancy kitchens, he wanted to cook for real people.
At Whip Up Cook Up, Marcus is the guy turning memories into meals. His recipes are fast, full of flavor, and built for home cooks who want big taste without the drama.