Easy Apple Pie Recipe That Tastes Like Grandma’s Hug
Baking a classic homemade apple pie with love brings pure comfort to any kitchen.
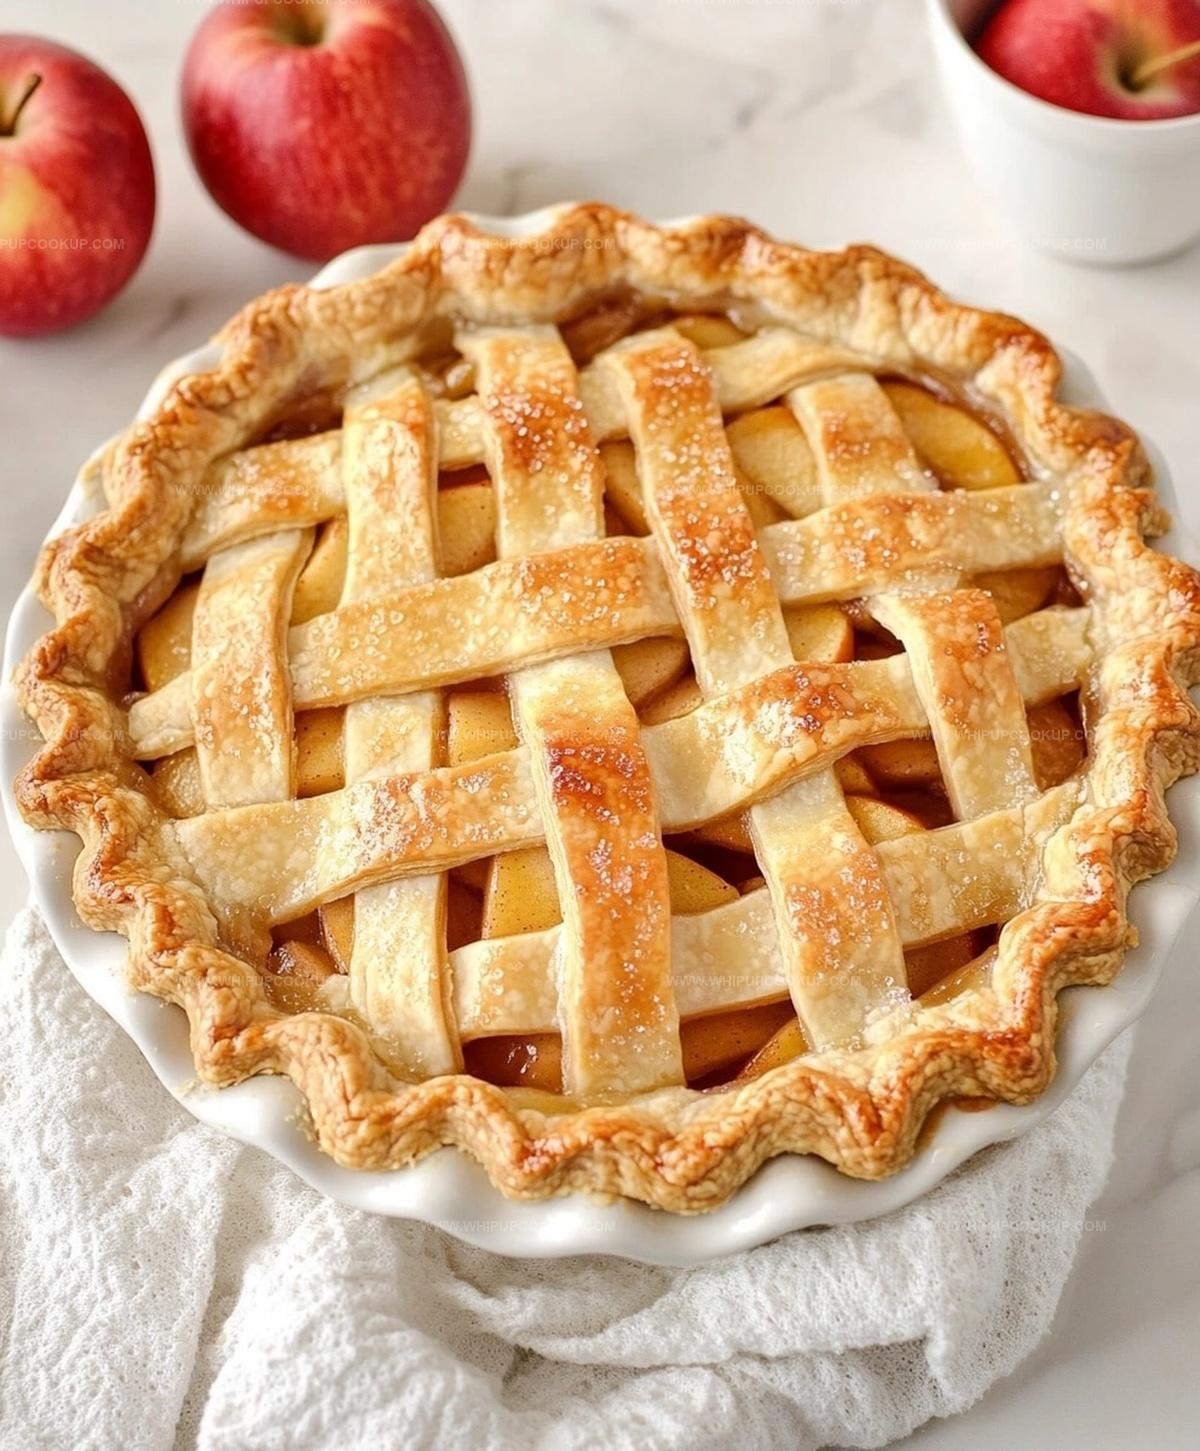
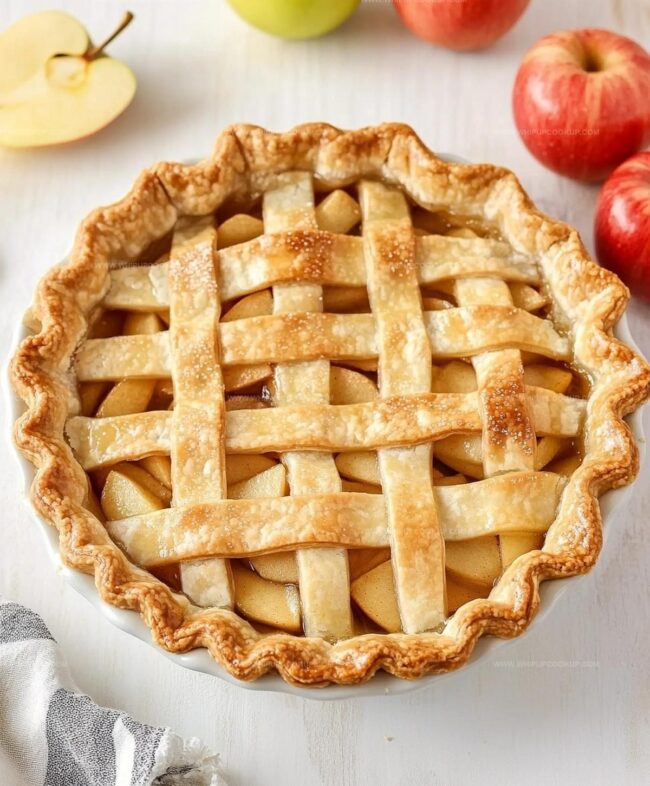
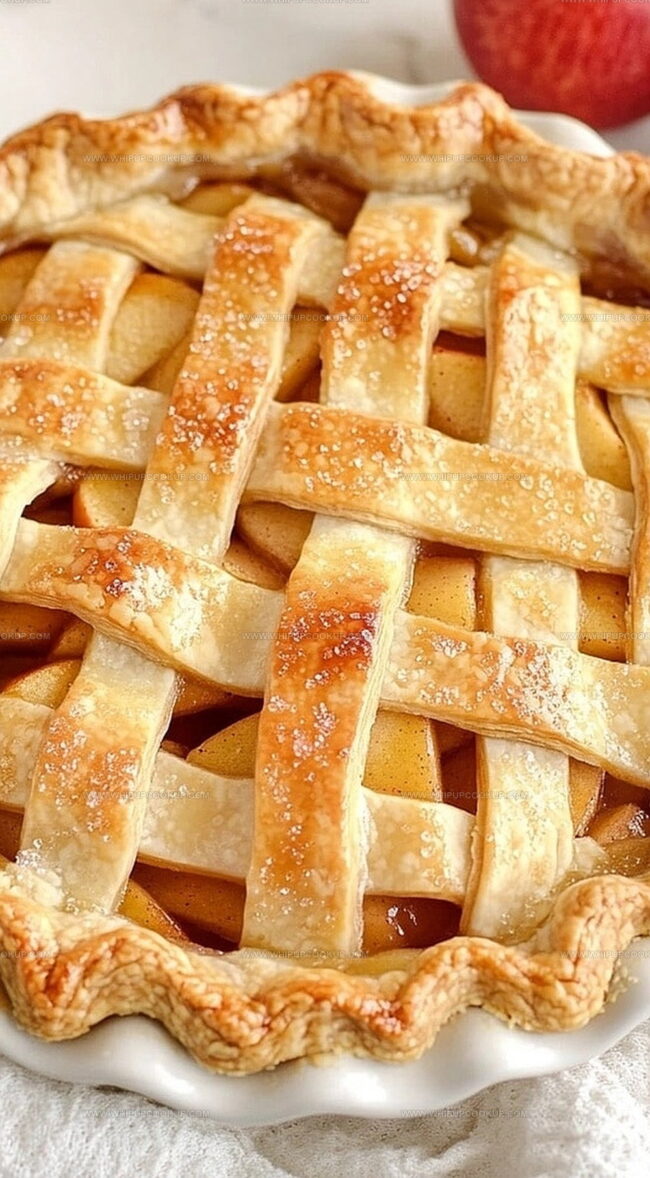
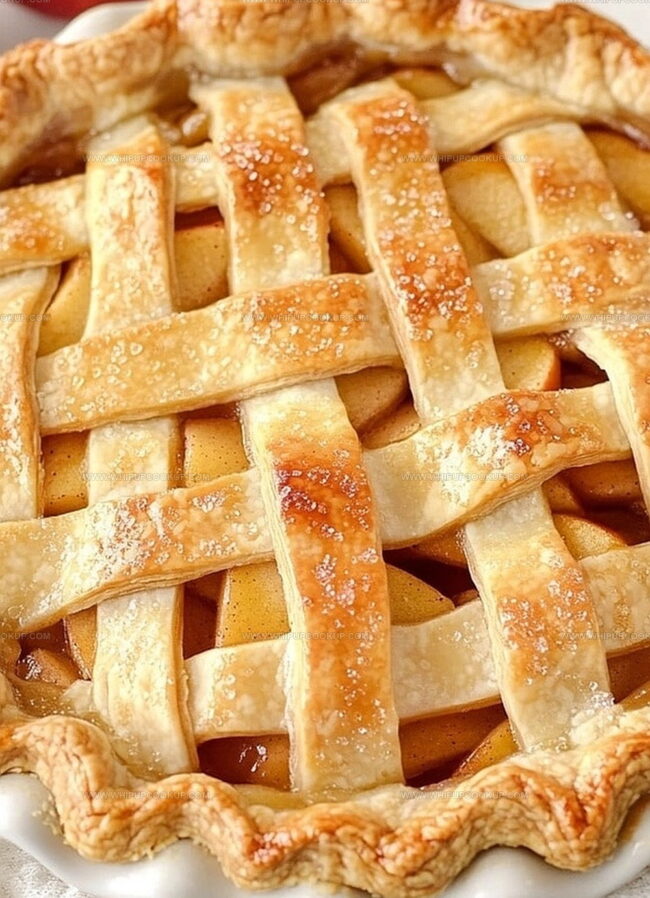
This timeless apple pie recipe delivers a golden, flaky crust that perfectly encases sweet, spiced fruit.
Crisp autumn apples mingle with warm cinnamon and brown sugar, creating a heavenly aroma that fills your home.
Each slice promises a delectable balance of tender fruit and buttery pastry that melts in your mouth.
Generations have cherished this simple yet extraordinary dessert for its nostalgic flavors and heartwarming essence.
Prepare to delight your loved ones with this irresistible pie that transforms an ordinary meal into a memorable celebration.
Take a bite and savor the magic of this beloved American classic.
Why Everyone Loves This Homemade Apple Pie Recipe
Ingredients for Delicious Homemade Apple Pie
Pie Crust:Filling Ingredients:Finishing Ingredients:How to Make Homemade Apple Pie Step-by-Step

Step 1: Warm Up the Oven
Fire up your oven to a toasty 425°F.
Make sure the rack is positioned in the center for even baking.
Step 2: Create the Pie Crust Foundation
Gently drape the first pie crust into a 9-inch pie dish.
Let the edges hang slightly over the rim, creating a beautiful base for your delicious creation.
Step 3: Prepare the Apple Filling
In a spacious mixing bowl, combine:Toss the ingredients together, ensuring every apple slice gets coated with the sweet and spicy mixture.
Step 4: Assemble the Pie Layers
Carefully pour the apple mixture into the prepared bottom crust.
Spread the filling evenly, creating a beautiful mountain of fruity goodness.
Step 5: Top and Seal the Pie
Roll out the second pie crust and drape it gracefully over the apple filling.
Press the edges together, creating a tight seal.
Use your fingers or a fork to crimp the edges, giving your pie a professional, homemade look.
Step 6: Add Final Flourishes
Cut several decorative slits across the top crust to allow steam to escape.
Brush the surface with a beaten egg to create a gorgeous golden sheen.
Sprinkle a light dusting of sugar for extra sparkle.
Step 7: Bake to Perfection
Place the pie in the oven.
Bake for 15 minutes at the initial high temperature.
Then lower the heat to 375°F and continue baking for 30 more minutes.
Look for a golden-brown crust and bubbling filling.
Step 8: Cool and Savor
Remove the pie from the oven and let it rest on a cooling rack.
Give it at least an hour to settle – this helps the filling set and makes slicing a breeze.
Serve warm with a scoop of vanilla ice cream for the ultimate comfort dessert.
Tips for the Best Homemade Apple Pie Texture
Storing and Reheating Homemade Apple Pie the Right Way
Ideal Pairings for Homemade Apple Pie
Fun Twists on Homemade Apple Pie Recipe
FAQs
Use firm, tart apples like Granny Smith, Honeycrisp, or Braeburn. These varieties hold their shape during baking and provide a perfect balance of sweetness and acidity.
Sprinkle a thin layer of breadcrumbs or ground nuts on the bottom crust before adding the apple filling. This helps absorb excess moisture and keeps the crust crisp.
Absolutely! Homemade pie crust is simple. Mix flour, salt, cold butter, and ice water. The key is keeping ingredients cold and handling the dough minimally to ensure a flaky texture.
Look for a golden-brown crust and bubbling filling around the edges. When you insert a knife into the center, the apples should be tender but not mushy.
Print
Delicious Homemade Apple Pie Recipe
- Total Time: 1 hour 5 minutes
- Yield: 8 1x
Description
Comforting Homemade Apple Pie brings classic American dessert magic straight to your kitchen. Buttery crust and caramelized cinnamon-spiced apples create a nostalgic slice of sweet perfection you’ll savor with pure delight.
Ingredients
Filling:
- 6 cups (1.4 liters) thinly sliced peeled apples
- 3/4 cup (150 grams) sugar
- 1 tablespoon (15 milliliters) lemon juice
Dry Ingredients:
- 2 tablespoons (16 grams) all-purpose flour
- 3/4 teaspoon ground cinnamon
- 1/4 teaspoon salt
- 1/8 teaspoon ground nutmeg
Crust:
- 1 pastry for double pie crust (homemade or store-bought)
Instructions
- Prepare the oven by heating to 425°F (220°C), ensuring optimal baking conditions for a perfectly golden pie.
- Carefully position the bottom pie crust into a 9-inch pie plate, trimming any overhanging edges with precision.
- Create a flavorful apple mixture by combining sliced apples with sugar, flour, cinnamon, salt, nutmeg, and lemon juice, gently tossing to coat each apple slice evenly.
- Transfer the seasoned apple filling into the prepared pie crust, distributing it uniformly to create a consistent layer.
- Drape the top crust over the apple filling, delicately sealing the edges by pressing and crimping with fingertips or a fork to create an elegant border.
- Enhance the pie’s appearance by creating decorative steam vents across the top crust, then brush with egg wash and sprinkle a light dusting of sugar for extra shine.
- Bake initially at 425°F for 15 minutes, then reduce temperature to 375°F and continue baking for 30-35 minutes until the crust turns golden brown and apples become tender.
- Remove from oven and allow the pie to rest on a cooling rack for at least one hour, enabling the filling to set and making slicing more manageable.
Notes
- Choose firm, tart apples like Granny Smith or Honeycrisp for the best balance of sweetness and texture in your pie.
- Soak sliced apples in cold water with lemon juice to prevent browning and maintain their crisp texture before mixing with spices.
- Create a lattice top crust for a more decorative and lighter pie that allows steam to escape more easily during baking.
- Prevent soggy bottom crust by sprinkling a thin layer of breadcrumbs or ground nuts before adding the apple filling to absorb excess moisture.
- Prep Time: 20 minutes
- Cook Time: 45 minutes
- Category: Desserts
- Method: Baking
- Cuisine: American
Nutrition
- Serving Size: 8
- Calories: 210
- Sugar: 10 g
- Sodium: 150 mg
- Fat: 8 g
- Saturated Fat: 3 g
- Unsaturated Fat: 4 g
- Trans Fat: 0 g
- Carbohydrates: 35 g
- Fiber: 2 g
- Protein: 1 g
- Cholesterol: 0 mg
Olivia Bennett
Recipe Developer & Culinary Educator
Expertise
Education
Schoolcraft College
With an Associate Degree in Culinary Arts from Schoolcraft College and a natural knack for teaching, Olivia Bennett’s all about making home cooking feel possible, even on your busiest day.
Her thing? Recipes that are budget-friendly, season-forward, and full of Southern warmth. Whether it’s a roasted veggie bowl or a five-ingredient skillet bake, Olivia makes sure it’s simple, satisfying, and something you’ll want to make again tomorrow.
When she’s not shooting step-by-step videos or testing spice blends, she’s out foraging, flipping through old cookbooks, or throwing laid-back dinner parties with a BYO-mason-jar theme.