Quick & Dreamy: Espresso Snowball Cookies Recipe For Coffee Lovers
Nestled in the cozy world of holiday baking, these delightful espresso snowball cookies pack a delicious punch of rich caffeine flavor.
Crumbly textures mingle with intense coffee notes that dance across your palate.
Every bite brings a magical winter moment straight to your kitchen.
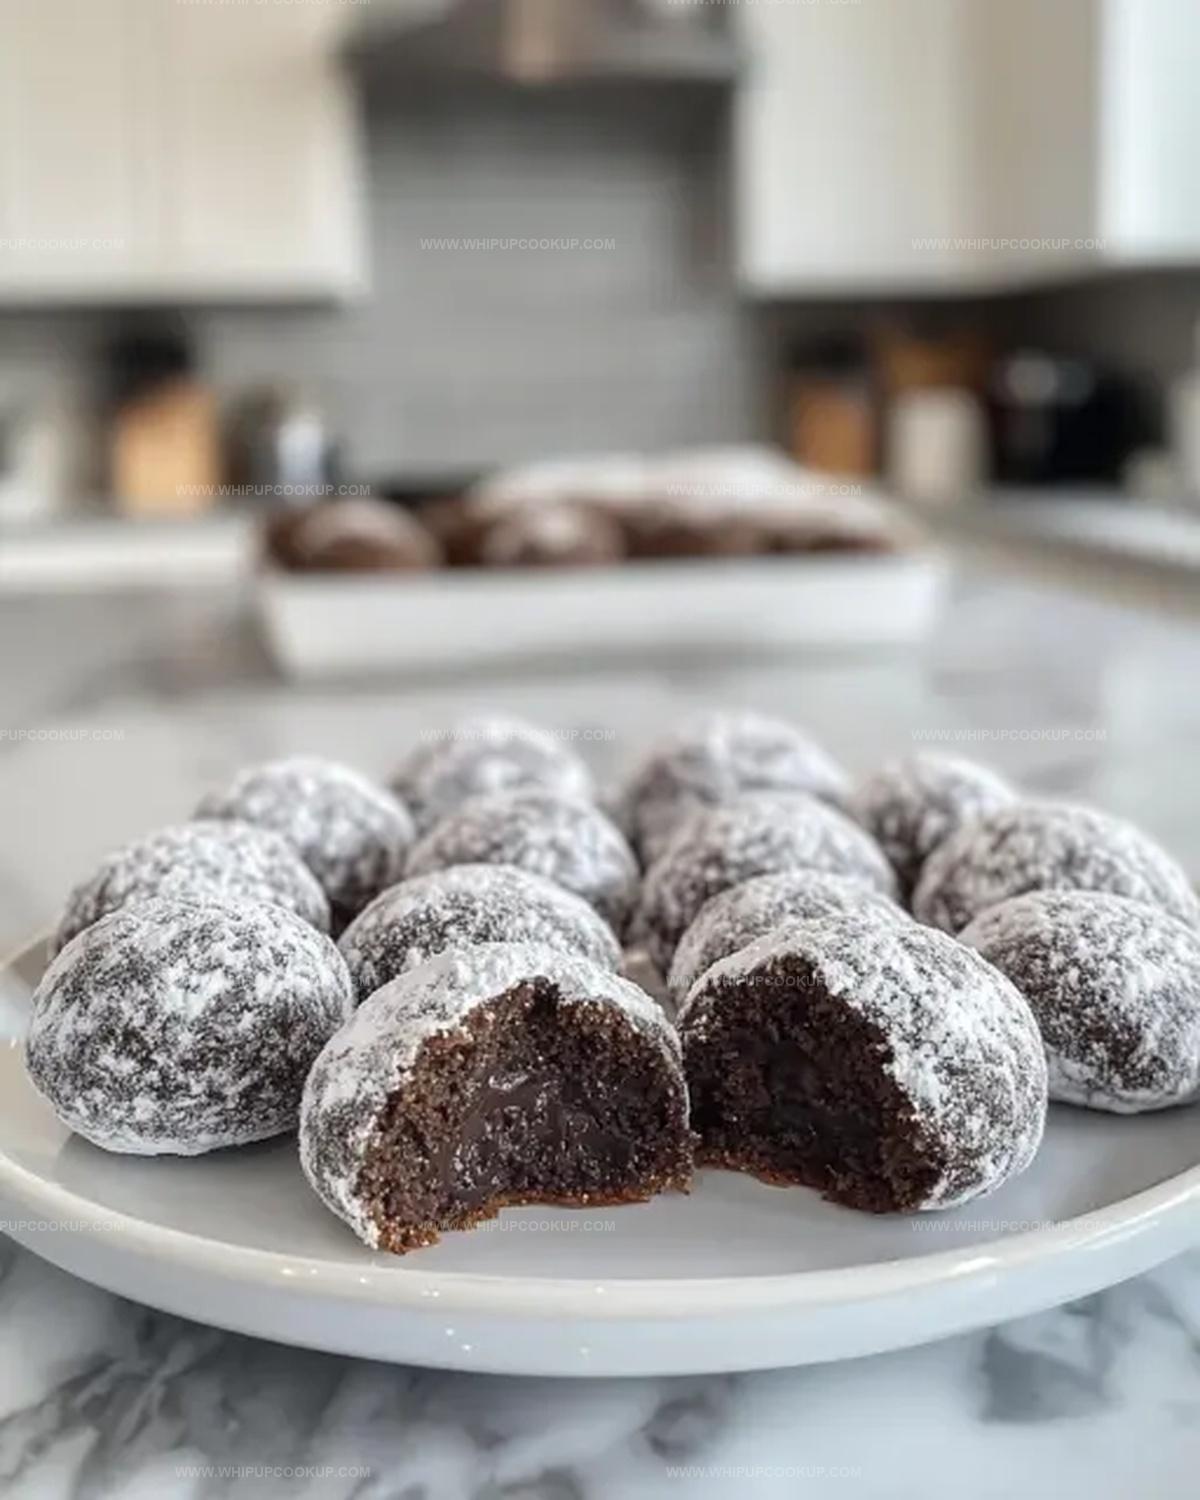
Small powdered sugar-dusted spheres hide a surprising espresso intensity that will charm cookie enthusiasts.
Warm spices and ground coffee create a sophisticated twist on classic snowball treats.
Butter and ground espresso beans merge into a delectable blend that feels both comforting and luxurious.
When you share these treats, friends will marvel at your culinary creativity and ask for the secret recipe.
Espresso Snowball Cookies Ingredients
Main Ingredients:Coating:Baking Espresso Snowball Cookies with Rich Coffee Flavor
Step 1: Whip Creamy Base
Grab a spacious mixing bowl and blend softened butter with powdered sugar using an electric mixer. Whip until the mixture becomes fluffy and light, creating a smooth, creamy foundation for your delightful cookies.
Step 2: Infuse Aromatic Flavors
Introduce vanilla extract and espresso powder into the creamy mixture. Stir thoroughly to distribute the rich coffee essence evenly throughout the dough, ensuring each bite delivers an intense flavor profile.
Step 3: Prepare Dry Ingredients
In a separate bowl, sift together:Gently whisk the ingredients to eliminate any potential lumps and create a uniform dry mixture.
Step 4: Marry Wet and Dry Components
Slowly incorporate the dry ingredients into the butter mixture. Mix carefully, avoiding overmixing, until the dough comes together smoothly and no flour streaks remain visible.
Step 5: Sprinkle Chocolate Surprise
Fold in chocolate chips or chopped chocolate chunks, distributing them evenly throughout the dough for delightful bursts of chocolatey goodness.
Step 6: Shape Delicate Morsels
Using your hands, roll the dough into small, uniform balls approximately 1 inch in diameter. Arrange these delicate spheres on a parchment-lined baking sheet, leaving slight spacing between each cookie.
Step 7: Bake to Perfection
Preheat the oven to 350°F. Place the baking sheet inside and bake for 12-15 minutes. The cookies should appear set but remain slightly soft to the touch.
Step 8: Create Snowy Coating
Allow cookies to cool slightly. While still warm, gently roll each cookie in powdered sugar, creating a light, snowy exterior. Once completely cooled, repeat the powdered sugar coating for an extra frosty finish.
Snowball Cookie Tips That Infuse Espresso Richness
Save Espresso Snowball Cookies and Reheat Without Losing Flavor
Espresso Snowball Cookies Snack Matches
Savor Coffee Companions: Bold Espresso Drink Pairings
Espresso Snowball Cookie Coffee Twists
FAQs
The espresso powder is the secret ingredient, concentrated coffee that infuses a rich, deep coffee taste throughout the entire cookie without adding extra liquid.
Absolutely! The espresso powder provides a bold coffee flavor that enhances the chocolate notes, making these cookies perfect for anyone who enjoys a strong coffee taste in their desserts.
While you can substitute, espresso powder has a more concentrated and robust flavor. Instant coffee might provide a milder coffee taste and could affect the overall texture of the cookies.
Chill the dough for 30 minutes before shaping and baking. This helps the butter firm up, preventing excessive spreading and maintaining the classic snowball cookie shape.
Espresso Snowball Cookies That Perk Up the Holiday Table
Print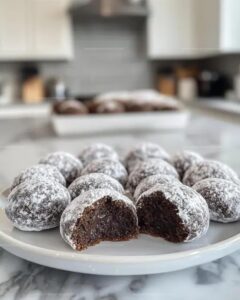
Espresso Snowball Cookies Recipe
- Total Time: 40 minutes
- Yield: 24 1x
Description
Delightful Espresso Snowball Cookies bring Italian coffee culture into classic holiday baking with rich, buttery texture and deep mocha notes. Powdered sugar coating adds elegant winter charm, making these compact treats perfect for coffee enthusiasts and cookie lovers seeking sophisticated seasonal indulgence.
Ingredients
Main Ingredients:
- 2 cups all-purpose flour
- 1 cup unsalted butter, softened
- 1/2 cup powdered sugar
- 1/2 cup mini chocolate chips or finely chopped dark chocolate
Flavor Enhancers:
- 1 tablespoon instant espresso powder
- 1 teaspoon vanilla extract
- 1/4 cup cocoa powder
Finishing Ingredients:
- 1/4 teaspoon salt
- Powdered sugar (for rolling)
Instructions
- Whip softened butter and powdered sugar in a spacious mixing vessel until the mixture achieves a cloud-like, aerated consistency.
- Incorporate vanilla essence and finely ground espresso powder, blending thoroughly to distribute coffee nuances evenly.
- Sift together flour, dark cocoa powder, and a delicate pinch of salt in a separate container, ensuring no lumps remain.
- Gently introduce dry ingredients into the butter mixture, stirring with minimal manipulation to preserve the dough’s tender texture.
- Delicately fold chopped chocolate or miniature chocolate morsels throughout the dough, creating pockets of rich, molten potential.
- Using palms, craft uniform spheres approximately one inch in diameter, positioning them with gentle precision onto a parchment-lined baking surface.
- Heat the oven to 350°F, allowing precise temperature equilibration before nestling the cookie orbs inside for 12-15 minutes, watching for subtle firmness without excessive browning.
- Allow cookies momentary respite from oven’s heat, then luxuriously enrobe each in a cascade of powdered sugar, creating a pristine, snow-kissed exterior.
- Once completely cooled, execute a second dusting of powdered sugar, enhancing the wintery aesthetic and sealing in the cookies’ delicate essence.
Notes
- Adjust espresso powder intensity to match your coffee preference, from subtle hints to bold, robust flavors.
- Experiment with different chocolate types like dark, milk, or white chocolate chips for unique taste variations.
- Chill the dough for 30 minutes before shaping to prevent spreading and maintain perfect round cookie shape.
- Create gluten-free version by substituting all-purpose flour with almond or gluten-free flour blend for dietary needs.
- Prep Time: 25 minutes
- Cook Time: 15 minutes
- Category: Desserts
- Method: Baking
- Cuisine: Italian
Nutrition
- Serving Size: 24
- Calories: 120
- Sugar: 3g
- Sodium: 50mg
- Fat: 8g
- Saturated Fat: 5g
- Unsaturated Fat: 2g
- Trans Fat: 0g
- Carbohydrates: 12g
- Fiber: 1g
- Protein: 2g
- Cholesterol: 30mg
Marcus Hale
Founder & Recipe Storyteller
Expertise
Education
Holyoke Community College – HCC-MGM Culinary Arts Institute
Marcus grew up surrounded by maple trees, farm stands, and the smell of Sunday stew simmering on the stove. After earning his Culinary Arts Certificate from the HCC-MGM Culinary Arts Institute, he knew he didn’t want to work in fancy kitchens, he wanted to cook for real people.
At Whip Up Cook Up, Marcus is the guy turning memories into meals. His recipes are fast, full of flavor, and built for home cooks who want big taste without the drama.