The Perfect Homemade Toffee Recipe That’ll Sweeten Your Day
Sweet memories flood back when I whip up this beloved toffee recipe that has delighted my clan for generations.
Buttery caramel notes dance across my kitchen, creating an irresistible aroma.
Crisp textures and rich flavors merge into a confection that sparks pure joy.
Grandma taught me this cherished technique decades ago, passing down her culinary wisdom.
Each batch connects me to generations of home cooks who understood the magic of simple ingredients.
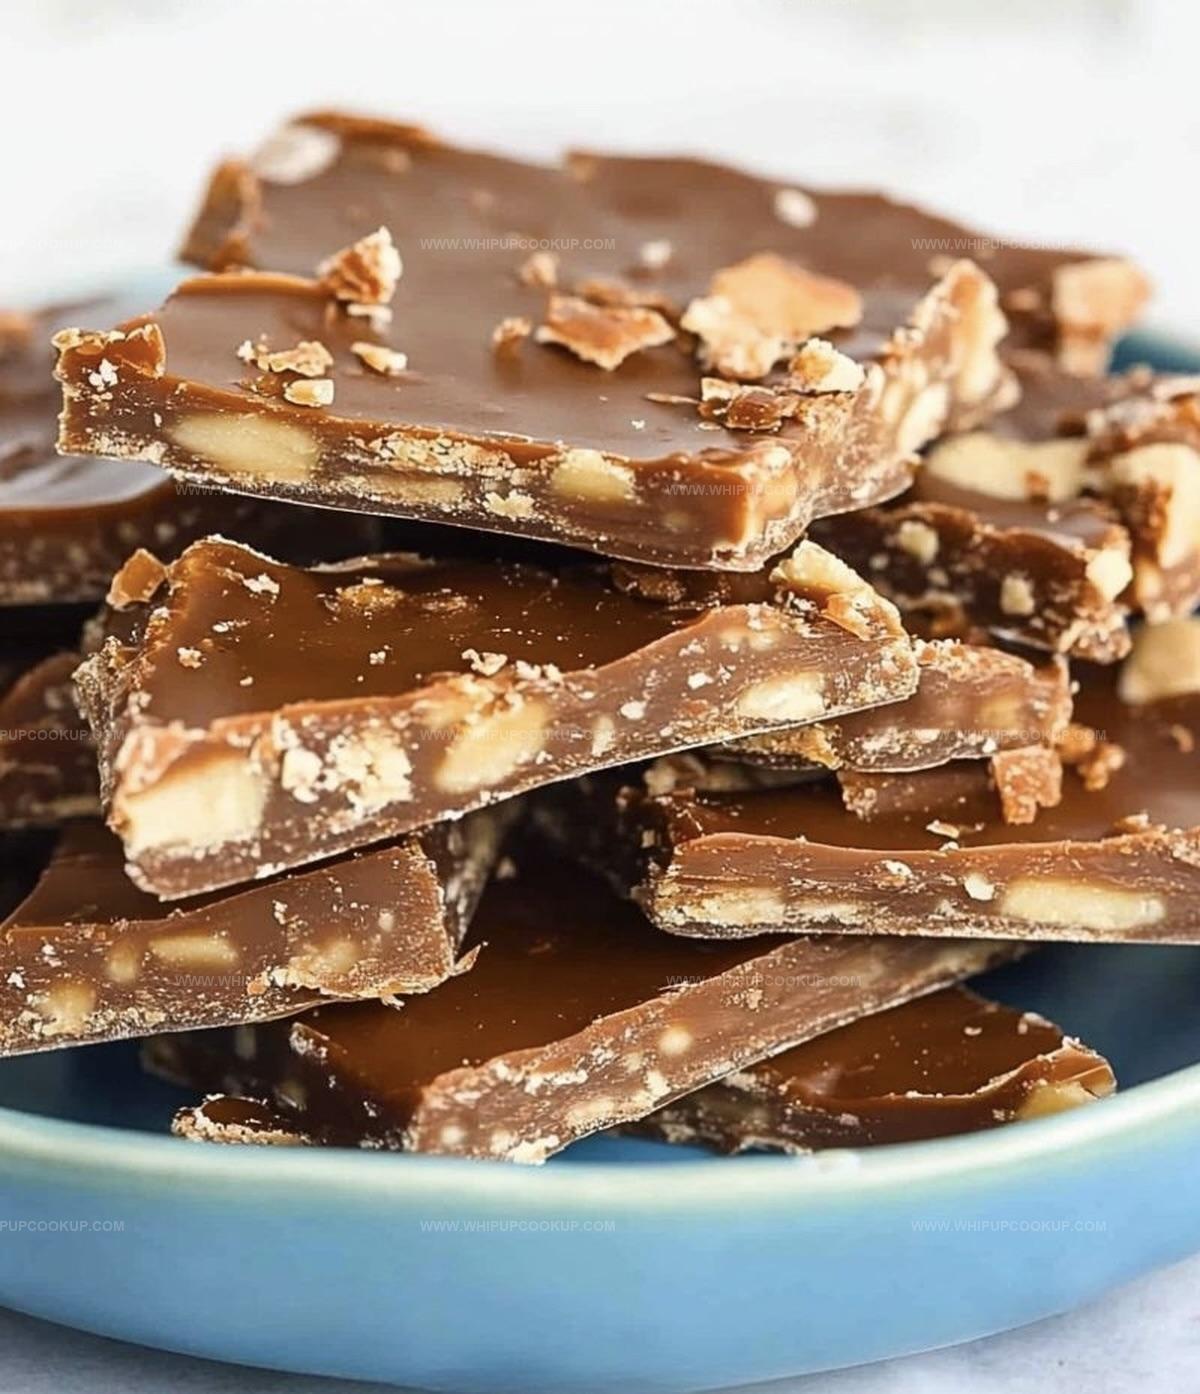
Chocolate-drizzled and perfectly golden, this treat promises to become your new obsession.
You’ll want to savor every delectable crumb and share the love with everyone around you.
What Makes This Toffee Recipe a Fan Favorite
Everything That Goes into the Perfect Toffee
Base Ingredients:Chocolate and Topping Ingredients:Flavoring Ingredient:Additional Preparation Ingredients:Simple Steps to Making Buttery Toffee at Home

Step 1: Prepare Baking Surface
Set up a baking sheet with parchment paper or silicone mat.
Scatter chopped nuts across the surface, creating a delightful base for your toffee.
Step 2: Create Toffee Base
In a sturdy saucepan, combine butter and sugar over medium heat.
Stir constantly to prevent burning.
Add a pinch of salt to enhance the flavor profile.
Step 3: Achieve Perfect Caramelization
Continue cooking the mixture, monitoring the temperature carefully.
Use a candy thermometer to reach 300°F, which signals the hard crack stage.
This is the magical moment when your toffee transforms into a golden, glossy delight.
Step 4: Infuse Flavor
Remove the pan from heat and quickly stir in vanilla extract.
The aroma will fill your kitchen with sweet anticipation.
Step 5: Spread the Magic
Pour the molten toffee onto the prepared baking sheet.
Use a spatula to spread it evenly, creating a smooth, golden canvas.
Step 6: Chocolate Topping
Sprinkle chocolate chips generously over the hot toffee.
Let them sit for a few minutes to melt completely.
Gently spread the chocolate into a uniform layer.
Step 7: Cool and Set
Allow the toffee to cool naturally at room temperature or speed up the process in the refrigerator.
Wait until it becomes completely firm and crisp.
Step 8: Break and Indulge
Once set, break the toffee into delectable bite-sized pieces.
Enjoy the satisfying crack and rich, buttery flavor of your homemade treat.
Tips for Smooth Texture and Great Snap
How to Keep Your Toffee Fresh and Crisp
What Treats Pair Well with Toffee
Sweet Variations to Try with This Toffee Recipe
FAQs
A candy thermometer ensures precise temperature, which is crucial for achieving the perfect toffee texture and preventing burning or undercooking.
Yes, almonds, pecans, or walnuts work great. Choose your favorite nut to add crunch and flavor to the toffee.
When the mixture turns a deep golden amber color and reaches 300°F on a candy thermometer, it’s at the hard crack stage and ready to be removed from heat.
You can use the cold water test: drop a small amount of toffee into cold water. If it forms hard, brittle threads that break when bent, it’s at the right temperature.
Print
Favorite Toffee Recipe
- Total Time: 25 minutes
- Yield: 12 1x
Description
Indulgent Grandma’s Toffee brings nostalgic sweet memories from childhood kitchens. Rich buttery layers melt perfectly, creating irresistible crisp chocolate-covered treats you cannot resist.
Ingredients
Main Ingredients:
- 1 cup (226 grams) unsalted butter
- 1 cup (200 grams) granulated sugar
- 1 cup (170 grams) semi-sweet or dark chocolate chips
- 1/2 cup (60 grams) chopped almonds (or preferred nuts)
Flavor Enhancers:
- 1 teaspoon (5 milliliters) vanilla extract
- 1/4 teaspoon (1.5 grams) salt
Instructions
- Prepare a baking sheet with parchment paper or silicone mat, distributing chopped nuts evenly across the surface for a crunchy foundation.
- Combine butter and sugar in a heavy-bottomed saucepan, heating over medium temperature while stirring consistently to prevent burning. Incorporate salt to enhance flavor profile.
- Monitor mixture carefully with a candy thermometer, cooking until it reaches precisely 300°F, indicating the hard crack stage. This critical point ensures proper toffee texture.
- Remove pan from heat immediately and swiftly integrate vanilla extract, creating depth and complexity in the caramelized mixture.
- Carefully pour molten toffee onto prepared sheet, using a spatula to spread evenly and create a uniform layer across the nutty base.
- Scatter chocolate chips directly onto hot toffee, allowing residual heat to gently melt them for 2-3 minutes without additional cooking.
- Smooth melted chocolate across toffee surface using gentle, consistent strokes to create an even, glossy coating.
- Allow confection to cool completely at room temperature or expedite setting by placing in refrigerator until firm and crisp.
- Once fully set, fracture toffee into irregular, bite-sized fragments, revealing the intricate layers of nuts, caramel, and chocolate.
Notes
- Select a reliable candy thermometer to ensure precise temperature tracking for the perfect toffee texture.
- Toast nuts beforehand to enhance their nutty flavor and add extra crunch to the final candy.
- Work quickly when spreading chocolate and toffee to achieve an even, smooth surface.
- Use unsalted butter for better control of the salt content and more consistent results.
- Prep Time: 10 minutes
- Cook Time: 15 minutes
- Category: Desserts, Snacks
- Method: Baking
- Cuisine: American
Nutrition
- Serving Size: 12
- Calories: 226
- Sugar: 18 g
- Sodium: 3 mg
- Fat: 16 g
- Saturated Fat: 10 g
- Unsaturated Fat: 6 g
- Trans Fat: 0 g
- Carbohydrates: 24 g
- Fiber: 1 g
- Protein: 2 g
- Cholesterol: 30 mg
Olivia Bennett
Recipe Developer & Culinary Educator
Expertise
Education
Schoolcraft College
With an Associate Degree in Culinary Arts from Schoolcraft College and a natural knack for teaching, Olivia Bennett’s all about making home cooking feel possible, even on your busiest day.
Her thing? Recipes that are budget-friendly, season-forward, and full of Southern warmth. Whether it’s a roasted veggie bowl or a five-ingredient skillet bake, Olivia makes sure it’s simple, satisfying, and something you’ll want to make again tomorrow.
When she’s not shooting step-by-step videos or testing spice blends, she’s out foraging, flipping through old cookbooks, or throwing laid-back dinner parties with a BYO-mason-jar theme.