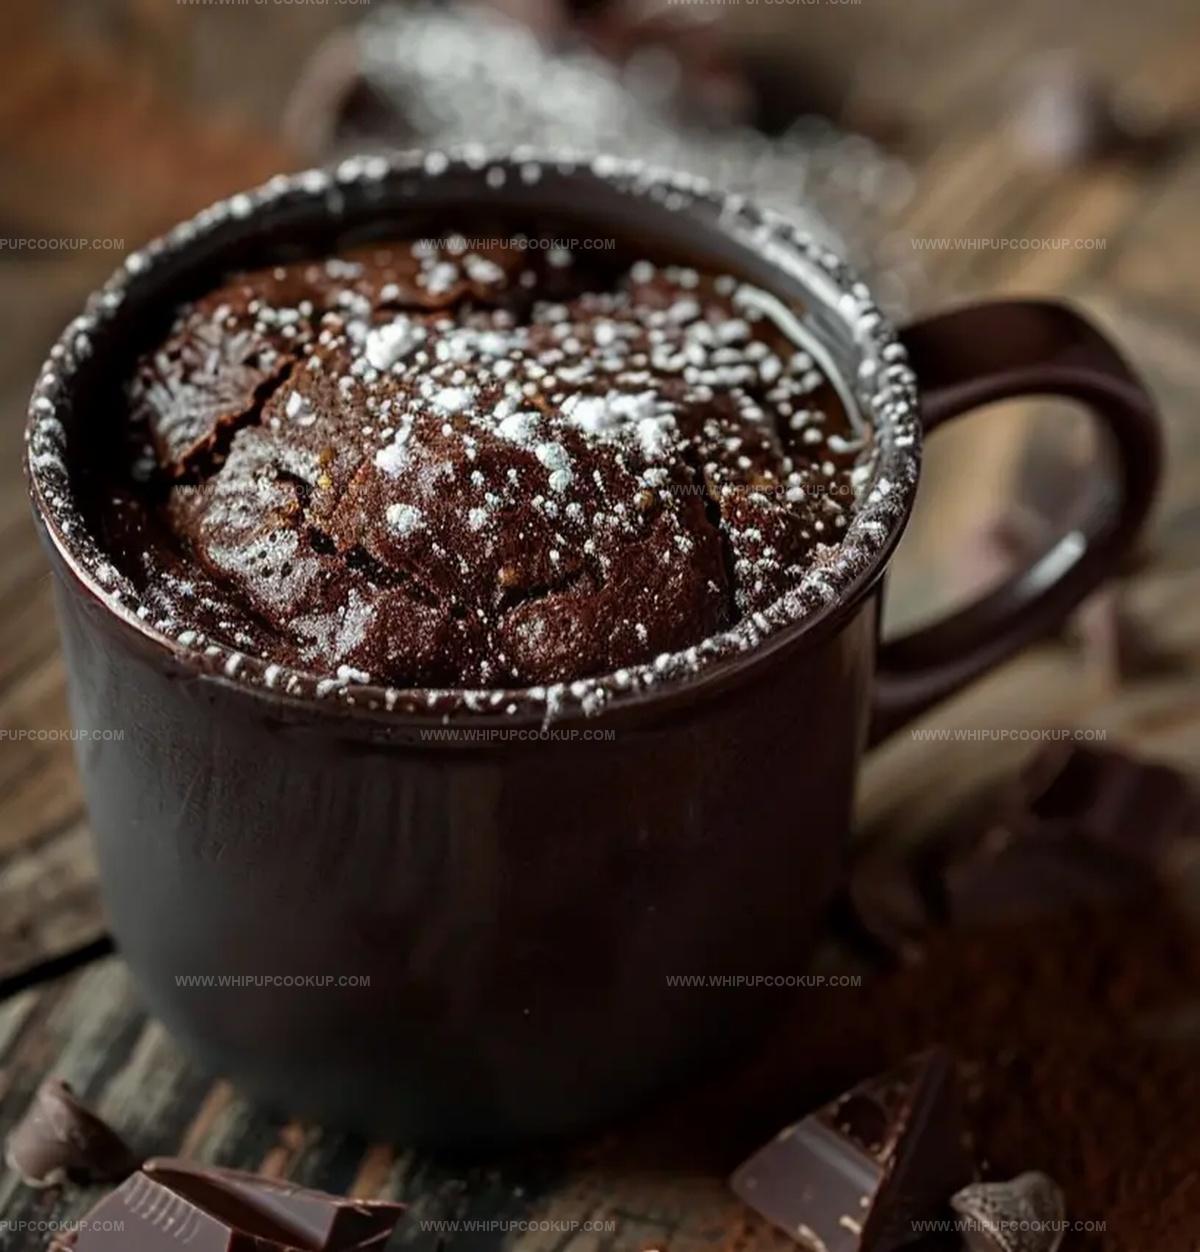
The Gooiest Flourless Chocolate Mug Brownie Recipe Ever
Whipping up a decadent flourless chocolate mug brownie satisfies those intense dessert cravings in minutes.
chocolate lovers rejoice with this quick fix that requires minimal ingredients and zero baking skills.
Microwave magic turns simple pantry staples into a rich, gooey treat.
Rich cocoa and smooth melted butter create an indulgent texture that melts in you mouth.
Protein-packed almond flour ensures a delightful gluten-free experience without sacrificing flavor.
Quick, convenient, and supremely chocolatey, this mug brownie becomes your new go-to dessert.
Dive into pure chocolate bliss with just a mug, a few ingredients, and two minutes of your time.
What’s Special About the Flourless Chocolate Mug Brownie
Ingredients for Flourless Chocolate Mug Brownie
Main Ingredients:Flavor Enhancers:Optional Toppings:How to Prepare the Flourless Chocolate Mug Brownie
Step 1: Melt The Butter
Grab a microwave-safe mug and drop in your butter.
Zap it in the microwave for 20-30 seconds until completely liquefied and smooth.
Step 2: Create Chocolate Base
Introduce cocoa powder and sugar into the melted butter.
Whisk vigorously until the mixture transforms into a rich, glossy chocolate blend without any dry lumps.
Step 3: Add Binding Ingredients
Crack a fresh egg directly into the mug.
Pour in vanilla extract and sprinkle a tiny pinch of salt.
Blend everything together until the mixture looks silky and uniform.
Step 4: Microwave Magic
Position the mug in the microwave center.
Cook on high power for 60-90 seconds.
Watch for a slightly soft center with set edges – this signals perfect brownie texture.
Step 5: Cool And Garnish
Allow the brownie to rest for a minute.
Optional toppings include:Step 6: Indulge Immediately
Grab a spoon and dive into your warm, gooey chocolate creation right from the mug.
Savor every delightful bite of this quick dessert wonder!
Smart Tips for Mug Brownie Perfection
How to Keep the Chocolate Mug Brownie Fresh
What to Pair with Your Mug Brownie
Custom Add-Ins for Your Mug Brownie
FAQs
Yes, you can substitute granulated sugar with brown sugar or coconut sugar for a slightly different flavor profile.
Replace the butter with coconut oil or vegetable oil to create a dairy-free version of the mug brownie.
Look for a slightly set top with a soft, gooey center. The brownie should not look liquid but should still have a moist appearance.
Absolutely! You can add chocolate chips, chopped nuts, or a small amount of peanut butter to customize your mug brownie.
Print
Flourless Chocolate Mug Brownie Recipe
- Total Time: 7 minutes
- Yield: 1 1x
Description
Rich chocolate lovers rejoice with this Flourless Chocolate Mug Brownie, a quick and indulgent dessert that satisfies deep cocoa cravings without complicated baking. Microwave magic delivers pure chocolate bliss in minutes, perfect for solo sweet moments or unexpected dessert emergencies.
Ingredients
Main Ingredients:
- 2 tablespoons (30 ml) unsalted butter
- 1 large egg
- 2 tablespoons (30 grams) granulated sugar
- 2 tablespoons (10 grams) unsweetened cocoa powder
Flavor Enhancers:
- 1/4 teaspoon (1.25 ml) vanilla extract
- Pinch of salt
Optional Toppings:
- Powdered sugar
- Whipped cream
- Vanilla ice cream
- Chocolate chips
Instructions
- Melt butter in a microwave-safe mug for 20-30 seconds until completely liquefied.
- Incorporate granulated sugar and unsweetened cocoa powder into the melted butter, stirring until the mixture becomes uniformly smooth and glossy.
- Introduce the egg, vanilla extract, and salt into the mug, whisking vigorously to create a homogeneous batter without any lumps.
- Microwave the mixture on high for 60-90 seconds, monitoring carefully to ensure the brownie sets but maintains a slightly molten center. Actual cooking duration may fluctuate based on microwave power.
- Extract the mug carefully, acknowledging the intense heat, and allow the brownie to rest for approximately one minute to stabilize its texture.
- Enhance the dessert with optional garnishes such as a light dusting of powdered sugar, a generous scoop of vanilla ice cream, or a sprinkle of chocolate chips for added decadence.
- Savor the warm, rich brownie directly from the mug using a spoon, relishing the intense chocolate flavor and soft, indulgent texture.
Notes
- Swap butter with coconut oil for a dairy-free version that maintains rich, indulgent flavor.
- Reduce cooking time by 15-20 seconds for an extra fudgy, molten center that oozes deliciousness when you dig in.
- Add a sprinkle of instant espresso powder to enhance the chocolate’s depth and create a more complex, sophisticated dessert experience.
- Prep Time: 5 minutes
- Cook Time: 2 minutes
- Category: Desserts, Snacks
- Method: Microwaving
- Cuisine: American
Nutrition
- Serving Size: 1
- Calories: 290
- Sugar: 14g
- Sodium: 105mg
- Fat: 21g
- Saturated Fat: 13g
- Unsaturated Fat: 8g
- Trans Fat: 0g
- Carbohydrates: 24g
- Fiber: 2g
- Protein: 5g
- Cholesterol: 186mg
Olivia Bennett
Recipe Developer & Culinary Educator
Expertise
Education
Schoolcraft College
With an Associate Degree in Culinary Arts from Schoolcraft College and a natural knack for teaching, Olivia Bennett’s all about making home cooking feel possible, even on your busiest day.
Her thing? Recipes that are budget-friendly, season-forward, and full of Southern warmth. Whether it’s a roasted veggie bowl or a five-ingredient skillet bake, Olivia makes sure it’s simple, satisfying, and something you’ll want to make again tomorrow.
When she’s not shooting step-by-step videos or testing spice blends, she’s out foraging, flipping through old cookbooks, or throwing laid-back dinner parties with a BYO-mason-jar theme.