Cozy Flu/Cold Tea Bombs Recipe: Soothing Sips for Healing
Brewing a magical flu/cold tea bomb can turn your wellness journey into a delightful experience.
Herbal ingredients packed with immune-boosting properties dance together in this comforting concoction.
Warm spices and natural healing elements merge to create a powerful wellness elixir.
Soothing honey and zesty citrus combine with carefully selected herbs to fight off pesky symptoms.
Every sip promises relief and comfort during those challenging sick days.
You’ll love how simple ingredients can make such a difference in your recovery process.
This recipe offers a natural, delicious approach to supporting your body’s healing mechanisms.
Discover your new favorite wellness ritual that tastes amazing and helps you feel better fast.
Tea Bombs That Soothe Cold Symptoms with Flavorful Relief
Flu & Cold Tea Bombs Soothing Ingredients
Main Ingredients:Flavor and Health Boosters:Tea and Garnish:Flu and Cold Tea Bombs Brewing Guide
Step 1: Whip Up Healing Ingredients
Gather a mixing bowl and combine the powerful wellness warriors: pure honey, freshly squeezed lemon juice, finely grated ginger, ground turmeric, warming cinnamon, and optional echinacea powder. Blend these ingredients thoroughly until they form a harmonious, smooth mixture that promises to tackle cold and flu symptoms.
Step 2: Mold Your Wellness Bombs
Take your silicone mold and lovingly fill each cavity with approximately one teaspoon of the healing concoction. Use the back of a spoon to press down evenly, ensuring a compact and consistent texture in each tea bomb.
Step 3: Sprinkle Medicinal Green Tea
Delicately scatter green tea leaves across the top of each mixture. Gently press the leaves into the surface, creating a beautiful and functional layer that will enhance the tea bomb’s therapeutic properties.
Step 4: Freeze Into Solid Healing Spheres
Place the silicone mold into the freezer, allowing the tea bombs to transform and solidify. Let them rest for 1-2 hours until they become firm and perfectly shaped wellness warriors.
Step 5: Store Your Immune-Boosting Treasure
Carefully remove the tea bombs from the molds. Transfer them into an airtight container and return to the freezer, preserving their potent healing potential for future use.
Step 6: Brew Your Wellness Elixir
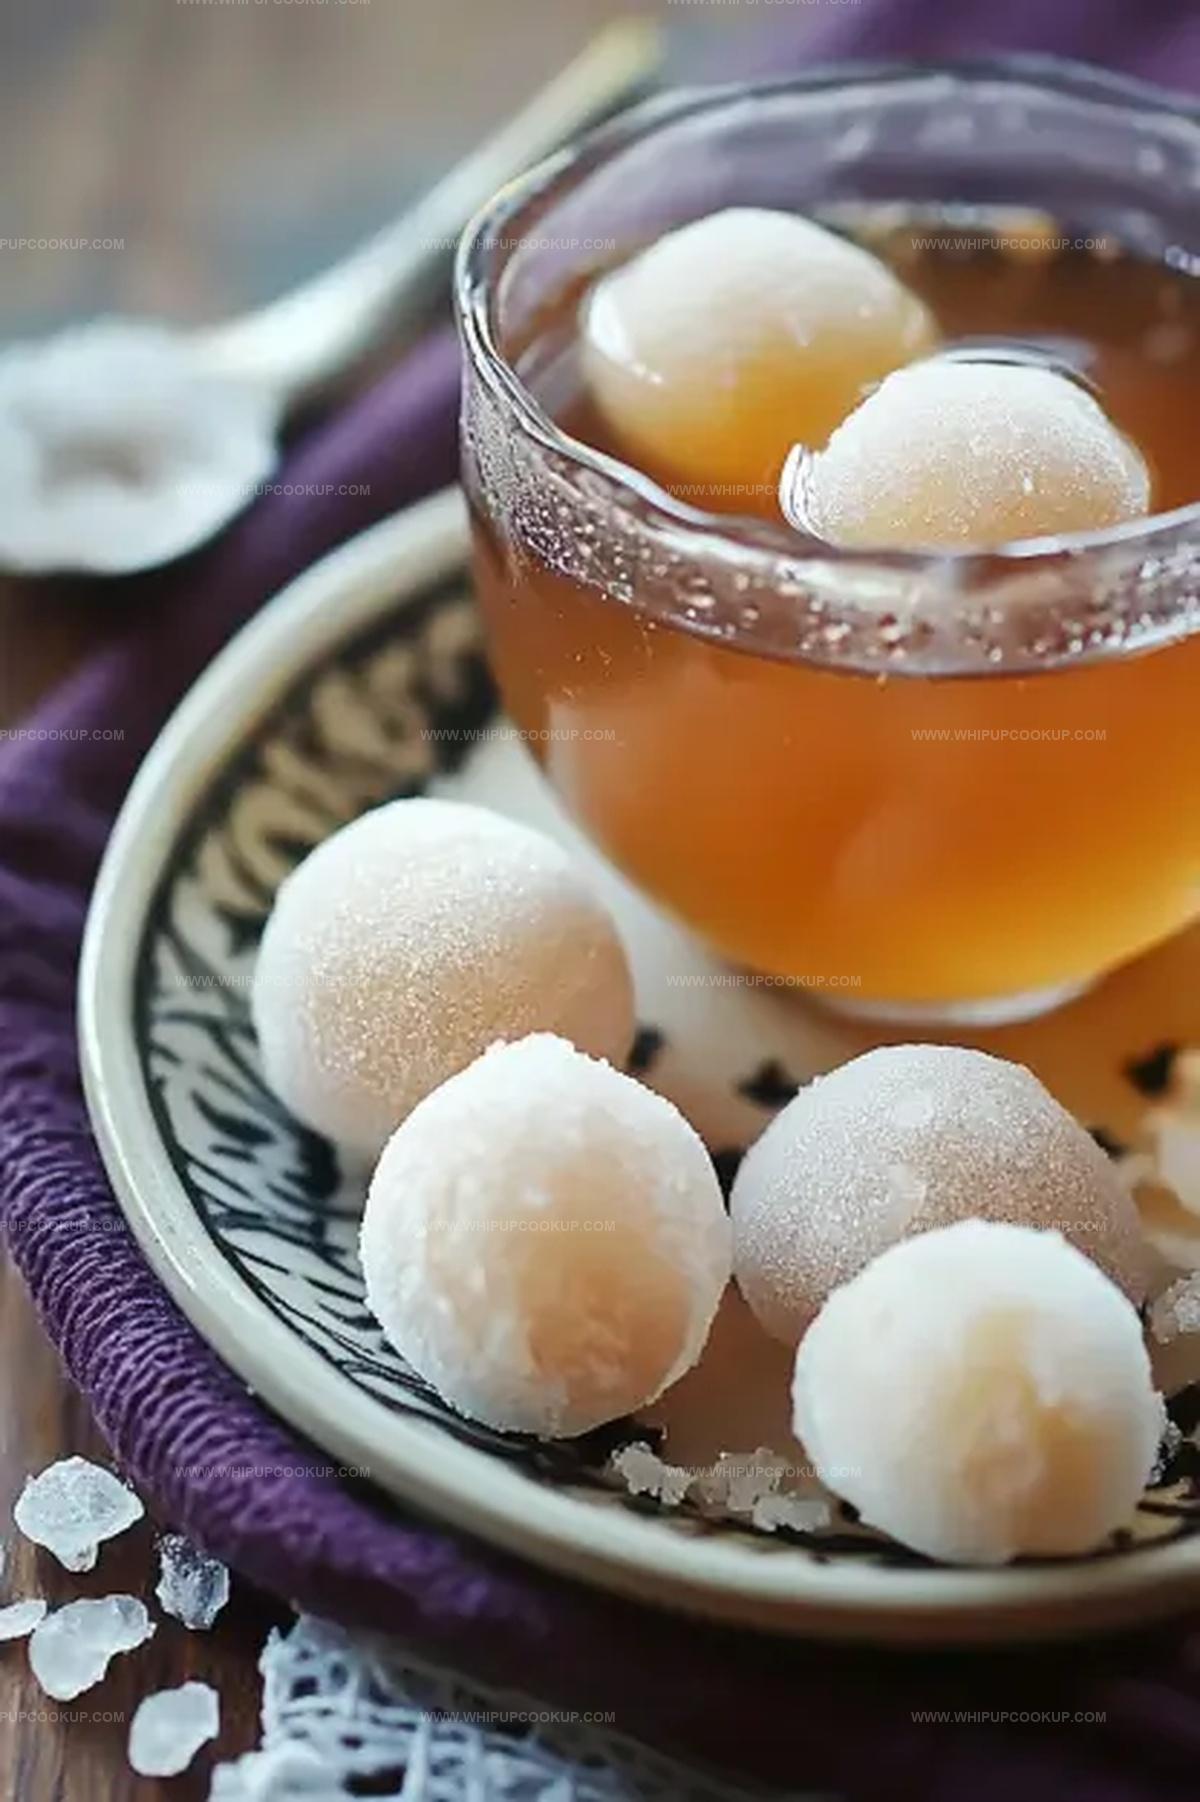
When ready to combat illness, place one tea bomb in a mug. Pour hot water over the bomb, stirring until it completely dissolves. Sip slowly and feel the soothing, immune-strengthening properties work their magic.
Tea Bomb Tips That Boost Cold and Flu Relief
Keep Tea Bombs for Cold and Flu Fresh
Tea Bombs for Flu and Cold Companion Picks
Halloween Mummy Cookie Designs
FAQs
This tea bomb combines powerful ingredients like ginger, turmeric, and echinacea that boost immunity, reduce inflammation, and help fight cold and flu symptoms naturally.
Yes, you can substitute honey with maple syrup, use different tea leaves, or swap out spices based on availability while keeping the core immune-boosting ingredients.
Tea bombs can be stored in an airtight container in the freezer for up to 2-3 months without losing their potency or flavor.
While most ingredients are natural, it’s recommended to consult a pediatrician before giving this tea bomb to children, especially those under 5 years old.
Print
Flu/Cold Tea Bombs Recipe
- Total Time: 2 hours 15 minutes
- Yield: 12 1x
Description
Warming Mexican Flu/Cold Tea Bombs blend healing herbal ingredients into delightful spherical treats perfect for soothing winter wellness. Comforting spices and medicinal herbs create a quick remedy you can sip and savor when feeling under the weather.
Ingredients
Main Ingredients:
- 1/4 cup (60 ml) honey
- 1 tablespoon (15 ml) lemon juice
- 1 tablespoon (12 g) green tea leaves (or 12 green tea bags)
Spices and Herbs:
- 1 teaspoon (2 g) freshly grated ginger
- 1/2 teaspoon (1 g) ground turmeric
- 1/4 teaspoon (0.5 g) ground cinnamon
Optional Ingredient:
- 1/2 teaspoon (1.5 g) echinacea powder
Instructions
- Craft a harmonious blend of honey, lemon juice, grated ginger, turmeric, cinnamon, and optional echinacea powder in a mixing bowl, whisking until ingredients meld seamlessly.
- Carefully dispense approximately one teaspoon of the aromatic mixture into each silicone mold, using gentle pressure to ensure even distribution.
- Delicately sprinkle green tea leaves across the surface of each filled mold, softly pressing them into the liquid base to create a unified texture.
- Transfer the molds to the freezer, allowing the tea bombs to solidify completely over 1-2 hours, transforming the liquid mixture into firm, compact spheres.
- Once fully frozen, carefully extract the tea bombs from their silicone molds, preserving their intricate shape and concentrated flavors.
- Arrange the prepared tea bombs in an airtight container, returning them to the freezer to maintain their integrity and potency.
- When ready to enjoy, place a single tea bomb in a mug, then cascade hot water over its surface, stirring gently until the bomb dissolves completely, releasing its healing essence into a comforting beverage.
Notes
- Customize the tea bombs by adjusting spice levels to suit personal taste preferences and heat tolerance.
- Experiment with alternative sweeteners like maple syrup or agave for vegan-friendly options.
- Consider using organic ingredients to maximize potential health benefits and reduce exposure to pesticides.
- Prep and freeze multiple batches to have a quick immune-boosting remedy on hand during cold and flu season.
- Prep Time: 15 minutes
- Cook Time: 2 hours
- Category: Tea, Snacks
- Method: Freezing
- Cuisine: American
Nutrition
- Serving Size: 12
- Calories: 40
- Sugar: 9 g
- Sodium: 1 mg
- Fat: 0 g
- Saturated Fat: 0 g
- Unsaturated Fat: 0 g
- Trans Fat: 0 g
- Carbohydrates: 10 g
- Fiber: 0 g
- Protein: 0 g
- Cholesterol: 0 mg
Marcus Hale
Founder & Recipe Storyteller
Expertise
Education
Holyoke Community College – HCC-MGM Culinary Arts Institute
Marcus grew up surrounded by maple trees, farm stands, and the smell of Sunday stew simmering on the stove. After earning his Culinary Arts Certificate from the HCC-MGM Culinary Arts Institute, he knew he didn’t want to work in fancy kitchens, he wanted to cook for real people.
At Whip Up Cook Up, Marcus is the guy turning memories into meals. His recipes are fast, full of flavor, and built for home cooks who want big taste without the drama.