
Sizzling S’mores Bombs Recipe: Crispy, Gooey Campfire Joy
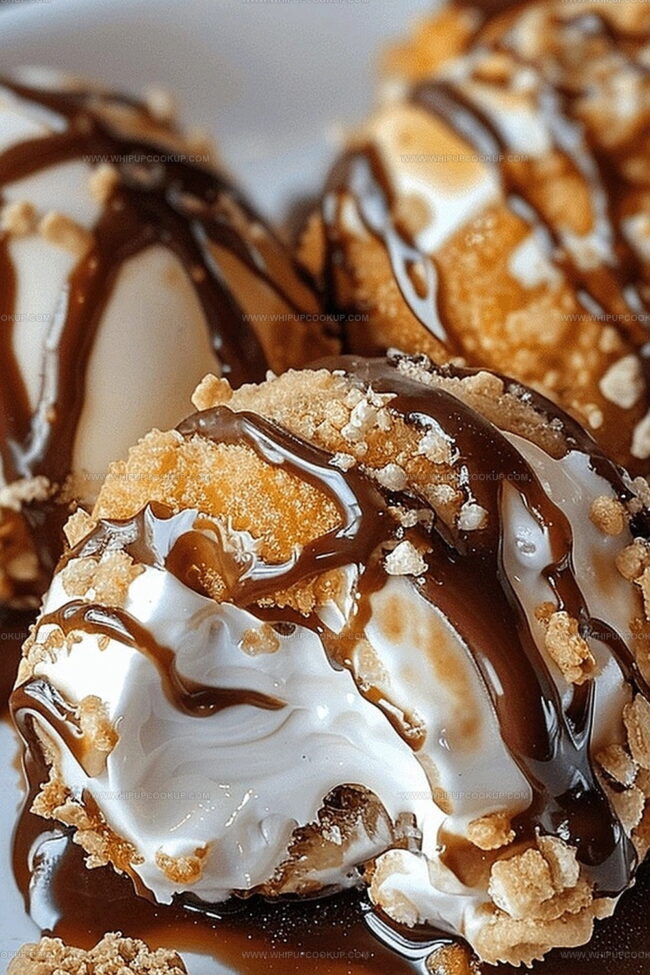
Crispy golden shells packed with gooey chocolate and marshmallow make these fried s’mores bombs an irresistible dessert adventure.
Sweet memories of campfire treats dance across your plate with each delightful bite.
Crunchy exteriors give way to molten centers that surprise and delight.
Chocolate lovers will swoon over this decadent twist on a classic favorite.
Homemade desserts rarely get more playful or indulgent than these crisp little bombs.
Simple ingredients and easy preparation mean you can whip up magic in minutes.
One taste, and everyone around the table will be begging for seconds.
S’mores Bombs That Fry Up into Sweet Campfire Goodness
Fried S’mores Bombs What You’ll Need
Main Ingredients:Frying Ingredients:Finishing Ingredients:Fried Smores Bombs Dessert Prep

Step 1: Flatten the Dough
Take each biscuit dough piece and gently roll it into a smooth, circular shape using your hands or a rolling pin. Ensure the dough is thin enough to wrap around the filling but thick enough to hold its shape.
Step 2: Create Delicious Pockets
Place the filling ingredients in the center of each dough round:Carefully fold the dough over the filling, creating a sealed pocket. Pinch and press the edges firmly to prevent any leakage during frying.
Step 3: Craft the Crunchy Coating
Roll each bomb generously in graham cracker crumbs, ensuring complete and even coverage. Gently press the crumbs into the dough to help them stick securely.
Step 4: Sizzle to Golden Perfection
Heat cooking oil in a deep pan or fryer until it reaches 350°F. Carefully lower 2-3 bombs into the hot oil, frying for 2-3 minutes. Rotate the bombs to achieve an even, golden-brown color on all sides.
Step 5: Final Decadent Touch
Remove the fried bombs and let them drain on paper towels to remove excess oil. Optional: Dust with a light sprinkle of powdered sugar for extra sweetness. Serve immediately while warm and enjoy the crispy, gooey goodness!
Smores Bomb Frying Tips for Gooey Campfire Bites
Preserve Fried Smores Bombs Just Right
Fried Smores Bombs Snack Ideas
Fried Smores Bomb Dessert Takes
FAQs
No, they’re super easy! Even beginner cooks can whip these up quickly with just a few simple ingredients and basic folding techniques.
Absolutely! You can assemble the bombs and refrigerate them for a few hours before frying. Just make sure to keep them sealed and covered so the dough doesn’t dry out.
Vegetable or canola oil are perfect because they have high smoke points and neutral flavors that won’t interfere with the s’mores taste. Make sure the oil is at the right temperature for crispy, golden results.
Press the edges firmly and pinch completely closed to prevent filling from leaking during frying. A fork can help create a tight seal and give a nice decorative edge.
Print
Fried Smores Bombs Recipe
- Total Time: 25 minutes
- Yield: 8 1x
Description
Campfire-inspired Fried S’mores Bombs bring marshmallow magic straight to your kitchen, melding classic graham cracker, chocolate, and gooey marshmallow into crispy golden delights. Dessert enthusiasts will dive into these irresistible treats that deliver a delightful crunch with a molten center of pure indulgence.
Ingredients
Main Ingredients:
- 8 large marshmallows
- 8 squares of milk chocolate (or chocolate chips)
- 1 can refrigerated biscuit dough (8-count)
Dry Ingredients:
- 1 cup graham cracker crumbs
- Powdered sugar (optional)
Cooking Ingredients:
- Vegetable oil or canola oil for frying
Instructions
- Gently stretch each biscuit dough into a uniform circular shape, ensuring the surface is smooth and even.
- Position a single marshmallow and chocolate square precisely at the center of the dough disc, creating a symmetrical filling arrangement.
- Carefully encase the chocolate and marshmallow by pulling the dough edges upward, creating a sealed pouch and crimping the borders to prevent leakage during frying.
- Thoroughly coat each enclosed bomb with graham cracker crumbs, rotating and pressing gently to ensure complete and consistent coverage.
- Prepare a deep skillet or fryer, heating the oil to the optimal temperature of 350°F, maintaining a consistent heat level for even cooking.
- Carefully lower 2-3 bombs into the hot oil, monitoring their transformation and rotating to achieve a uniform golden-brown exterior.
- Extract the fried bombs using a slotted spoon, allowing excess oil to drain on absorbent paper towels to maintain a crisp texture.
- Optional: Delicately dust the warm bombs with a light sprinkle of powdered sugar for an elegant finishing touch.
- Serve immediately while the exterior remains crisp and the interior filling is molten and gooey.
Notes
- Seal edges meticulously to prevent filling from leaking during frying, which could cause dangerous oil splatters.
- Experiment with different chocolate types like dark, milk, or flavored varieties to customize flavor profiles.
- Chill bombs briefly before frying to help maintain structural integrity and prevent premature filling escape.
- Use gluten-free biscuit dough and graham crackers for a celiac-friendly version without compromising delicious taste.
- Prep Time: 15 minutes
- Cook Time: 10 minutes
- Category: Snacks, Desserts
- Method: Frying
- Cuisine: American
Nutrition
- Serving Size: 8
- Calories: 210
- Sugar: 10g
- Sodium: 320mg
- Fat: 11g
- Saturated Fat: 3.5g
- Unsaturated Fat: 7g
- Trans Fat: 0g
- Carbohydrates: 26g
- Fiber: 1g
- Protein: 2g
- Cholesterol: 0mg
Marcus Hale
Founder & Recipe Storyteller
Expertise
Education
Holyoke Community College – HCC-MGM Culinary Arts Institute
Marcus grew up surrounded by maple trees, farm stands, and the smell of Sunday stew simmering on the stove. After earning his Culinary Arts Certificate from the HCC-MGM Culinary Arts Institute, he knew he didn’t want to work in fancy kitchens, he wanted to cook for real people.
At Whip Up Cook Up, Marcus is the guy turning memories into meals. His recipes are fast, full of flavor, and built for home cooks who want big taste without the drama.