
Spooky Chocolate Graveyard Dirt Cake Cups Recipe For Halloween
Delicious graveyard dirt cake cups bring a playful Halloween spirit to your dessert table.
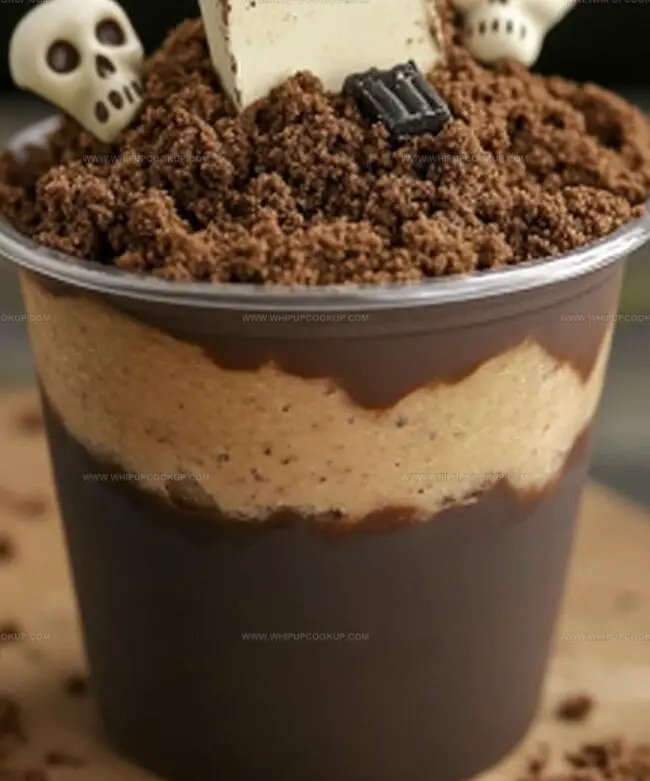
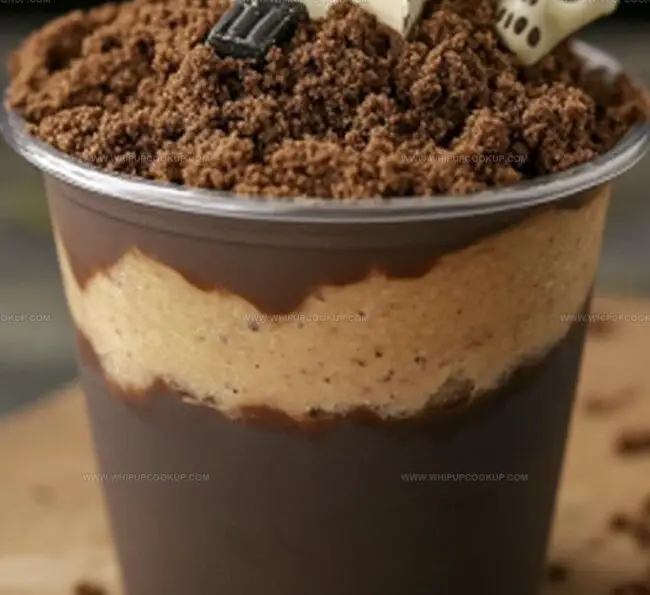
Creamy pudding layers nestled between crushed chocolate cookies create a wickedly fun treat.
Chocolate crumbs mimic soil while gummy worms peek through like mischievous underground creatures.
Marshmallow ghosts and candy tombstones add whimsical decorative touches to this spooky dessert.
Kids and adults alike will love the interactive and imaginative presentation of this themed sweet.
Simple ingredients and quick assembly make these cups a perfect last-minute party contribution.
Let’s dig into this ghoulishly delightful dessert that promises to delight and surprise everyone at your Halloween gathering.
Dirt Cake Cups That Look Spooky and Taste Sweet
Candy Corn Cookies with Peanut Butter Ingredients
Dairy Base:Cookies and Crumbs:Pudding and Sweeteners:Decorative Elements:Building Graveyard Dirt Cake Cups for Halloween
Step 1: Whip Up Chocolate Pudding
Grab a large mixing bowl and whisk together chocolate pudding mix and milk. Keep whisking for about 5 minutes until the mixture starts getting thick and creamy. Gently fold in the thawed whipped topping to create a smooth, rich base.
Step 2: Blend Creamy Mixture
In a separate bowl, use a mixer to cream together softened butter and cream cheese until they’re perfectly smooth. Pour in the prepared pudding mixture and blend everything until it’s completely combined and silky.
Step 3: Transform Cookies Into Dirt
Toss chocolate cream-filled cookies into a food processor or blender. Pulse and grind until the cookies look like crumbly, dark dirt. The finer the crumbs, the more realistic your graveyard effect will be.
Step 4: Layer Delicious Graveyard
Grab clear serving cups and start building your spooky dessert. Alternate layers of cookie crumbs and pudding mixture:Finish with a final topping of cookie crumbs to create the perfect “dirt” surface.
Step 5: Chill and Decorate
Slide the cups into the refrigerator and let them chill until you’re ready to serve.
Dirt Cake Tips for Graveyard Cup Treats
Dirt Cake With Graveyard Theme Best Storage Guide
Graveyard Dirt Cake Cups Snack Matches
Graveyard Dirt Cake Cup Designs
FAQs
Instant pudding works best for quick setting and consistent texture, but you can use homemade pudding if you prefer a more from-scratch approach.
No, you can use Oreos, chocolate graham crackers, or any dark chocolate cookie that crumbles well for the dirt effect.
You can prepare the dirt cups up to 2 days ahead, keeping them covered in the refrigerator until ready to serve.
Absolutely! Kids love helping crush cookies, layering ingredients, and adding spooky decorations, making it a fun Halloween activity.
Print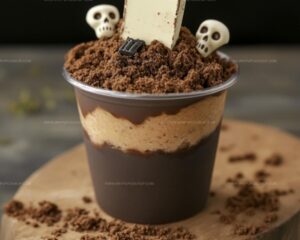
Graveyard Dirt Cake Cups Recipe
- Total Time: 15 minutes
- Yield: 12 1x
Description
Spooky graveyard dirt cake cups unleash Halloween’s playful spirit with layers of chocolatey delight and ghostly decorations. Creamy pudding, crushed cookies, and whimsical tombstone toppings create a haunting dessert that will delight guests at any ghoulish gathering.
Ingredients
Main Ingredients:
- 1 lb. 3 oz. family-sized box of chocolate cream-filled cookies
- 2 (3.9 oz) packages of instant chocolate pudding mix
- 3 1/2 cups milk
Dairy Ingredients:
- 1/2 cup butter, softened
- 8 oz. cream cheese, softened
- 8 oz. container of frozen whipped topping, thawed
Decorative Ingredients:
- Edible tombstones and bones
Instructions
- Whisk the chocolate pudding mix and milk vigorously for approximately 5 minutes until the mixture develops a thick, creamy consistency. Gently incorporate the thawed whipped topping, creating a smooth and airy base.
- Beat the softened butter and cream cheese in a separate mixing bowl until achieving a silky, uniform texture. Gradually blend in the prepared pudding mixture, ensuring a seamless integration of ingredients.
- Transform the chocolate cream-filled cookies into fine, soil-like crumbs using a food processor or blender. Pulse until the cookies resemble a texture reminiscent of dark, crumbly earth.
- Craft the dessert by strategically layering the cookie crumbs and pudding mixture in individual serving cups. Alternate between the rich, chocolatey components, creating visually appealing strata that mimic layers of ground.
- Refrigerate the assembled dessert cups until the moment of serving. Just before presentation, enhance the Halloween theme by adorning the surface with edible tombstone and bone decorations, transforming the treats into a ghoulishly delightful culinary landscape.
Notes
- Choose top-quality pudding mix for a richer, smoother chocolate base that elevates the entire dessert’s flavor profile.
- Crush cookies meticulously to achieve a fine, dirt-like texture that mimics realistic ground appearance and enhances visual appeal.
- Chill the pudding mixture for 15-20 minutes before layering to ensure a firmer, more stable consistency that holds its shape perfectly.
- Consider gluten-free cookie alternatives like chocolate graham crackers or gluten-free chocolate sandwich cookies for celiac-friendly adaptations.
- Prep Time: 15 minutes
- Cook Time: 0 minutes
- Category: Desserts, Snacks
- Method: Blending
- Cuisine: American
Nutrition
- Serving Size: 12
- Calories: 350
- Sugar: 25 g
- Sodium: 250 mg
- Fat: 20 g
- Saturated Fat: 10 g
- Unsaturated Fat: 8 g
- Trans Fat: 0 g
- Carbohydrates: 38 g
- Fiber: 2 g
- Protein: 4 g
- Cholesterol: 30 mg
Marcus Hale
Founder & Recipe Storyteller
Expertise
Education
Holyoke Community College – HCC-MGM Culinary Arts Institute
Marcus grew up surrounded by maple trees, farm stands, and the smell of Sunday stew simmering on the stove. After earning his Culinary Arts Certificate from the HCC-MGM Culinary Arts Institute, he knew he didn’t want to work in fancy kitchens, he wanted to cook for real people.
At Whip Up Cook Up, Marcus is the guy turning memories into meals. His recipes are fast, full of flavor, and built for home cooks who want big taste without the drama.