Spooky-Sweet Halloween Cookies and Cream Fudge Recipe
Whipping up some delightful halloween cookies and cream fudge can turn an ordinary evening into a spooky sweet celebration.
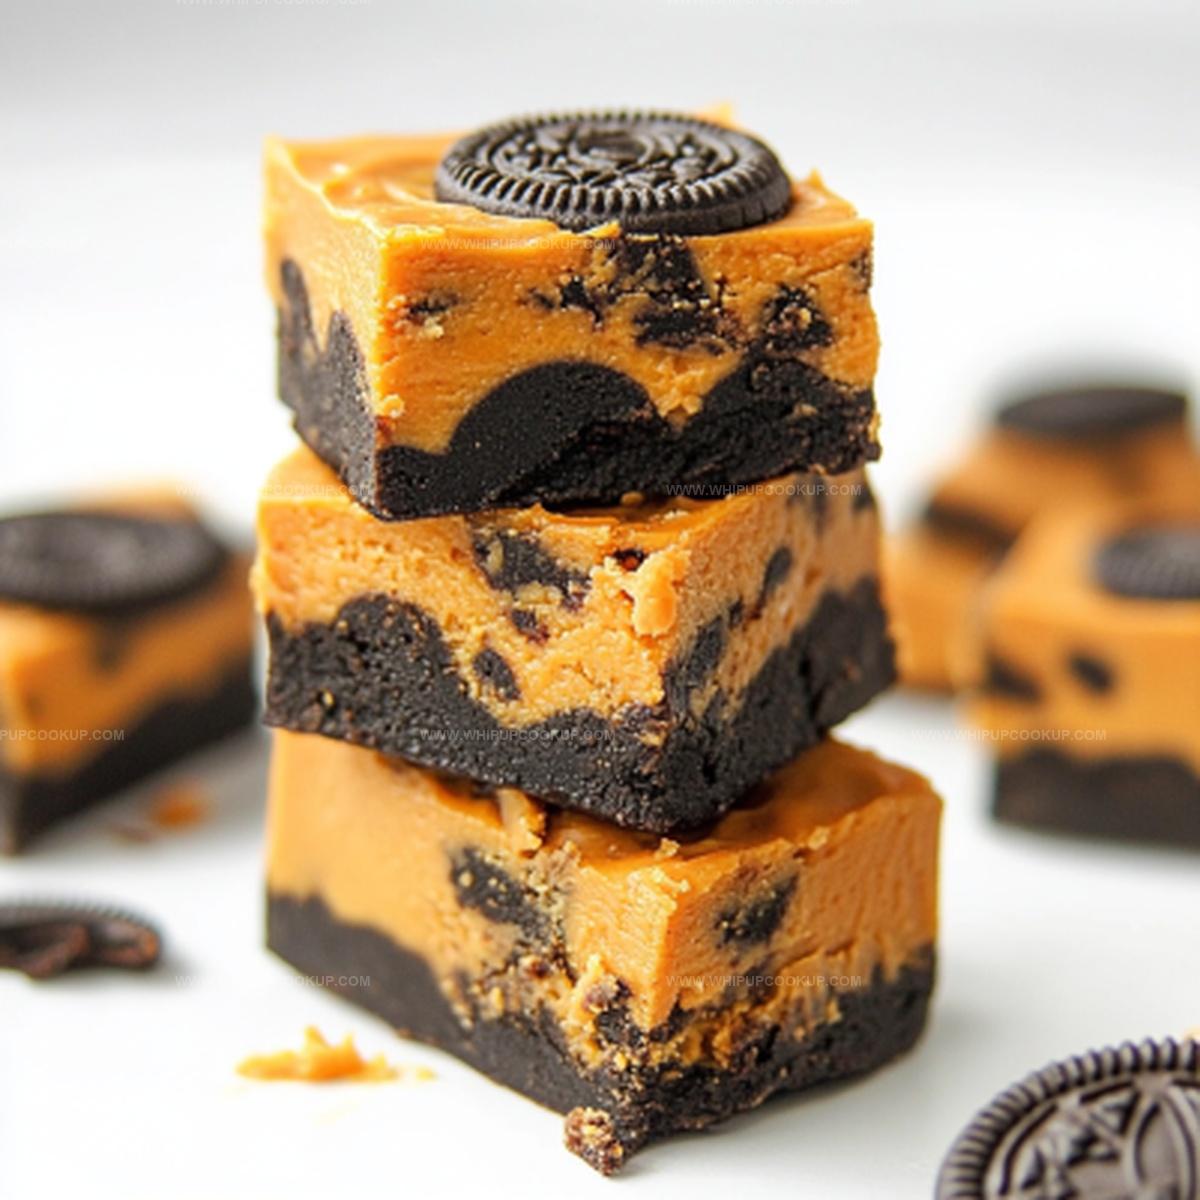
Creamy textures blend with dark chocolate undertones, creating a festive treat that captures the spirit of the season.
Chocolate lovers will appreciate the rich, indulgent layers of flavor packed into each bite-sized square.
Mysterious and decadent, these fudge pieces promise to bewitch anyone who tries them.
Kids and adults alike will fall under the spell of this ghostly good dessert.
Toss together a batch and watch how quickly these hauntingly delicious morsels disappear from the plate.
Prepare to enchant your taste buds with a recipe that screams Halloween fun!
Cookies and Cream Halloween Fudge Ingredients
Core Ingredients:Coloring and Flavoring:Optional Preparation Ingredients:Making Halloween Cookies and Cream Fudge Easy
Step 1: Prepare Melting Base
Grab a large microwave-safe bowl and combine white chocolate chips with sweetened condensed milk. The magical mixing begins here to create a creamy foundation for your Halloween treat.
Step 2: Melt Chocolate Mixture
Place the bowl in the microwave and heat for 2 minutes. Carefully remove and stir until the mixture becomes perfectly smooth and glossy. If any stubborn chunks remain, pop it back in the microwave for an additional 30 seconds.
Step 3: Add Festive Halloween Color
Introduce orange gel food coloring to transform your fudge into a vibrant Halloween-themed delight. Stir until you achieve the perfect spooky orange shade that screams Halloween spirit.
Step 4: Mix in Oreo Cookies
Fold in chopped Oreo cookies, creating a delicious cookies and cream texture. Set aside a small portion of cookie pieces for a decorative topping.
Ingredients for this step:Step 5: Prepare Fudge Pan
Line a 7×11 or 9×9 baking dish with parchment paper. This will make removing your fudge a breeze once it’s set.
Step 6: Shape and Decorate Fudge
Pour the fudge mixture into the prepared pan, spreading it evenly with a spatula. Sprinkle the reserved Oreo pieces on top for a festive and crunchy finish.
Step 7: Set and Chill
Allow the fudge to set at room temperature for a few hours. For faster results, pop it in the refrigerator for about 1 hour until firm and fully set.
Step 8: Slice and Serve
Once the fudge has completely set, cut into squares. Your spooky Halloween Cookies and Cream Fudge is ready to delight friends and family!
Halloween Fudge Tips for Cookies and Cream Delight
How to Keep Halloween Cookies and Cream Fudge Fresh
Cookies and Cream Fudge Flavor Matches
Cookies and Cream Fudge Takes
FAQs
The orange gel food coloring and Oreo cookies give this fudge a festive Halloween look and flavor, creating a spooky twist on traditional fudge.
Gel food coloring is recommended because it provides more vibrant color and doesn’t thin out the fudge mixture like liquid food coloring would.
Fold the cookies gently into the melted chocolate mixture and don’t overmix, which helps maintain their crunch and texture.
Yes! Kids can help sprinkle Oreo cookies on top and pour the mixture into the pan, making it a fun Halloween baking activity.
Fudge That Mixes Cookies and Cream into One Sweet Bite
Print
Halloween Cookies and Cream Fudge Recipe
- Total Time: 3 hours 15 minutes
- Yield: 12 1x
Description
Spooky halloween Cookies and Cream Fudge brings ghoulish delight to festive gatherings with its creamy white chocolate base and crumbled oreo surprises. Haunting black and orange sprinkles crown this wickedly delicious treat that chocolate enthusiasts and halloween fans will devour in moments.
Ingredients
Main Ingredients:
- 18 ounces (510 grams) white chocolate chips
- 14 ounces (397 grams) sweetened condensed milk
- 2 cups roughly chopped Oreo cookies
Coloring and Flavoring:
- 1/4 teaspoon orange gel food coloring
Optional Garnish:
- None mentioned in the original recipe
Instructions
- Prepare a rectangular or square baking dish by lining it completely with parchment paper, ensuring smooth edges for easy removal.
- Place white chocolate chips and sweetened condensed milk into a microwave-safe container, creating a creamy base for the festive treat.
- Heat the mixture in the microwave, stopping every 30-45 seconds to stir and prevent scorching, until the chocolate melts completely and forms a silky consistency.
- Introduce vibrant orange gel food coloring, gently stirring to achieve a rich, Halloween-inspired hue throughout the mixture.
- Carefully chop Oreo cookies into irregular chunks, maintaining varied sizes for visual and textural interest.
- Incorporate most of the crushed Oreo cookies into the melted chocolate mixture, folding gently to distribute evenly without breaking the cookie pieces.
- Transfer the fudge mixture into the prepared parchment-lined dish, using a spatula to spread it uniformly and create a smooth surface.
- Strategically sprinkle the remaining Oreo cookie fragments across the top, pressing them lightly to ensure they adhere to the fudge.
- Allow the fudge to solidify naturally at room temperature for approximately 2-3 hours, or expedite the process by refrigerating for 45-60 minutes.
- Once completely set, lift the fudge from the dish using the parchment paper edges and slice into clean, precise squares for serving.
Notes
- Customize the orange shade by adding gel food coloring gradually to achieve the perfect Halloween festive look.
- Add a pinch of sea salt to enhance the chocolate and cookie flavors, creating a more complex taste profile.
- Ensure white chocolate chips are high-quality for smoother, creamier fudge texture and richer flavor.
- For gluten-free version, substitute regular Oreos with gluten-free chocolate sandwich cookies to maintain the classic cookies and cream experience.
- Prep Time: 15 minutes
- Cook Time: 3 hours
- Category: Desserts, Snacks
- Method: Baking
- Cuisine: American
Nutrition
- Serving Size: 12
- Calories: 200
- Sugar: 18 g
- Sodium: 50 mg
- Fat: 10 g
- Saturated Fat: 6 g
- Unsaturated Fat: 4 g
- Trans Fat: 0 g
- Carbohydrates: 26 g
- Fiber: 1 g
- Protein: 2 g
- Cholesterol: 5 mg
Marcus Hale
Founder & Recipe Storyteller
Expertise
Education
Holyoke Community College – HCC-MGM Culinary Arts Institute
Marcus grew up surrounded by maple trees, farm stands, and the smell of Sunday stew simmering on the stove. After earning his Culinary Arts Certificate from the HCC-MGM Culinary Arts Institute, he knew he didn’t want to work in fancy kitchens, he wanted to cook for real people.
At Whip Up Cook Up, Marcus is the guy turning memories into meals. His recipes are fast, full of flavor, and built for home cooks who want big taste without the drama.