
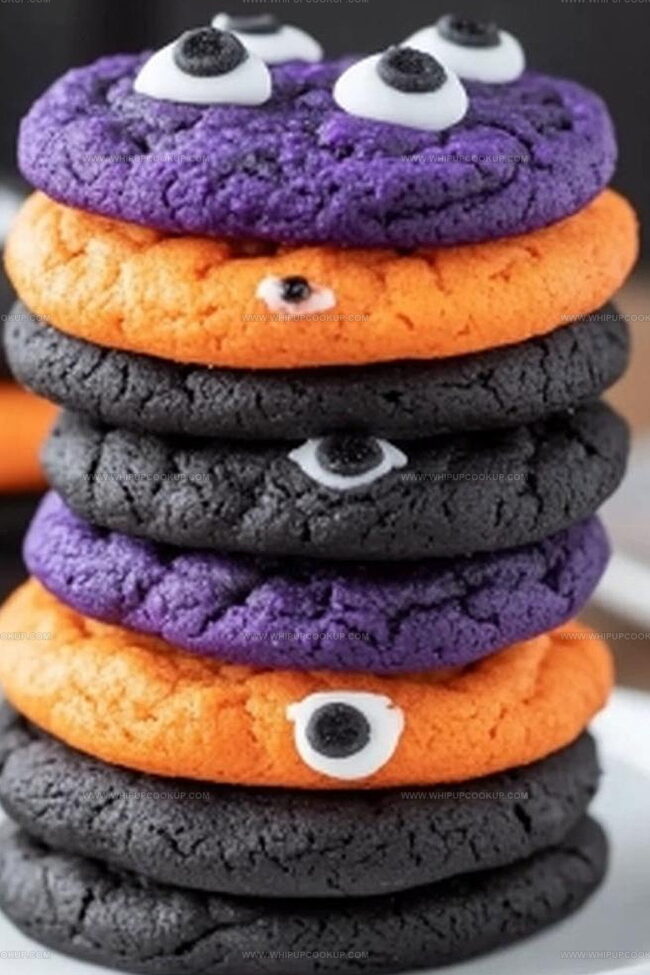
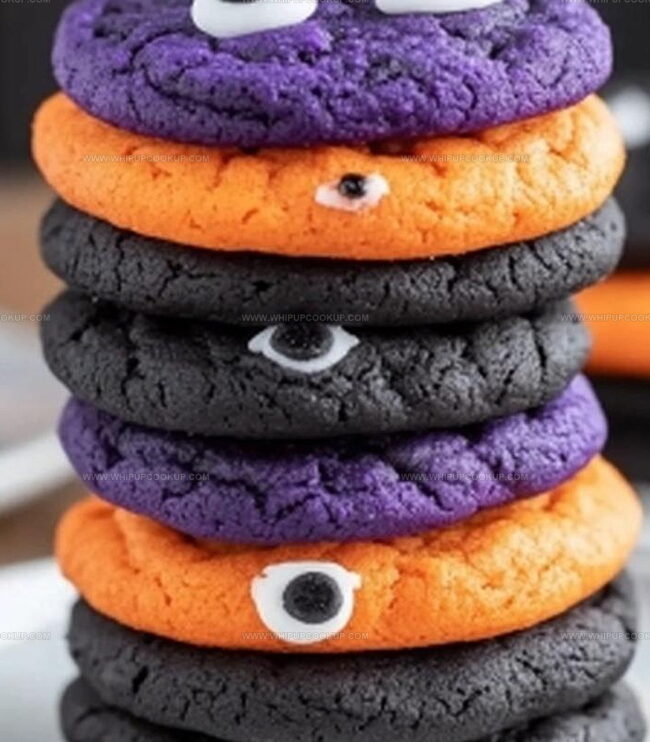
Spooky Halloween Monster Eye Crinkle Cookies Recipe
Spooky chocolate monster eye crinkle cookies bring a playful twist to your Halloween dessert table.
Creepy yet delightful, these treats capture the imagination of ghoulish gatherings.
Powdered sugar coats each cookie like a ghostly veil, creating an irresistible visual effect.
Dark chocolate provides a rich backdrop for the startling candy eyeballs that peek out mischievously.
Kids and adults alike will marvel at the unexpected whimsy of these festive sweets.
Baking becomes an adventure when you craft these wickedly cute confections.
Let the monster cookie madness begin!
Monster Eye Cookies That Stare Back and Taste Delicious
Halloween Crinkle Monster Cookies Ingredients
Base Mix:Coloring and Decoration:Baking Essentials:Baking Halloween Monster Eye Crinkle Cookies
Step 1: Crank Up the Oven
Fire up your oven to a cozy 350°F and line a baking sheet with parchment paper for easy cleanup.
Step 2: Mix Magical Cookie Dough
Grab a large mixing bowl and combine:Stir until the mixture transforms into a vibrant, smooth dough.
Step 3: Chill the Dough
Pop the dough into the refrigerator for a quick 15-minute cool-down. This helps make the dough easier to handle.
Step 4: Shape Spooky Cookie Balls
Roll the chilled dough into bite-sized balls. Give each ball a luxurious bath in powdered sugar, ensuring they’re completely coated.
Step 5: Add Monster Eyes
Gently press those creepy candy monster eyes into the center of each sugar-coated dough ball. Make sure they’re looking right at you!
Step 6: Freeze for Perfect Shape
Place the decorated dough balls in the freezer for 10-15 minutes. This little chill session helps them maintain their monstrous form during baking.
Step 7: Bake the Monsters
Slide the baking sheet into the oven and bake for 6-8 minutes. You’ll know they’re ready when the tops look perfectly crinkled and the centers are set.
Step 8: Cool and Admire
Let the cookies rest on the baking sheet for a few minutes, then transfer to a wire rack to cool completely. Watch those monster eyes stare back at you!
Step 9: Serve Spooky Treats
Plate up your creepy-crawly cookies and get ready to impress with your monster baking skills!
Cookie Tips That Turn Monster Crinkles into Halloween Fun
Store and Reheat Monster Eye Crinkle Cookies the Easy Way
Monster Eye Crinkle Cookies Party Picks
Monster Eye Crinkle Cookie Treats
FAQs
Cake mix provides a quick, easy base that guarantees soft, chewy cookies with minimal effort and consistent texture every time.
Yes, you can skip the food coloring and still have delicious crinkle cookies, though they won’t have the Halloween color theme.
Chilling the dough and freezing the cookie balls before baking helps them maintain their shape and prevents excessive spreading during baking.
You can purchase candy monster eyes at craft stores, baking supply shops, specialty cake decorating stores, or online retailers like Amazon and Etsy.
Print
Halloween Monster Eye Crinkle Cookies Recipe
- Total Time: 40 minutes
- Yield: 24 1x
Description
Spooky halloween monster eye crinkle cookies bring festive fright to dessert tables with ghoulish green and red candy eyeballs nestled in powdery chocolate cookies. Creepy and delicious, these treats will delight party guests and spark Halloween spirit with each delightfully eerie bite.
Ingredients
Main Ingredients:
- 1 box vanilla cake mix (Betty Crocker)
- 2 eggs
- 1/3 cup (79 ml) vegetable oil
Additional Ingredients:
- 2 cups (240 grams) icing sugar
Decorative Ingredients:
- Gel food coloring (orange, black, and purple)
- Candy monster eyes
- Halloween-themed sprinkles (optional)
Instructions
- Prepare your workspace by preheating the oven and lining a baking sheet with parchment paper for smooth cookie removal.
- Mix cake mix, vegetable oil, and eggs in a large bowl, ensuring a uniform consistency with vibrant gel food coloring to create a festive Halloween aesthetic.
- Refrigerate the dough for a quarter-hour to enhance its moldability and prevent excessive spreading during baking.
- Craft uniform dough spheres using a tablespoon measure, rolling each ball meticulously for consistent size and shape.
- Generously coat each dough ball in powdered icing sugar, creating a crackled exterior and sweet protective layer.
- Position the sugar-coated balls on the prepared baking sheet, leaving adequate spacing for potential expansion.
- Gently press whimsical monster eyes into the center of each cookie, ensuring they are securely embedded but not fully submerged.
- Brief freezing of the decorated dough balls will help maintain their structural integrity during the baking process.
- Slide the baking sheet into the preheated oven, monitoring the cookies until their surfaces develop characteristic crinkles and centers appear set.
- Allow the freshly baked monsters to rest momentarily on the baking sheet before transferring to a cooling rack.
- Once completely cooled, serve these spine-chilling sweet treats and delight in their ghoulish appearance.
Notes
- Ensure even color distribution by mixing the gel food coloring thoroughly into the dough to create a vibrant Halloween look.
- Chilling the dough helps prevent spreading and maintains the cookies’ shape during baking, resulting in perfect crinkle texture.
- Use fresh candy eyes for the most realistic monster appearance, and press them gently into the cookie surface just before baking to keep them secure.
- For gluten-free option, substitute the cake mix with a gluten-free cake mix, making these monster cookies accessible to more dietary needs.
- Prep Time: 30 minutes
- Cook Time: 10 minutes
- Category: Desserts
- Method: Baking
- Cuisine: American
Nutrition
- Serving Size: 24
- Calories: 150
- Sugar: 18g
- Sodium: 180mg
- Fat: 7g
- Saturated Fat: 1g
- Unsaturated Fat: 6g
- Trans Fat: 0g
- Carbohydrates: 20g
- Fiber: 0g
- Protein: 2g
- Cholesterol: 15mg
Marcus Hale
Founder & Recipe Storyteller
Expertise
Education
Holyoke Community College – HCC-MGM Culinary Arts Institute
Marcus grew up surrounded by maple trees, farm stands, and the smell of Sunday stew simmering on the stove. After earning his Culinary Arts Certificate from the HCC-MGM Culinary Arts Institute, he knew he didn’t want to work in fancy kitchens, he wanted to cook for real people.
At Whip Up Cook Up, Marcus is the guy turning memories into meals. His recipes are fast, full of flavor, and built for home cooks who want big taste without the drama.