
Spooky-Sweet Halloween Pumpkin Cookies Recipe
Whipping up delectable halloween pumpkin cookies brings pure autumn magic right into your kitchen.
Crisp leaves dance outside while warm spices fill the air with comfort.
Cozy afternoons call for sweet treats that spark childhood memories.
Seasonal baking creates moments of pure joy and connection.
Soft, pillowy cookie textures blend perfectly with rich pumpkin warmth.
Delightful aromas will make everyone gather around the cooling rack with excitement.
FAQs
Roll out the dough and use pumpkin-shaped cookie cutters. For extra Halloween spirit, decorate with orange and black icing, create jack-o’-lantern faces, or add candy googly eyes.
Yes! Prepare the dough, wrap it tightly in plastic wrap, and store in the refrigerator for up to 3 days before baking. This makes party prep easier and allows the flavors to develop.
While this recipe doesn’t include actual pumpkin puree, you can add 1/4 cup of pumpkin puree and adjust the flour slightly to incorporate a true pumpkin taste. Alternatively, add pumpkin pie spice to enhance the seasonal flavor.
Absolutely! Children can help roll out the dough, use cookie cutters, and decorate the cookies. It’s a fun Halloween activity that lets kids get creative and enjoy baking together.
Pumpkin Cookies That Look Spooky and Taste Like Fall
Halloween Pumpkin Cookies Ingredient List
Cookie Base:Leavening Agents:Flavoring and Decoration:Halloween Pumpkin Cookies Made Simple and Spookily Sweet
Step 1: Warm Up the Oven
Fire up your oven to create the perfect baking environment. Set the temperature to 200°C (180°C fan-assisted, or 400°F) so it’s ready and waiting.
Step 2: Blend Creamy Base
In a spacious mixing bowl, combine:Whip these ingredients together until the mixture transforms into a light, fluffy cloud of deliciousness.
Step 3: Mix Dry Ingredients
Sift the following dry components into your creamy base:Stir everything until the dough comes together and looks slightly crumbly.
Step 4: Shape and Chill Dough
Gently knead the dough just enough to form a smooth, uniform ball. Wrap the dough in plastic wrap and let it rest in the refrigerator for 15 minutes. This quick chill helps develop richer flavors and makes the dough easier to handle.
Step 5: Roll Out Pumpkin Magic
Dust your work surface with flour. Roll out the chilled dough to about 1/4 inch thickness. Use Halloween-themed cookie cutters like pumpkins, ghosts, or bats to create spooky shapes.
Step 6: Bake Haunting Treats
Place the cut-out cookies on a lined baking sheet. Slide them into the preheated oven and bake until the edges turn a beautiful golden brown, typically 10-12 minutes.
Step 7: Cool and Decorate
Remove cookies from the oven and let them cool on the baking sheet for a few minutes. Transfer to a wire rack to cool completely. Decorate with Halloween-themed icing or sprinkles for extra festive flair.
Pumpkin Cookie Tips for Spooky Holiday Treats
Keep Halloween Pumpkin Cookies Delicious
Halloween Pumpkin Cookies Party Matches
Pumpkin Cookie Halloween Ideas
Print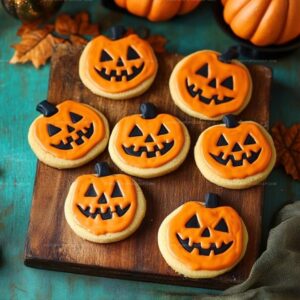
Halloween Pumpkin Cookies Recipe
- Total Time: 40 minutes
- Yield: 12 1x
Description
Spooky halloween pumpkin cookies bring festive autumn charm to cookie lovers’ tables. Creamy pumpkin spice and sweet frosting create delightful seasonal treats you’ll crave all fall long.
Ingredients
Main Ingredients:
- 250 g (8.8 oz) plain white flour (all-purpose flour)
- 110 g (3.9 oz) slightly salted butter, cubed
- 100 g (3.5 oz) white caster sugar (superfine sugar)
- 1 medium free-range egg
Leavening Agents:
- 1/4 teaspoon bicarbonate of soda (baking soda)
- 1/4 teaspoon baking powder
Flavor Enhancers:
- 1/2 teaspoon vanilla extract
- 1/4 teaspoon salt
Instructions
- Preheat the oven to 200°C (180°C fan-assisted, or 400°F) and line a baking sheet with parchment paper for easy cleanup.
- In a spacious mixing bowl, cream together softened butter and sugar until the mixture transforms into a light, airy consistency.
- Incorporate the egg and vanilla extract, whisking vigorously to create a smooth, pale emulsion that brings depth to the cookie base.
- Gradually sift the dry ingredients – flour, baking powder, salt, and bicarbonate of soda – directly into the wet mixture, folding gently to prevent overmixing.
- Once the dough begins to come together, use your hands to knead it lightly, ensuring all ingredients are evenly distributed without developing tough gluten.
- Shape the dough into a compact ball, wrap it securely in plastic film, and refrigerate for 15 minutes to enhance flavor development and make rolling easier.
- After chilling, roll out the dough on a lightly floured surface to approximately 5mm thickness, using precise, even strokes to create a uniform sheet.
- Use festive Halloween-themed cookie cutters to stamp out spooky shapes, transferring the delicate cut-outs carefully onto the prepared baking sheet.
- Bake in the preheated oven for 10-12 minutes, watching closely to achieve a golden-brown edge while maintaining a soft, tender center.
- Remove from the oven and allow cookies to cool on the baking sheet for 5 minutes before transferring to a wire rack to cool completely.
Notes
- Chill the dough thoroughly to prevent spreading and maintain the cookie’s shape during baking.
- Use room temperature butter for smoother mixing and better cookie texture.
- Adjust spices like cinnamon or nutmeg to enhance the pumpkin flavor and create a more autumnal taste profile.
- For gluten-free options, substitute regular flour with a 1:1 gluten-free baking blend to maintain the cookie’s structure.
- Prep Time: 30 minutes
- Cook Time: 10 minutes
- Category: Desserts, Snacks
- Method: Baking
- Cuisine: American
Nutrition
- Serving Size: 12
- Calories: 150
- Sugar: 8g
- Sodium: 120mg
- Fat: 6g
- Saturated Fat: 4g
- Unsaturated Fat: 2g
- Trans Fat: 0g
- Carbohydrates: 22g
- Fiber: 0.5g
- Protein: 2g
- Cholesterol: 20mg
Marcus Hale
Founder & Recipe Storyteller
Expertise
Education
Holyoke Community College – HCC-MGM Culinary Arts Institute
Marcus grew up surrounded by maple trees, farm stands, and the smell of Sunday stew simmering on the stove. After earning his Culinary Arts Certificate from the HCC-MGM Culinary Arts Institute, he knew he didn’t want to work in fancy kitchens, he wanted to cook for real people.
At Whip Up Cook Up, Marcus is the guy turning memories into meals. His recipes are fast, full of flavor, and built for home cooks who want big taste without the drama.