Magical Holiday Meringue Trees Recipe – Festive Winter Wonders
Crafting whimsical holiday meringue trees will spark joy in your festive kitchen.
Delicate peaks of sweetness transform simple ingredients into magical winter decorations.
Crisp white swirls remind you of snowy landscape silhouettes.
Light and airy textures promise delightful moments of seasonal celebration.
Pastry chefs and home bakers alike can master these elegant dessert centerpieces.
Pastry bags and steady hands become your creative tools for edible art.
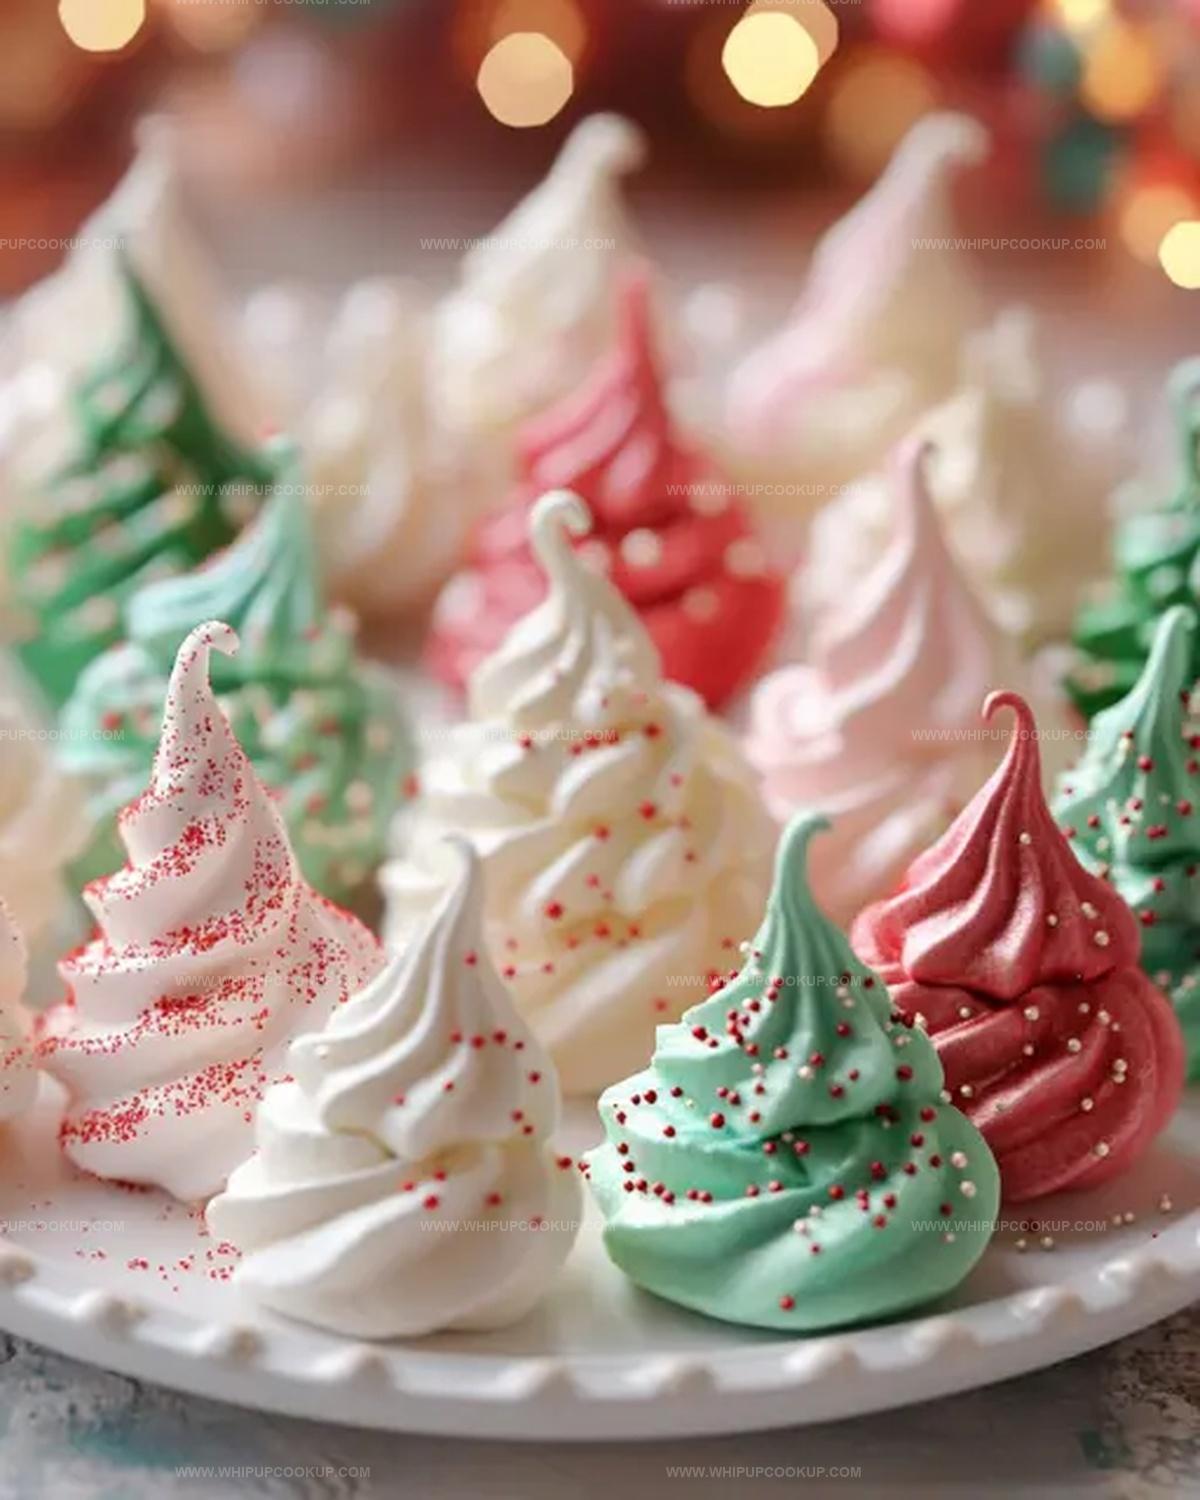
Meringues That Swirl Up Into Holiday Tree Shapes
Brown Butter Pecan Cookies Pantry Breakdown
Main Ingredients:
Egg Whites: Fresh and at room temperature for best volume.
Granulated Sugar: Provides sweetness and structure to the meringue.
Vanilla Extract: Adds a warm, classic flavor to the dessert.
Coloring and Decoration:Optional Additions:Steps for Holiday Meringue Trees
Step 1: Prepare Baking Station
Warm up your oven to 225°F, creating a cozy environment for your sweet creations. Grab two baking sheets and lovingly cover them with parchment paper, ensuring a smooth surface for your meringue trees.
Step 2: Whip Egg Whites to Perfection
Grab your electric mixer and transform egg whites with a tiny pinch of salt into a fluffy cloud. Start mixing at medium speed until soft, billowy peaks emerge that look like delicate mountain tops.
Step 3: Create Glossy Meringue Magic
Slowly sprinkle sugar into the egg white mixture, one tablespoon at a time. Crank up the mixer to high speed, watching the mixture transform into a glossy, stiff wonderland that holds its shape beautifully.
Step 4: Infuse Vanilla Charm
Gently fold vanilla extract into your meringue, introducing a warm, sweet aroma that will make your kitchen smell like holiday happiness.
Step 5: Paint with Color
Divide your meringue into separate bowls and unleash your inner artist. Add drops of food coloring to each bowl, folding carefully to create vibrant green, blue, or festive red hues.
Step 6: Shape Magical Trees
Select a piping bag with a star tip and channel your inner pastry chef. Carefully pipe tree-shaped silhouettes onto the prepared baking sheets, creating whimsical holiday landscapes.
Step 7: Slow Bake and Dry
Slide the baking sheets into the oven and let the meringues dry slowly for 1½ to 2 hours. After baking, crack the oven door open and let them cool gradually for another hour, developing a perfect crisp texture.
Step 8: Decorate and Celebrate
Sprinkle edible glitter or festive sprinkles over your meringue trees, transforming them into sparkling winter wonderlands ready to delight everyone at your holiday gathering.
Meringue Tips That Keep Holiday Tree Shapes Perfect
Store Meringue Trees Without Losing Their Shape
Coconut Balls Without Milk Serving Matches
Pair with Festive Winter Drinks:Brown Butter Pecan Cookie Flavor Takes
FAQs
Look for soft, rounded peaks that slightly curl when the beater is lifted. When you lift the beater, the peak should gently fall over, not stand straight up or be too runny.
This happens when sugar is added too quickly or not fully dissolved. Always add sugar gradually, one tablespoon at a time, and beat thoroughly until the mixture is smooth and glossy with no sugar granules.
You can use a zip-lock bag with a corner snipped off, or use a spoon to create rough tree shapes. However, a piping bag with a star tip will give the most professional and detailed holiday tree design.
Ensure a low, consistent oven temperature and avoid opening the oven door during baking. After baking, let meringues cool slowly in the oven with the door slightly open to prevent sudden temperature changes that cause cracking.
Print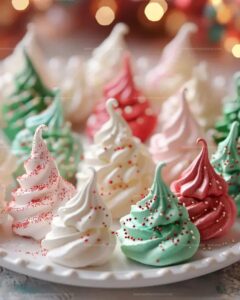
Holiday Meringue Trees Recipe
- Total Time: 3 hours 20 minutes
- Yield: 12 1x
Description
Sweet holiday meringue trees bring festive cheer to winter gatherings, sparkling with delicate peaks and whimsical green swirls. Crisp, airy confections will delight guests with their charming seasonal spirit.
Ingredients
Meringue Base:
- 4 large egg whites
- 1 cup (200 grams) granulated sugar
- 1/2 teaspoon (2.5 milliliters) vanilla extract
- 1 pinch salt
Coloring and Decoration:
- Food coloring (red, green, white)
- Sprinkles for decoration
Instructions
- Carefully separate egg whites, ensuring no yolk contamination, and allow them to reach room temperature for optimal volume.
- Place egg whites in a clean, grease-free mixing bowl and incorporate a tiny pinch of salt.
- Whip egg whites using an electric mixer at medium speed until they transform into soft, billowy peaks that gently curl when the whisk is lifted.
- Introduce granulated sugar gradually, adding one tablespoon at a time while continuously beating at high speed.
- Continue mixing until the meringue becomes thick, glossy, and forms stiff peaks that hold their shape firmly (approximately 5-7 minutes of vigorous beating).
- Delicately incorporate vanilla extract by gently folding it into the meringue using a spatula to maintain the mixture’s airy structure.
- Separate the meringue into individual bowls and introduce food coloring, using a gentle folding technique to distribute color evenly without deflating the mixture.
- Transfer the colored meringue into a piping bag fitted with a star-shaped tip for creating intricate tree designs.
- Carefully pipe tree-shaped silhouettes onto parchment-lined baking sheets, ensuring consistent spacing between each design.
- Position the baking sheets in a preheated oven at 225°F (110°C) and allow meringues to dry and crisp for 1½ to 2 hours.
- After baking, turn off the oven and leave the door slightly ajar, allowing meringues to cool and further set for an additional hour.
- Once completely cooled, embellish the meringue trees with festive sprinkles or shimmering edible glitter just before serving.
Notes
- Whip egg whites at room temperature for maximum volume and stability.
- Use clean, grease-free equipment to ensure meringue peaks form correctly.
- Add sugar gradually to prevent deflating the egg whites and create smooth, glossy texture.
- Low and slow baking helps dry out meringues without browning, maintaining their delicate structure.
- Store in an airtight container to prevent moisture absorption and maintain crisp texture.
- Experiment with different food coloring shades for festive holiday variations.
- Adjust piping techniques to create unique tree shapes and sizes.
- Prep Time: 20 minutes
- Cook Time: 3 hours
- Category: Desserts
- Method: Baking
- Cuisine: American
Nutrition
- Serving Size: 12
- Calories: 50
- Sugar: 12 g
- Sodium: 5 mg
- Fat: 0 g
- Saturated Fat: 0 g
- Unsaturated Fat: 0 g
- Trans Fat: 0 g
- Carbohydrates: 12 g
- Fiber: 0 g
- Protein: 1 g
- Cholesterol: 0 mg
Marcus Hale
Founder & Recipe Storyteller
Expertise
Education
Holyoke Community College – HCC-MGM Culinary Arts Institute
Marcus grew up surrounded by maple trees, farm stands, and the smell of Sunday stew simmering on the stove. After earning his Culinary Arts Certificate from the HCC-MGM Culinary Arts Institute, he knew he didn’t want to work in fancy kitchens, he wanted to cook for real people.
At Whip Up Cook Up, Marcus is the guy turning memories into meals. His recipes are fast, full of flavor, and built for home cooks who want big taste without the drama.