
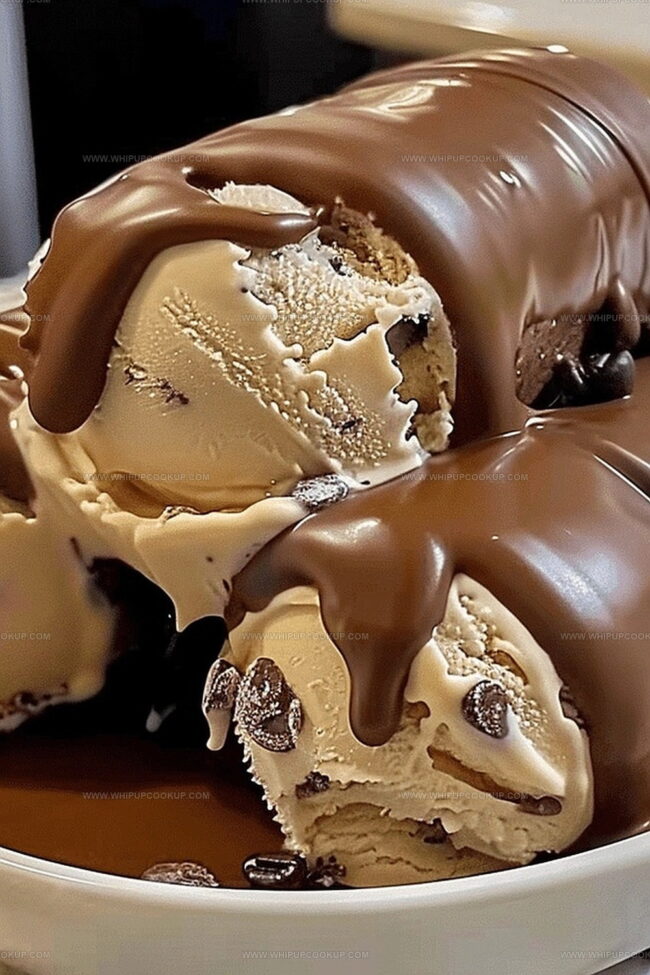
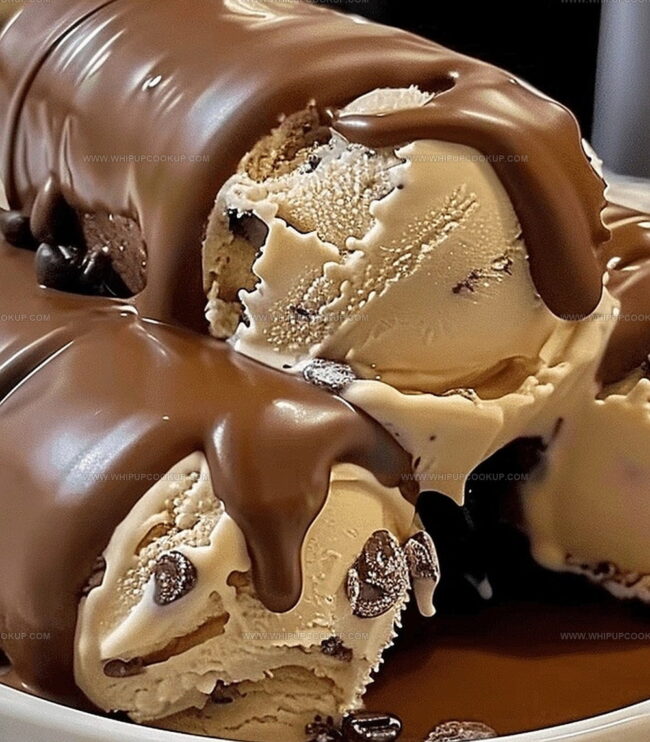
Creamy Homemade Coffee Ice Cream Recipe for Sweet Success
Crafting silky homemade coffee ice cream brings pure dessert magic right into your kitchen.
Sweet cream and bold espresso dance together in a delightful frozen treat.
Cold brewing techniques intensify the rich coffee essence without bitter undertones.
Smooth custard bases create that luxurious texture everyone craves in a perfect scoop.
Professional pastry chefs often guard their secret techniques, but this recipe breaks down every step simply.
Real ingredients make all the difference between average and extraordinary frozen delights.
Whip up this creamy masterpiece and watch eyes light up with pure delight.
What’s Great About Homemade Coffee Ice Cream
Coffee Ice Cream (Homemade) Ingredients
Main Ingredients:Flavor Enhancers:Preparation Ingredients:Homemade Coffee Ice Cream Instructions
Step 1: Prepare Whipping Cream
Grab a large mixing bowl and pour in the heavy cream. Use an electric mixer or whisk to beat the cream vigorously until it transforms into fluffy, stiff peaks that stand up tall and proud.
Step 2: Create Coffee Flavor Base
In a separate bowl, combine the sweetened condensed milk with:Whisk these ingredients together until they become a smooth, harmonious blend that promises rich coffee flavor.
Step 3: Blend Cream Mixtures
Carefully fold the coffee mixture into the whipped cream. Use gentle circular motions to incorporate everything without deflating the cream’s beautiful airiness. Stir until the mixture looks completely uniform and creamy.
Step 4: Add Optional Crunch
If you’re feeling adventurous, sprinkle in chocolate chips for an extra layer of deliciousness. Gently stir to distribute them evenly throughout the ice cream base.
Step 5: Prepare For Freezing
Transfer the entire mixture into a freezer-safe container. Use a spatula to smooth the top, creating an even surface for perfect freezing.
Step 6: Freeze And Set
Cover the container and place it in the freezer. Allow the ice cream to set and solidify for 4-6 hours. The waiting is the hardest part!
Step 7: Scoop And Serve
Remove the container from the freezer. Grab your favorite ice cream scoop and serve up this homemade coffee delight. Enjoy each creamy, caffeinated bite!
Ice Cream Tips That Make Homemade Coffee Dreams Come True
Homemade Coffee Ice Cream Storage Guide
Pairing Sweets for Coffee Ice Cream
Enhance Coffee Ice Cream with Perfect Pairings:Coffee Ice Cream Style Options
FAQs
Yes, dissolve 2-3 tablespoons of instant coffee granules in a small amount of hot water before mixing with the condensed milk for concentrated coffee flavor.
Since the recipe contains caffeine, it’s best for adults or older children. You can make a decaf version by using decaffeinated coffee or coffee extract.
No, this is a no-churn ice cream method that doesn’t require an ice cream maker. The whipped cream and condensed milk create a creamy texture without churning.
The coffee flavor is moderate and can be adjusted by increasing or decreasing the amount of coffee used. For a stronger taste, add an extra tablespoon of coffee or use espresso.
Print
Homemade Coffee Ice Cream Recipe
- Total Time: 4 hours 20 minutes
- Yield: 4 1x
Description
Indulgent coffee lovers will swoon over this homemade coffee ice cream recipe, where rich espresso meets creamy perfection. Cold, smooth scoops promise a delightful journey through robust coffee flavors that you’ll savor with each delectable bite.
Ingredients
Main Coffee Ingredients:
- 2 cups (480 ml) heavy cream
- 2 tablespoons (30 ml) instant coffee
- 1/4 cup (60 ml) strong brewed coffee
Sweetening Ingredients:
- 1 cup (240 ml) sweetened condensed milk
- 1 teaspoon (5 ml) vanilla extract
Optional Flavor Enhancers:
- 1/2 teaspoon (2.5 ml) cinnamon
- 1/2 cup (85 g) chocolate chips
Instructions
- Whip heavy cream in a spacious mixing vessel until it develops robust, standing peaks that hold their shape when the whisk is lifted.
- In a separate bowl, thoroughly integrate sweetened condensed milk with rich espresso, aromatic vanilla extract, and warm ground cinnamon, creating a harmonious coffee-infused base.
- Delicately incorporate the coffee mixture into the fluffy whipped cream, using a gentle folding technique to maintain the cream’s airy texture and prevent deflation.
- If desired, sprinkle in decadent chocolate chips, distributing them evenly throughout the creamy mixture for added indulgence.
- Transfer the velvety concoction into a freezer-safe container, using a spatula to smooth the surface and eliminate any air pockets.
- Seal the container with a tight-fitting lid to prevent ice crystal formation and preserve the smooth consistency.
- Place in the freezer and allow the mixture to solidify, periodically checking after 4 hours until it reaches a perfect, scoopable consistency.
- When ready to serve, let the ice cream rest at room temperature for a few minutes to soften slightly, ensuring easy scooping and optimal flavor release.
Notes
- Use freshly brewed espresso or strong coffee for the most robust and authentic coffee flavor that will elevate the entire dessert.
- Ensure heavy cream is cold before whipping to achieve maximum volume and stiff, stable peaks that create a luxurious texture.
- Experiment with different coffee varieties like Colombian or Ethiopian beans to introduce unique flavor profiles and subtle taste variations.
- For a dairy-free alternative, replace heavy cream with coconut cream and use dairy-free sweetened condensed milk to accommodate dietary restrictions.
- Prep Time: 20 minutes
- Cook Time: 4 hours
- Category: Desserts, Snacks
- Method: Freezing
- Cuisine: American
Nutrition
- Serving Size: 4
- Calories: 410
- Sugar: 28 g
- Sodium: 60 mg
- Fat: 30 g
- Saturated Fat: 18 g
- Unsaturated Fat: 10 g
- Trans Fat: 0 g
- Carbohydrates: 34 g
- Fiber: 1 g
- Protein: 4 g
- Cholesterol: 100 mg
Marcus Hale
Founder & Recipe Storyteller
Expertise
Education
Holyoke Community College – HCC-MGM Culinary Arts Institute
Marcus grew up surrounded by maple trees, farm stands, and the smell of Sunday stew simmering on the stove. After earning his Culinary Arts Certificate from the HCC-MGM Culinary Arts Institute, he knew he didn’t want to work in fancy kitchens, he wanted to cook for real people.
At Whip Up Cook Up, Marcus is the guy turning memories into meals. His recipes are fast, full of flavor, and built for home cooks who want big taste without the drama.