Effortless Homemade French Bread Recipe: Bakery-Fresh Joy
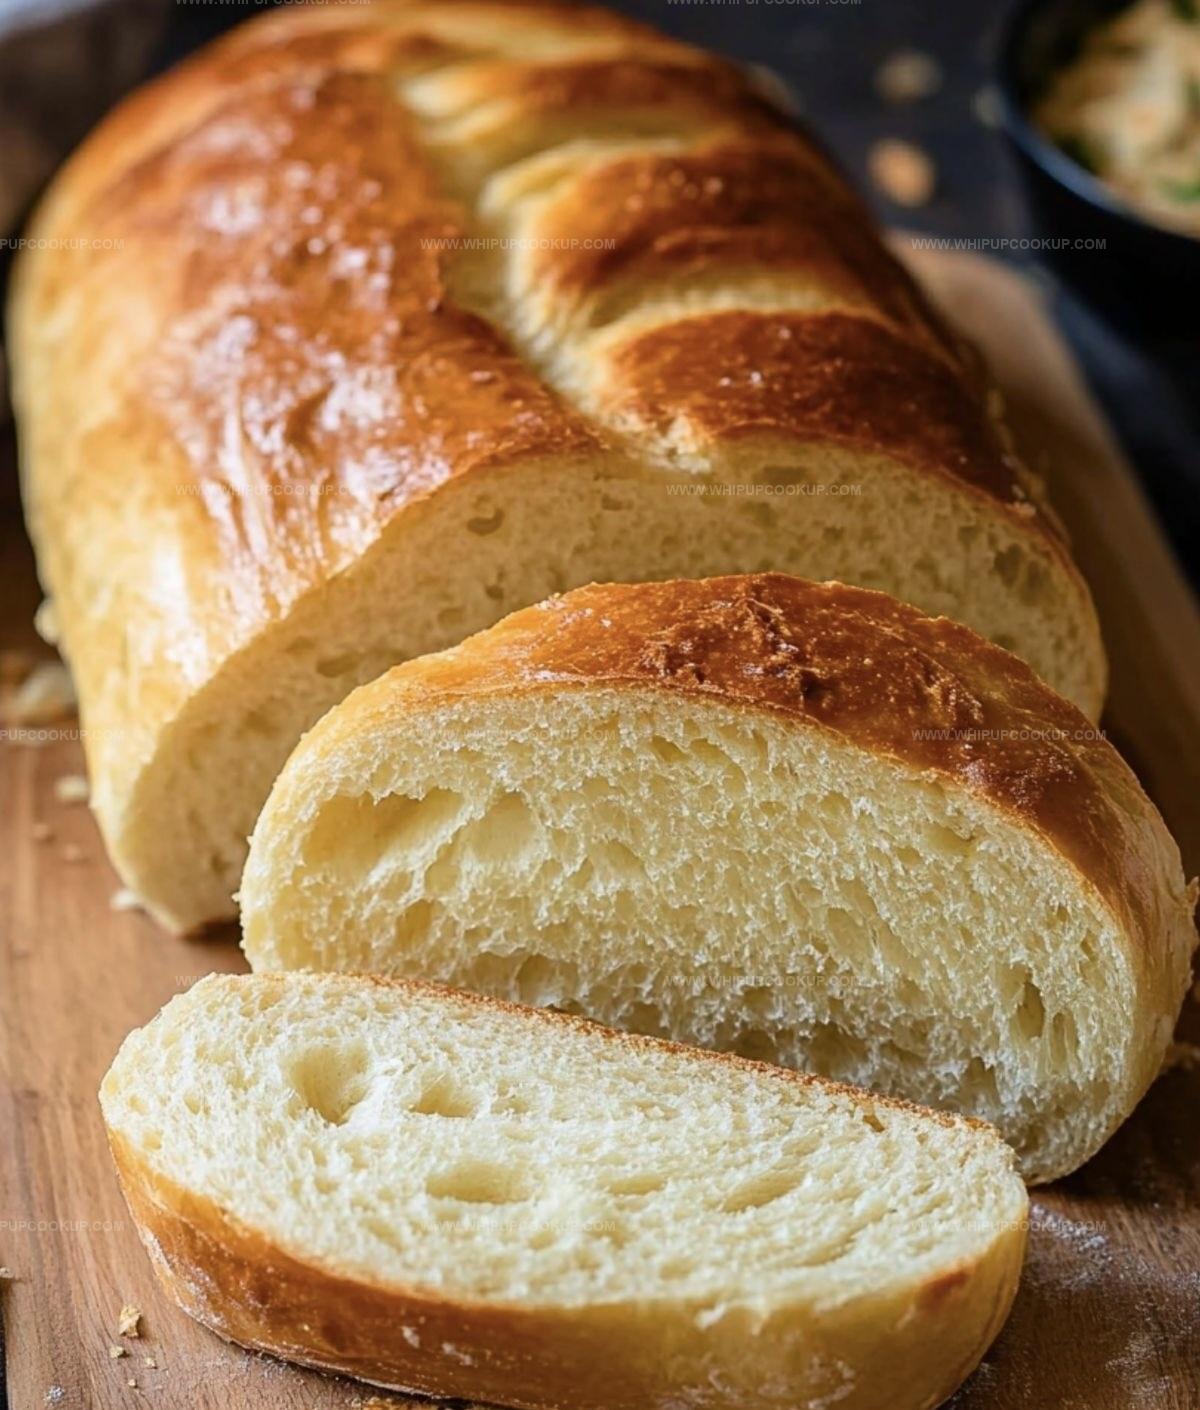
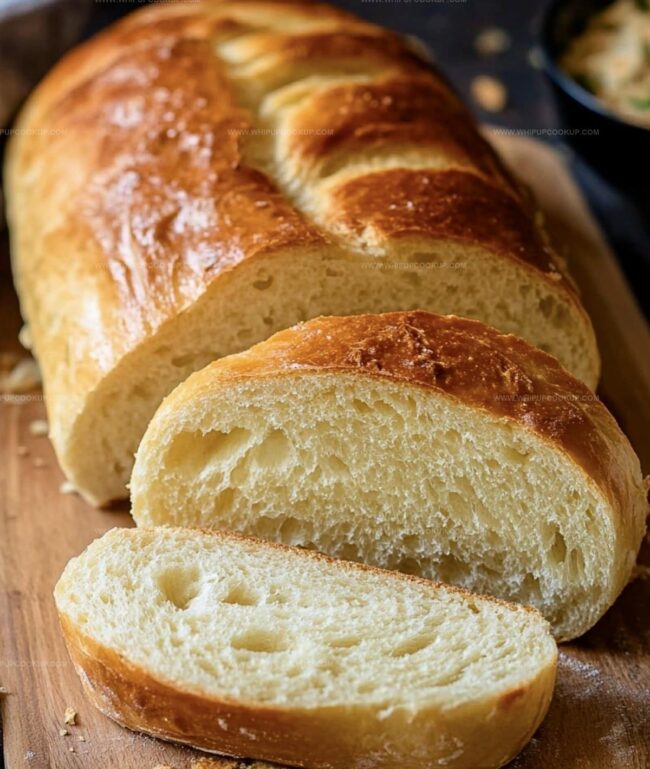
Fresh from the oven, this homemade French bread brings warmth and comfort to any kitchen.
Crusty exterior and soft interior make it irresistible for bread enthusiasts.
Golden-brown edges promise a delightful crunch with every slice.
Crafting your own loaf feels like a culinary adventure that connects you to generations of bakers.
Simple ingredients transform into something magical through patient kneading and careful baking.
Rich aromas will drift through your home, inviting everyone to gather around.
You can create this classic bread with confidence and joy.
Best Pairings for Homemade French Bread
Delicious Variations of Homemade French Bread
FAQs
French bread uses simple ingredients like flour, water, yeast, and salt, creating a crispy exterior and soft interior with minimal kneading and no added fats.
Yes, you can knead the dough by hand on a floured surface. Hand-kneading takes about 8-10 minutes and helps develop gluten for a perfect texture.
When you mix yeast with warm water and sugar, it should become frothy and bubbly within 5-10 minutes. If no bubbles form, your yeast might be old or inactive.
Steam helps create a crispy, golden crust by keeping the bread’s surface moist during the initial baking phase, which allows the bread to expand and develop a beautiful color and texture.
Why Homemade French Bread Is a Classic Delight
Ingredients for Homemade French Bread
Bread Base:Yeast Activation:Optional Moisture and Flavor Enhancement:Step-by-Step Instructions for Homemade French Bread
Step 1: Awaken the Yeast
Grab a cozy bowl and pour in warm water.
Sprinkle sugar and yeast into the liquid.
Watch the magic happen as the mixture becomes foamy and alive with bubbling potential.
This process tells you the yeast is ready to work its magic.
Step 2: Create the Dough Foundation
Grab a spacious mixing bowl and combine flour and salt.
Pour the frothy yeast mixture into the dry ingredients.
Mix everything until a shaggy dough emerges.
Don’t worry about perfection – just blend until ingredients come together.
Step 3: Develop Dough Texture
Transfer the dough onto a lightly floured surface.
Begin kneading with confident hands, pushing and folding rhythmically.
If using a stand mixer, let the machine work its wonder.
Continue until the dough transforms into a smooth, elastic wonder that springs back when touched.
Step 4: First Rising Adventure
Place the dough in a generously greased bowl.
Cover with a clean kitchen towel and find a warm, draft-free spot.
Let the dough rest and expand, nearly doubling in volume.
This resting period allows flavors to develop and yeast to work its transformative magic.
Step 5: Shape Beautiful Loaves
Gently deflate the risen dough with a soft punch.
Divide into two equal portions.
Roll and shape each piece into elegant oval or classic baguette forms.
Position the loaves on a baking sheet, giving them room to grow.
Step 6: Second Rising Moment
Drape a light cloth over the shaped loaves.
Allow them to rise again, becoming puffy and voluminous.
This second rise ensures a light, airy texture in your final bread.
Step 7: Prepare for Baking
Crank the oven to 425°F.
Grab a sharp knife and create elegant diagonal slashes across each loaf’s surface.
These cuts aren’t just decorative – they help steam escape and create beautiful bread patterns.
Step 8: Create Steam-Baked Perfection
Place a pan filled with hot water on the oven’s bottom rack.
This clever technique generates steam, producing a crispy, golden crust.
Slide your prepared loaves into the oven and bake until they turn a gorgeous golden brown.
Step 9: Cool and Savor
Remove the bread and let it rest on a cooling rack.
Resist immediate cutting – waiting allows the internal structure to set.
Slice when slightly warm and enjoy the fruits of your baking adventure.
Tips for Crusty, Fluffy Homemade French Bread
Storing and Reheating Homemade French Bread the Right Way
Print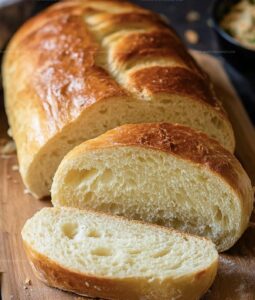
Homemade French Bread Recipe
- Total Time: 45 minutes
- Yield: 2 1x
Description
Savor the rustic charm of homemade French bread, a culinary masterpiece that whispers tales of Paris bakeries. Golden-crusted and pillowy inside, this simple yet elegant loaf invites you to experience authentic French baking magic.
Ingredients
Main Ingredients:
- 4 cups (500 grams) bread flour
- 1 1/2 cups (360 milliliters) warm water (100-110°F / 37-43°C)
- 2 1/4 teaspoons (1 packet) active dry yeast
Flavor Enhancers:
- 2 teaspoons sugar
- 2 teaspoons salt
- 1 tablespoon olive oil
Finishing Ingredients:
- 1 egg white
- 1 tablespoon water (for egg wash)
- 1 cup hot water (for steam)
Instructions
- Awaken the yeast by blending tepid water, sugar, and yeast in a mixing vessel. Allow the mixture to transform into a bubbly foam over 5–10 minutes.
- Create a flour base by incorporating salt into a large mixing container. Integrate the activated yeast solution and combine until a cohesive dough emerges.
- Transform the dough through vigorous kneading on a flour-dusted surface for 8–10 minutes, or utilize a stand mixer for 5–7 minutes until achieving a silky, resilient texture.
- Nurture the dough’s initial fermentation by transferring it into a lightly greased receptacle. Drape with a protective cover and position in a warm environment for 60–90 minutes, allowing it to expand and double in volume.
- Deflate the risen dough with a gentle punch, partition into two equal segments, and sculpt into elongated baguette-like formations. Position the shaped loaves carefully on a baking tray.
- Permit a secondary rising phase by covering the loaves, allowing them to expand for 30–45 minutes in a draft-free zone.
- Prepare the oven at 425°F (220°C) and artfully score each loaf with diagonal slashes using a razor-sharp knife.
- Generate moisture by placing a water-filled pan in the oven. Bake the loaves for 20–25 minutes until they develop a rich, golden exterior.
- Allow the bread to rest and stabilize for a minimum of 15 minutes before slicing, then savor the fresh, aromatic creation.
Notes
- Use room temperature ingredients to ensure optimal yeast activation and consistent dough texture.
- Avoid adding too much flour during kneading, which can make the bread dense and tough.
- Create a warm, draft-free environment for rising by placing the dough near a preheated oven or in a slightly warmed area.
- For a crispier crust, spritz water on the bread during baking or use a spray bottle to create additional steam.
- Prep Time: 20 minutes
- Cook Time: 25 minutes
- Category: Breakfast, Lunch, Dinner, Snacks
- Method: Baking
- Cuisine: French
Nutrition
- Serving Size: 2
- Calories: 240
- Sugar: 1g
- Sodium: 470mg
- Fat: 2.5g
- Saturated Fat: 0.4g
- Unsaturated Fat: 2.1g
- Trans Fat: 0g
- Carbohydrates: 49g
- Fiber: 2g
- Protein: 8g
- Cholesterol: 0mg
Olivia Bennett
Recipe Developer & Culinary Educator
Expertise
Education
Schoolcraft College
With an Associate Degree in Culinary Arts from Schoolcraft College and a natural knack for teaching, Olivia Bennett’s all about making home cooking feel possible, even on your busiest day.
Her thing? Recipes that are budget-friendly, season-forward, and full of Southern warmth. Whether it’s a roasted veggie bowl or a five-ingredient skillet bake, Olivia makes sure it’s simple, satisfying, and something you’ll want to make again tomorrow.
When she’s not shooting step-by-step videos or testing spice blends, she’s out foraging, flipping through old cookbooks, or throwing laid-back dinner parties with a BYO-mason-jar theme.