Magical Homemade Gumdrops Recipe: Sweet Joy in Every Bite
Sweet and chewy gumdrops can bring instant joy to any dessert table.
Crafting these colorful treats transforms simple ingredients into delightful gems.
Kids absolutely adore helping in the kitchen during this fun project.
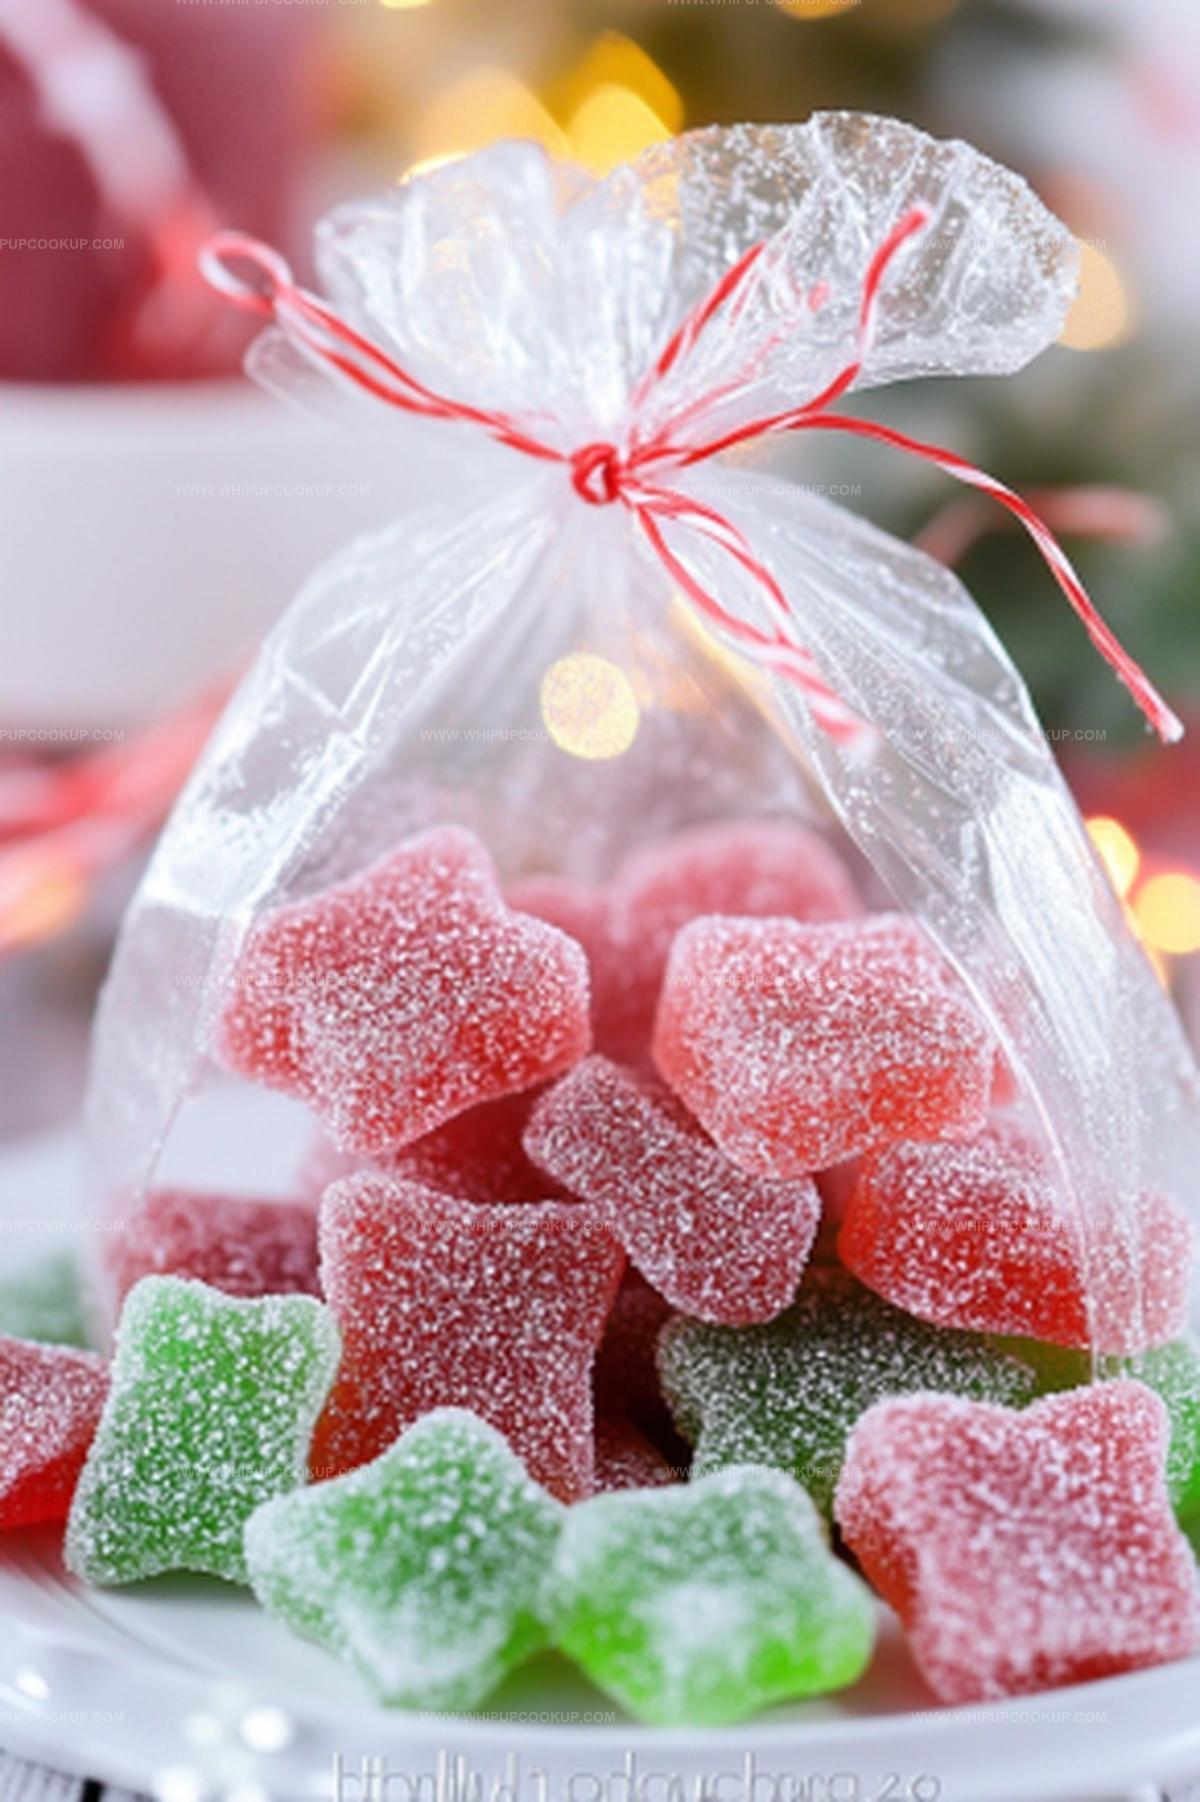
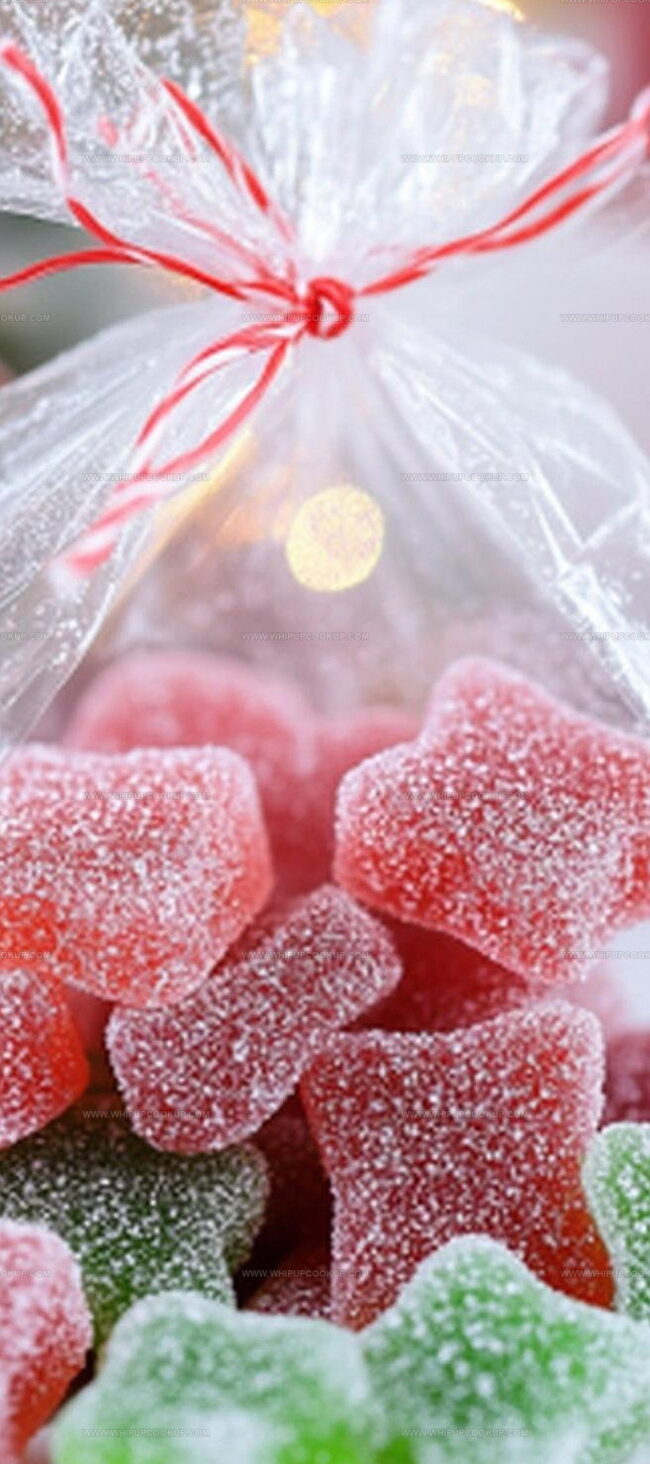
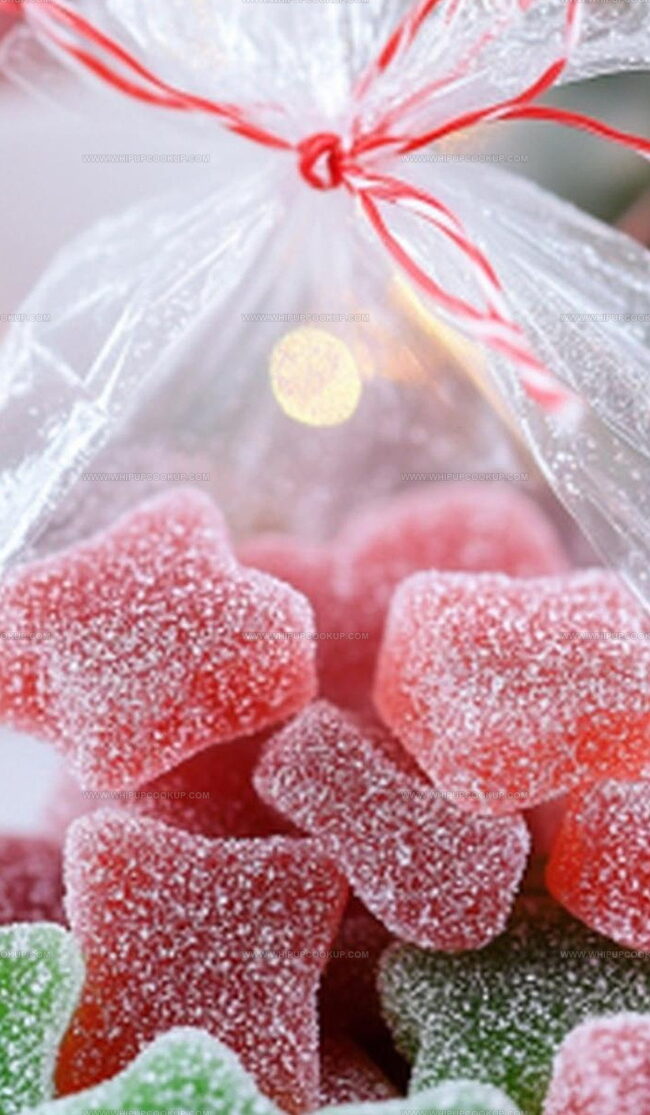
Soft, sugary squares sparkle with fruity flavors that dance across your palate.
Vibrant colors make these homemade candies look like precious jewels.
Gathering just a few pantry staples lets you create something magical.
Come explore this delightful recipe that will spark pure happiness in every bite.
Sweet Reasons to Make Homemade Gumdrops
Peanut Butter Balls (Old-Fashioned) Ingredients
Main Ingredients:Coating Ingredients:Optional Additions:Guide to Making Homemade Gumdrops
Step 1: Prepare Baking Surface
Grab a 9×13 inch baking dish and coat it thoroughly with cooking spray to ensure easy removal of the gumdrops later.
Step 2: Mix Gumdrop Base
In a large saucepan, combine the following ingredients:Stir everything together and let the mixture sit for a minute to allow ingredients to meld.
Step 3: Bring to Boiling Point
Heat the mixture over medium temperature, stirring continuously. Once it reaches a full boil, continue cooking for exactly one minute to activate the gelatin and create the perfect gumdrop texture.
Step 4: Set and Chill
Pour the hot mixture into the prepared baking dish. Transfer to the refrigerator and let it set completely. This will take approximately 3 hours, though overnight chilling works best for optimal firmness.
Step 5: Prepare Cutting Surface
Cover a cutting board with parchment paper. Sprinkle a generous layer of sugar across the surface to prevent sticking.
Step 6: Release and Cut Gumdrops
Gently loosen the edges of the set gelatin using a spatula. Carefully invert the entire mixture onto the sugar-coated parchment paper. Use festive cookie cutters to create fun shapes like stars, hearts, or holiday-themed designs.
Step 7: Dry and Develop Texture
Allow the cut gumdrops to air dry for about 8 hours. They should develop a slightly tacky surface during this time.
Step 8: Final Sugar Coating
Roll each gumdrop in additional sugar to create a sparkling, sweet exterior. Store the completed treats in an airtight container to maintain their delightful texture.
Candy Tips That Get Homemade Gumdrops Just Right
Store Homemade Gumdrops Without Sticking
Brie Rolls with Cranberries Pairings
Pair Festive Gumdrops with Complementary Flavors
Peanut Butter Ball Classic Variants
FAQs
Yes, homemade gumdrops are kid-friendly and fun to make together. They can help cut shapes and roll in sugar, making it a great family activity.
Absolutely! You can experiment with various Jell-O flavors like strawberry, orange, grape, or lime to create different colored and flavored gumdrops.
You just need basic kitchen tools like a saucepan, 9×13 baking dish, parchment paper, and cookie cutters. No specialized candy-making equipment is required.
When stored in an airtight container at room temperature, homemade gumdrops typically stay fresh for about 1-2 weeks.
Print
Homemade Gumdrops Recipe
- Total Time: 45 minutes
- Yield: 12 1x
Description
Sweet, chewy Homemade Gumdrops bring nostalgic candy shop magic right into home kitchens with simple ingredients and easy preparation. Fruity, sugar-coated gems will delight friends and family, offering a playful twist on classic confectionery you can’t resist.
Ingredients
Main Ingredients:
- 2.5 cups granulated sugar
- 1.5 cups applesauce (no sugar added)
Gelling Agents:
- 6 ounces (170 grams) Jell-O (any flavor, such as cherry, lime, or orange)
- 12 ounces (340 grams) unflavored gelatin (2 envelopes)
Flavor Enhancer:
- 1 teaspoon lemon juice
Instructions
- Prepare a 9×13 baking dish by thoroughly coating it with cooking spray, creating a non-stick surface for the gumdrop mixture.
- In a large saucepan, blend sugar, applesauce, Jell-O, unflavored gelatin, and lemon juice, allowing the ingredients to meld together for one minute.
- Heat the mixture over medium temperature, continuously stirring to prevent scorching, and bring to a rolling boil for exactly one minute.
- Transfer the liquid mixture into the prepared baking dish, spreading evenly, and refrigerate until completely set and firm, which may take 3-4 hours or ideally overnight.
- Create a work surface by laying parchment paper on a cutting board and generously dusting with sugar to prevent sticking.
- Carefully loosen the gelatin edges using a flexible spatula and gently invert the entire sheet onto the sugared parchment paper.
- Use decorative cookie cutters to slice the gumdrop mixture into whimsical shapes, ensuring clean cuts.
- Allow the freshly cut gumdrops to air-dry for approximately 8 hours, creating a slightly tacky exterior.
- Roll each gumdrop in additional sugar, ensuring complete coverage and a sparkling finish.
- Store the completed treats in an airtight container to maintain their texture and prevent moisture absorption.
Notes
- Select high-quality Jell-O flavors to create vibrant, delicious gumdrops that pop with color and taste.
- Use fresh lemon juice for a bright, zesty undertone that enhances the overall flavor profile of your homemade treats.
- Ensure precise timing when boiling the mixture to achieve the perfect texture – one minute is crucial for setting the gumdrops correctly.
- Let gumdrops dry completely to develop a slightly tacky exterior that holds the sugar coating beautifully, creating a professional-looking candy.
- Prep Time: 40 minutes
- Cook Time: 5 minutes
- Category: Desserts, Snacks
- Method: Boiling
- Cuisine: American
Nutrition
- Serving Size: 12
- Calories: 99
- Sugar: 17 g
- Sodium: 0 mg
- Fat: 0 g
- Saturated Fat: 0 g
- Unsaturated Fat: 0 g
- Trans Fat: 0 g
- Carbohydrates: 24 g
- Fiber: 0 g
- Protein: 1 g
- Cholesterol: 0 mg
Marcus Hale
Founder & Recipe Storyteller
Expertise
Education
Holyoke Community College – HCC-MGM Culinary Arts Institute
Marcus grew up surrounded by maple trees, farm stands, and the smell of Sunday stew simmering on the stove. After earning his Culinary Arts Certificate from the HCC-MGM Culinary Arts Institute, he knew he didn’t want to work in fancy kitchens, he wanted to cook for real people.
At Whip Up Cook Up, Marcus is the guy turning memories into meals. His recipes are fast, full of flavor, and built for home cooks who want big taste without the drama.