Sparkly Sweet Crystal Treats: Homemade Rock Candy Recipe
Sweet crystals of homemade rock candy sparkle with childhood memories and pure sugary delight.
Sugar enthusiasts adore this classic treat that brings magic to the kitchen.
Crafting these crystalline wonders requires patience and simple ingredients.
You can create delightful candy sticks that glimmer like edible jewels.
Gentle stirring and careful sugar suspension transform ordinary kitchen moments into extraordinary experiences.
The process connects you with a timeless culinary tradition that delights both young and old.
Prepare to embark on a sweet adventure that promises sugary success and smiles.
Why Homemade Rock Candy Is a Classic
Ingredients for Homemade Rock Candy
Main Ingredients:
Sugar Solution:Stick Preparation:Optional Flavor and Color Enhancers:Supporting Ingredients:
Preparation Tools:Containment and Drying:How to Make Homemade Rock Candy Easily

Step 1: Prepare Sugar-Coated Sticks
Dip wooden skewers or lollipop sticks into water, then roll them generously in granulated sugar.
These sugar-crusted sticks will serve as the foundation for your crystal growth.
Let the sticks dry completely overnight to ensure a perfect starting point for your candy adventure.
Step 2: Create Sugar Syrup Magic
Grab a large pot and bring water to a gentle simmer over medium heat.
Gradually introduce sugar into the water, stirring continuously until it dissolves completely.
Allow the mixture to reach a soft boil.
This is the perfect moment to add food coloring or flavoring if desired.
Remember to maintain a slow, steady pace for the best crystal formation.
Step 3: Cool Down the Sweet Mixture
Remove the pot from heat and let the sugar solution rest for approximately 20 minutes.
Patience is crucial during this stage to prevent potential glass cracking and to prepare for the crystallization process.
Step 4: Warm Up Your Containers
Prepare clean mason jars by rinsing them with hot water.
This gentle warming prevents thermal shock when you pour the hot sugar solution.
If using metal containers, you can skip this step.
Step 5: Transfer Liquid Crystal Base
Carefully pour the cooled sugar solution into your prepared containers.
If you’re planning to create multiple flavors or colors, now is the perfect time to add them gently to the mixture.
Step 6: Suspend Candy Sticks
Attach a clothespin to each sugar-coated stick.
Carefully lower the sticks into the sugar solution, ensuring they hang in the center of the jar without touching the sides or bottom.
This positioning is critical for optimal crystal growth.
Step 7: Cultivate Crystal Growth
Find a quiet, undisturbed spot to place your jars.
Over the next 3-5 days, watch in wonder as delicate sugar crystals begin to form.
Use a fork occasionally to break up any thin sugar layers that might develop on the surface.
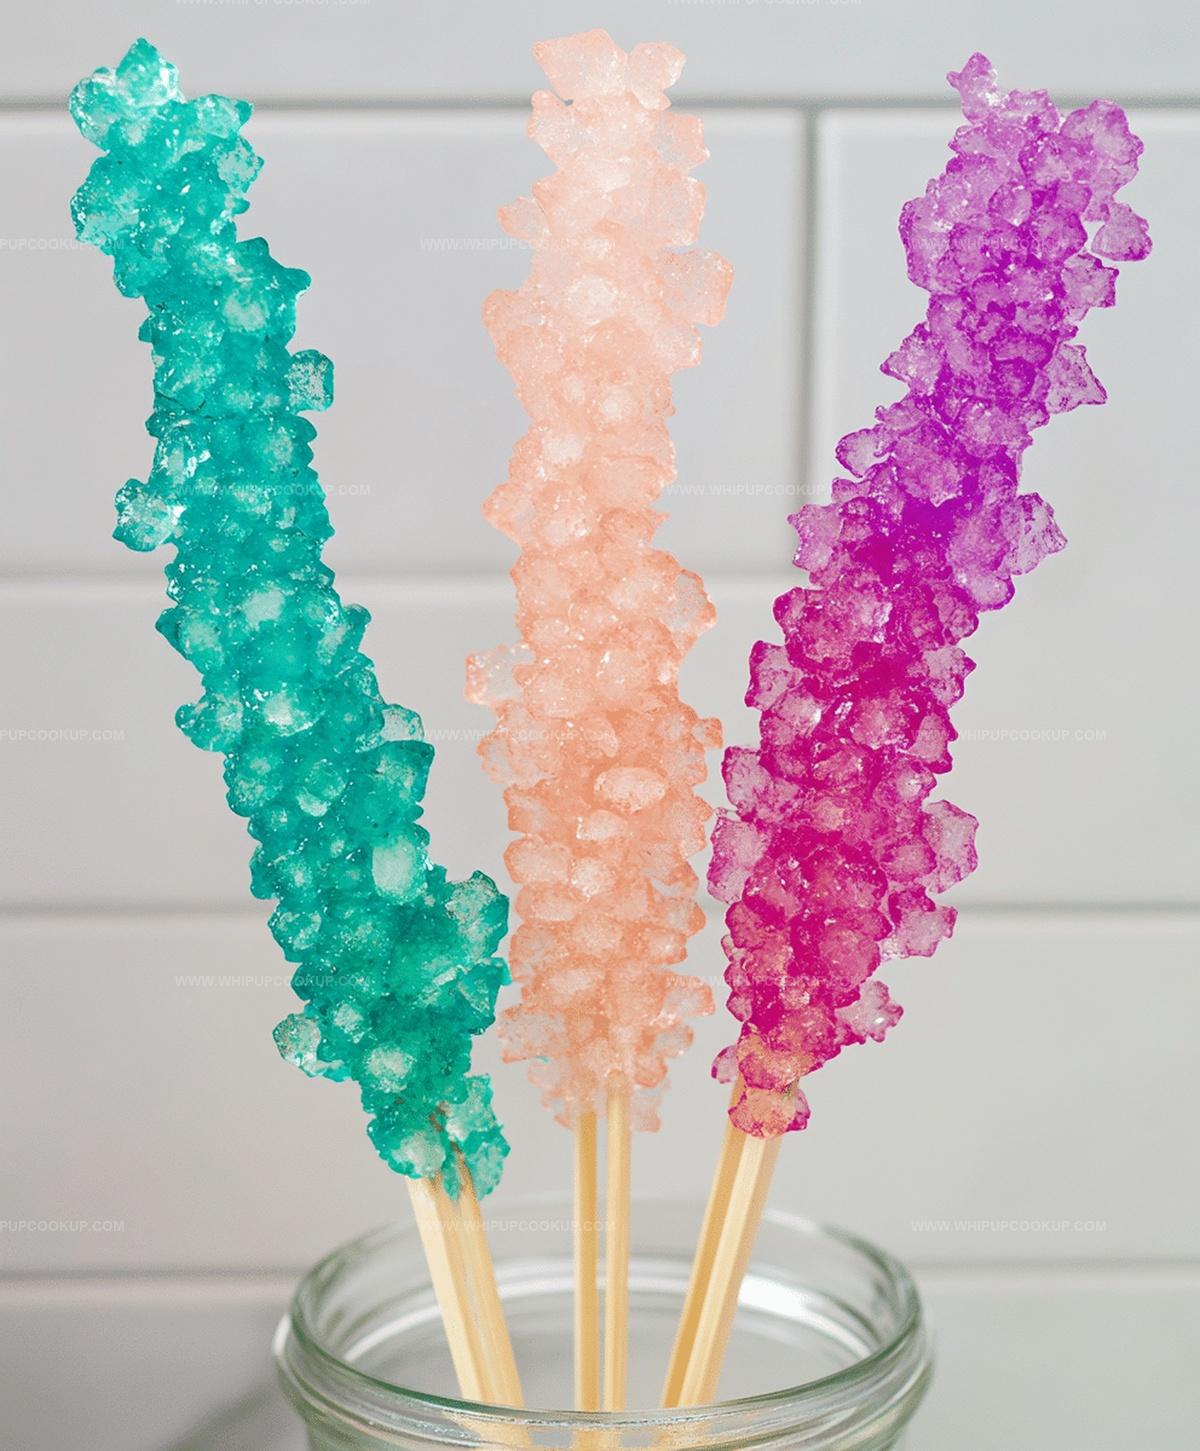
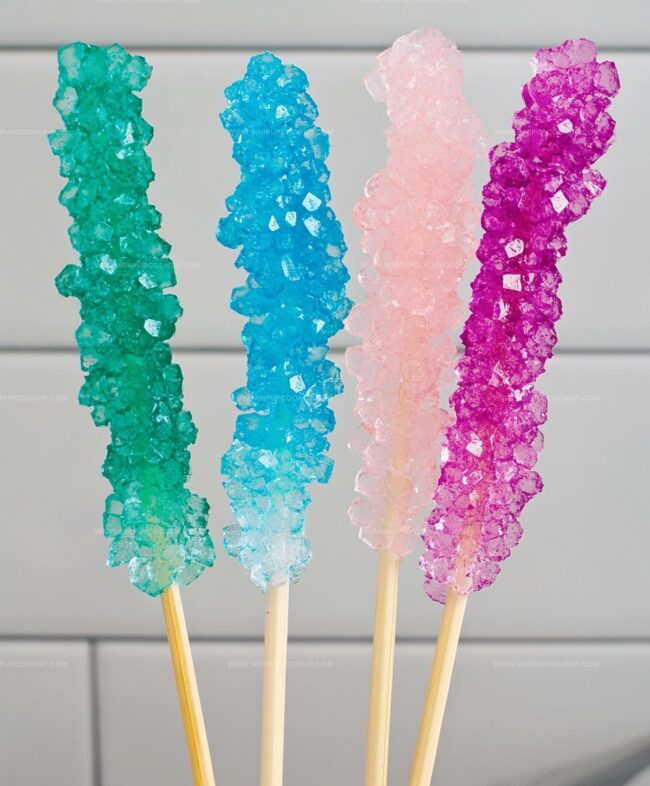
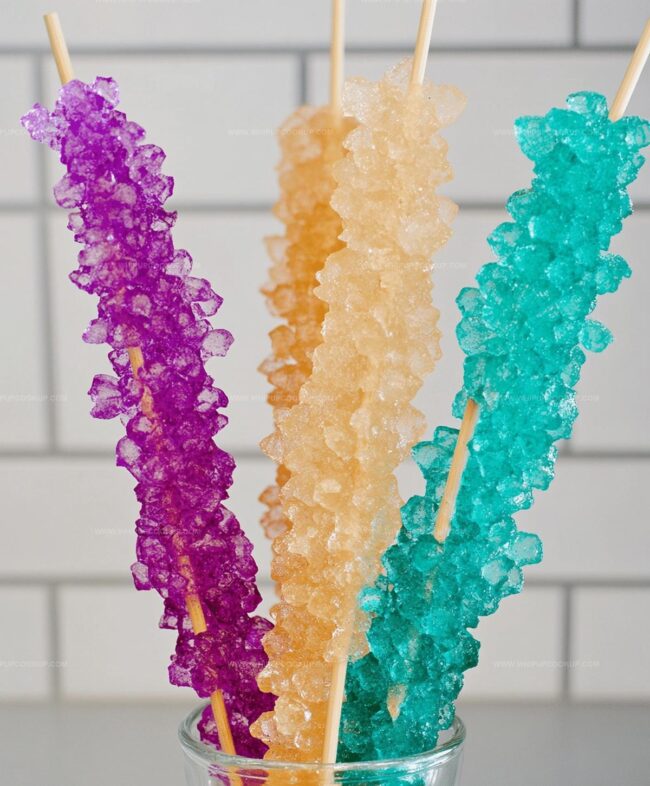
Step 8: Harvest and Celebrate
Once your crystals have reached the desired size, gently remove the sticks from the jars.
Allow them to air dry for about 4 hours.
Your homemade rock candy is now ready to be admired and enjoyed!
Pro Tips for Rock Candy Making
How to Store and Reheat Rock Candy
What Pairs Well with Rock Candy
Creative Variations of Rock Candy
FAQs
Coating the sticks with sugar creates tiny seed crystals that help larger sugar crystals grow more easily and consistently on your rock candy.
Granulated white sugar works best. Other sugars like brown sugar or raw sugar might not create the same crystal formation and could affect the final texture.
The solution is ready when all sugar is completely dissolved and the mixture looks clear, with no sugar granules visible at the bottom of the pot. Stirring constantly and adding sugar gradually helps achieve this.
Common issues include moving the jars, sudden temperature changes, or not letting the solution cool enough before adding sticks. Patience and minimal disturbance are key to successful crystal growth.
Print
Homemade Rock Candy Recipe
- Total Time: 3 days 10 minutes
- Yield: 6 1x
Description
Sweet crystals of homemade rock candy sparkle with sugary magic, promising a delightful journey through childhood memories. Crystal-clear strands of pure sugar delight invite you to savor a simple yet enchanting treat that connects generations through its pure, nostalgic charm.
Ingredients
Main Ingredients:
- 3 cups (600 g) white granulated sugar
- 1 cup (240 ml) water
Flavoring:
- 1–2 teaspoons flavoring
Equipment:
- Wooden skewer or cotton string
- Clothespin or pencil
- Clean glass jar
- Sauce pan
Instructions
- Prepare sugar-coated sticks by moistening wooden skewers or lollipop sticks with water, then carefully rolling them in granulated sugar. Allow these “seed crystal” sticks to dry completely overnight, ensuring optimal crystal formation.
- Create sugar syrup by heating water in a large pot over medium temperature. Gradually incorporate sugar, stirring consistently until fully dissolved. Maintain a gentle boil, carefully monitoring the mixture’s consistency and avoiding rapid heating.
- Remove sugar solution from heat and allow it to cool for approximately 20 minutes. Cooling prevents potential glass container damage and promotes proper crystal development.
- Warm glass containers with hot water to prevent thermal shock when adding hot sugar solution. This precautionary step ensures jar integrity during the crystallization process.
- Gently transfer cooled sugar solution into prepared jars. Add desired flavor extracts or food coloring at this stage, stirring delicately to distribute evenly throughout the liquid.
- Suspend prepared sugar-coated sticks in the solution using clothespins, ensuring they remain centered without touching jar sides or bottom. Proper positioning is crucial for optimal crystal growth.
- Position jars in a stable, undisturbed location for 3-5 days. Monitor crystal formation periodically, using a fork to break any thin sugar layers that develop on the surface.
- Carefully extract crystallized sticks from jars once desired crystal size is achieved. Allow candies to air dry for approximately 4 hours, creating a beautiful, sweet treat ready for enjoyment.
Notes
- Create a stable seed layer by thoroughly coating wooden skewers with sugar, ensuring better crystal formation and smoother rock candy texture.
- Use filtered or distilled water for clearer, more uniform sugar crystals and prevent impurities from disrupting crystal growth.
- Maintain consistent room temperature around 70-75°F during crystallization process to optimize sugar crystal development and prevent premature hardening.
- Prep Time: 3 days
- Cook Time: 10 minutes
- Category: Desserts, Snacks
- Method: Simmering
- Cuisine: American
Nutrition
- Serving Size: 6
- Calories: 300
- Sugar: 100 g
- Sodium: 0 mg
- Fat: 0 g
- Saturated Fat: 0 g
- Unsaturated Fat: 0 g
- Trans Fat: 0 g
- Carbohydrates: 100 g
- Fiber: 0 g
- Protein: 0 g
- Cholesterol: 0 mg
Olivia Bennett
Recipe Developer & Culinary Educator
Expertise
Education
Schoolcraft College
With an Associate Degree in Culinary Arts from Schoolcraft College and a natural knack for teaching, Olivia Bennett’s all about making home cooking feel possible, even on your busiest day.
Her thing? Recipes that are budget-friendly, season-forward, and full of Southern warmth. Whether it’s a roasted veggie bowl or a five-ingredient skillet bake, Olivia makes sure it’s simple, satisfying, and something you’ll want to make again tomorrow.
When she’s not shooting step-by-step videos or testing spice blends, she’s out foraging, flipping through old cookbooks, or throwing laid-back dinner parties with a BYO-mason-jar theme.