Irresistible Leftover Halloween Candy Cookies Recipe
Sweet memories of childhood halloween hauls spark magic in these leftover halloween candy cookies that blend nostalgia with delicious creativity.
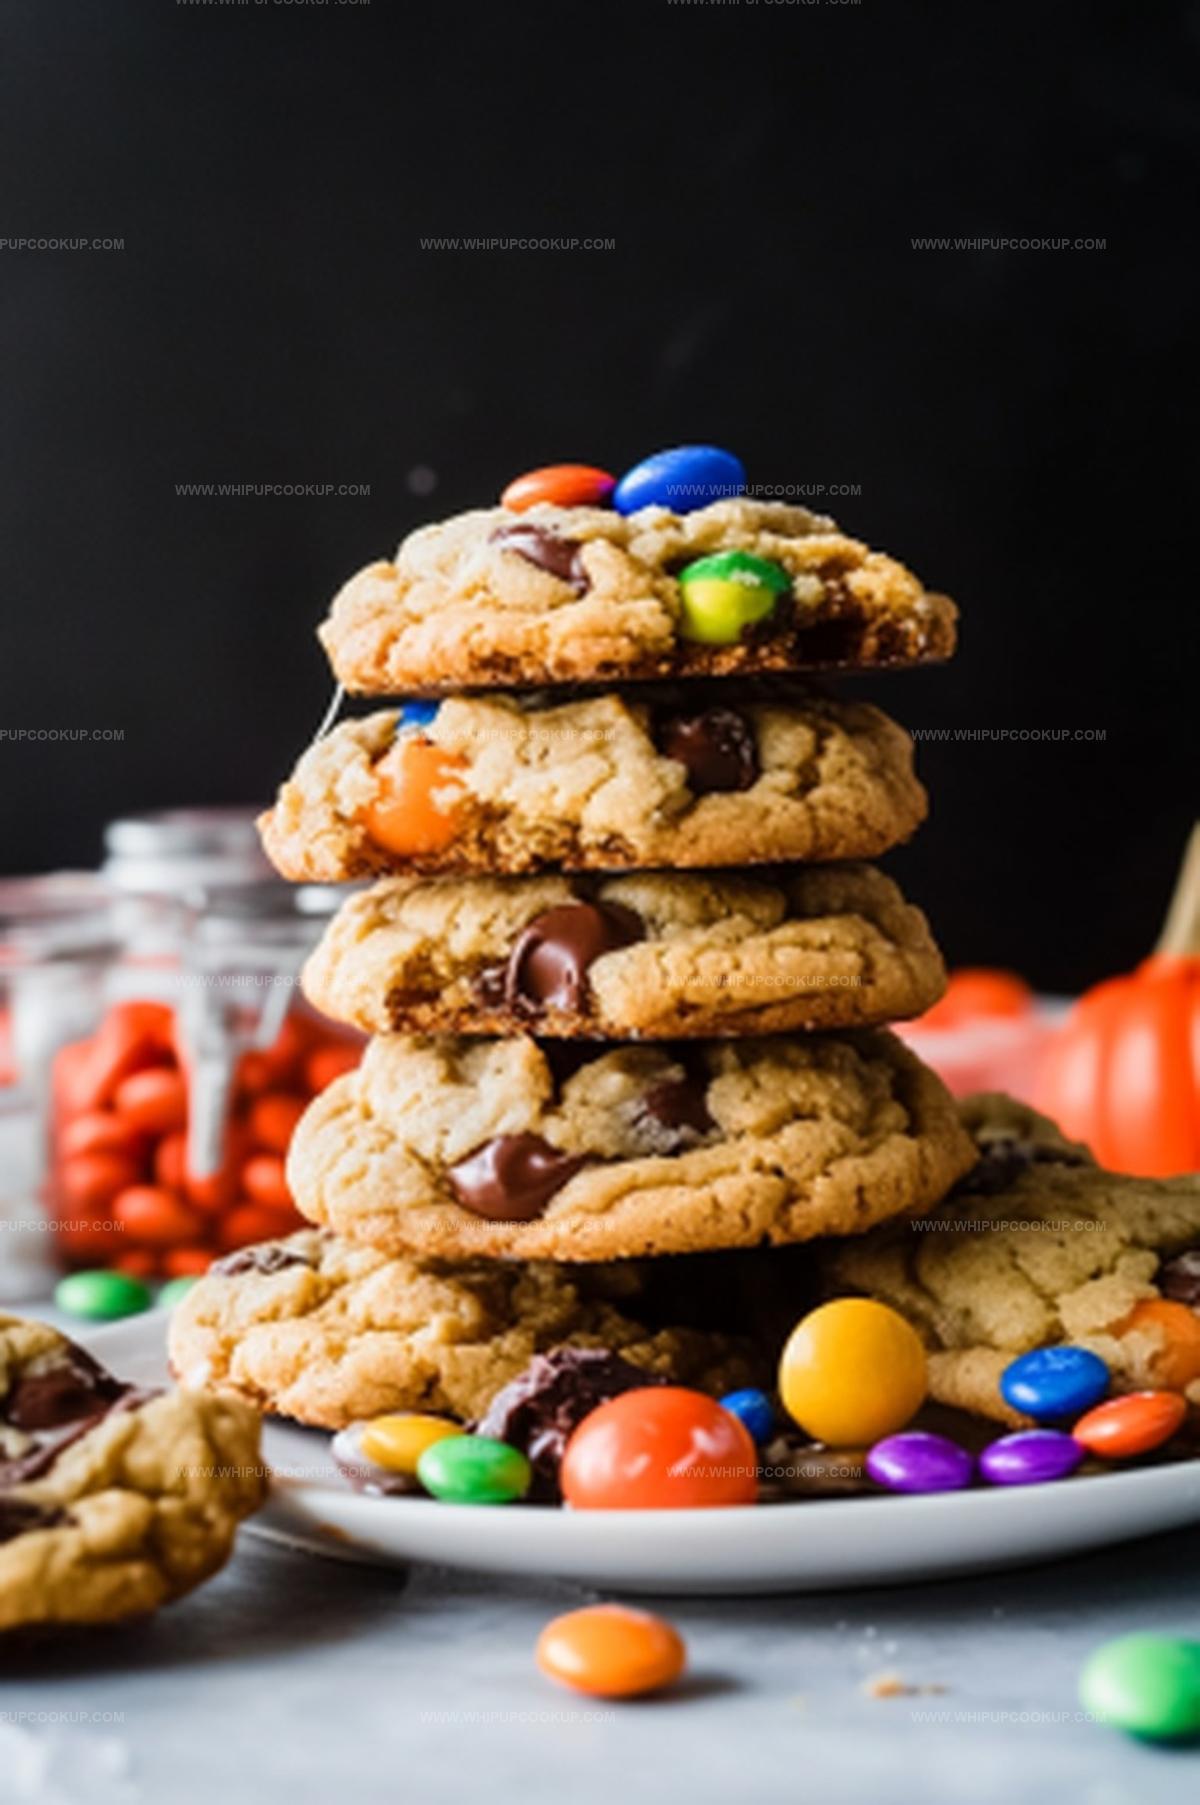
Unexpected flavor combinations emerge when chocolate bars, lollipops, and caramel treats get chopped and folded into soft, chewy dough.
Colorful candy chunks create vibrant surprises in every single bite.
Kids and adults alike will appreciate this clever way to repurpose extra sweets lingering after the holiday.
No piece of candy goes to waste when you transform random treats into a delectable dessert.
Crisp edges and gooey centers make these cookies irresistible for anyone seeking a playful twist on classic chocolate chip favorites.
Bake a batch and watch smiles light up the room.
Leftover Halloween Candy Cookies Ingredients
Base Ingredients:Dry Ingredients:Candy Mix-Ins:How to Make Leftover Halloween Candy Cookies from Your Sweet Stash
Step 1: Warm Up the Oven
Preheat your oven to 350°F. Line a baking sheet with parchment paper to prevent sticking and make cleanup super easy.
Step 2: Create a Creamy Base
In a large mixing bowl, blend together:Whip these ingredients until they become light, fluffy, and look like a cloud of sweetness.
Step 3: Add Moisture and Flavor
Pour in:Mix thoroughly until all ingredients are perfectly combined and create a smooth mixture.
Step 4: Build the Cookie Foundation
Gradually incorporate the dry ingredients:Stir until a soft, slightly sticky dough forms that holds together beautifully.
Step 5: Unleash the Halloween Candy Magic
Chop up those leftover Halloween candies and gently fold them into the cookie dough. This is where the real fun begins!
Step 6: Shape the Cookies
Use a cookie scoop to create uniform dough balls on the prepared baking sheet. Leave some space between each cookie to allow for spreading.
Step 7: Add Extra Candy Excitement
Press a few extra candy pieces on top of each cookie dough ball. This creates a tempting preview of the delicious treats inside.
Step 8: Bake to Perfection
Slide the baking sheet into the preheated oven and bake for 9-11 minutes. Look for golden brown edges that signal cookie greatness.
Step 9: Cool and Celebrate
Remove the cookies from the oven and transfer them to a wire rack. Let them cool for a few minutes before diving into your delicious candy-loaded creation.
Cookie Tips for Halloween Candy Combos
Save Leftover Halloween Candy Cookies Right
Halloween Candy Cookies Treat Picks
Halloween Candy Cookie Mix Ideas
FAQs
Yes, you can use a variety of chocolate bars, candy bars, or chopped candy. Avoid hard candies or very sticky candies that might not melt well.
No refrigeration is necessary. You can mix and bake the cookies immediately after preparing the dough.
Chopping the candy into smaller pieces helps prevent burning. Also, placing extra candy pieces on top of the dough after scooping ensures they don’t sink or burn during baking.
You can substitute the all-purpose flour with a gluten-free flour blend. Be sure to use a blend that includes xanthan gum for better texture.
Cookies That Turn Leftover Halloween Candy into Joy
Print
Leftover Halloween Candy Cookies Recipe
- Total Time: 35 minutes
- Yield: 24 1x
Description
Sweet Halloween candy finds new life in these delightful cookies, blending nostalgic treats with classic baking magic. Chocolate chunks, caramel bits, and colorful candy pieces create irresistible morsels you’ll crave long after the spooky season ends.
Ingredients
Main Ingredients:
- 2 1/2 cups all-purpose flour
- 1 1/2 cups brown sugar
- 1/2 cup cane sugar
- 2 eggs
- 1/2 cup butter, room temperature
- 1 1/2 cups leftover Halloween candy, chopped
Leavening and Binding Agents:
- 1 teaspoon baking soda
- 1 tablespoon cornstarch
- 1 teaspoon vanilla extract
Seasoning:
- Pinch of salt
Instructions
- Prepare a workspace by lining baking sheets with parchment paper and heating the oven to 350°F (175°C).
- In a spacious mixing vessel, whip butter and sugars together until achieving a pillowy, airy consistency that appears almost cloud-like.
- Incorporate eggs and aromatic vanilla extract, blending thoroughly to create a smooth, unified mixture.
- Sift together dry ingredients including flour, baking soda, cornstarch, and salt, then gradually integrate into the wet mixture until a cohesive dough develops.
- Carefully chop diverse Halloween candy into varied sized chunks, distributing them evenly throughout the cookie dough.
- Utilize a cookie scoop to portion uniform dough balls onto prepared baking sheets, ensuring adequate spacing between each cookie.
- Strategically place additional candy pieces atop each dough mound, creating an appetizing visual arrangement that hints at the delightful treats hidden within.
- Transfer cookies to the preheated oven, baking for 10-12 minutes until edges transform into a delicate golden hue and centers appear softly set.
- Allow cookies to rest momentarily on baking sheets, then delicately transfer to wire cooling racks to prevent continued baking and preserve their tender texture.
- Once cooled, serve and savor these nostalgic sweet treasures that brilliantly repurpose leftover Halloween candy.
Notes
- Quickly chop candy into smaller pieces for even distribution throughout the cookie dough, ensuring every bite has delicious candy bits.
- Refrigerate dough for 30 minutes before baking to prevent excessive spreading and create thicker, chewier cookies.
- Use a mix of chocolate and hard candies for texture variety, avoiding extremely sticky candies that might burn during baking.
- For gluten-free options, substitute all-purpose flour with a 1:1 gluten-free baking blend and verify all candy ingredients are gluten-free.
- Prep Time: 25 minutes
- Cook Time: 10 minutes
- Category: Desserts, Snacks
- Method: Baking
- Cuisine: American
Nutrition
- Serving Size: 24
- Calories: 150
- Sugar: 10 g
- Sodium: 90 mg
- Fat: 7 g
- Saturated Fat: 4 g
- Unsaturated Fat: 2.5 g
- Trans Fat: 0 g
- Carbohydrates: 22 g
- Fiber: 0.5 g
- Protein: 2 g
- Cholesterol: 30 mg
Marcus Hale
Founder & Recipe Storyteller
Expertise
Education
Holyoke Community College – HCC-MGM Culinary Arts Institute
Marcus grew up surrounded by maple trees, farm stands, and the smell of Sunday stew simmering on the stove. After earning his Culinary Arts Certificate from the HCC-MGM Culinary Arts Institute, he knew he didn’t want to work in fancy kitchens, he wanted to cook for real people.
At Whip Up Cook Up, Marcus is the guy turning memories into meals. His recipes are fast, full of flavor, and built for home cooks who want big taste without the drama.