Heavenly Maple Nut Fudge Recipe: A Sweet Winter Dream
Sweet maple syrup dances through this creamy, nutty fudge recipe that promises pure indulgence.
Soft peaks of sugary goodness melt on your tongue with each delectable bite.
Crafting homemade treats brings warmth to your kitchen and joy to everyone gathering around.
Pecans add a delightful crunch that perfectly complements the silky smooth maple base.
Rich flavors combine in a simple yet elegant dessert that feels like a special occasion.
Comfort and nostalgia blend seamlessly in this irresistible confection.
You’ll find yourself falling in love with every single square of this decadent maple magic.
Maple Nut Fudge That’s Sweet and Simple
Fireball Whiskey Caramels Ingredients
Base Ingredients:Nuts:Baking Preparation:Steps for Maple Nut Fudge
Step 1: Prepare Baking Vessel
Line a square baking pan with parchment paper, creating generous overhangs to help lift the fudge later. The paper should extend beyond the edges, allowing for easy removal and clean cutting.
Step 2: Create Smooth Fudge Base
Gather your ingredients:Combine all ingredients in a medium saucepan. Heat gently over medium flame, whisking continuously until the mixture transforms into a silky, glossy blend. The process takes about 8-10 minutes, and you’ll notice the texture becoming thick and luxurious.
Step 3: Introduce Nutty Crunch
Remove the saucepan from heat and fold in freshly chopped walnuts. Stir thoroughly to ensure the nuts are evenly distributed throughout the creamy mixture.
Step 4: Shape and Set Fudge
Pour the warm fudge into the prepared pan. Use a spatula to spread the mixture evenly, creating a smooth surface. Gently tap the pan on the counter to eliminate any trapped air bubbles.
Step 5: Chill and Solidify
Refrigerate the fudge for a minimum of 4 hours. The cooling process allows the fudge to firm up and develop its characteristic dense texture.
Step 6: Slice and Serve
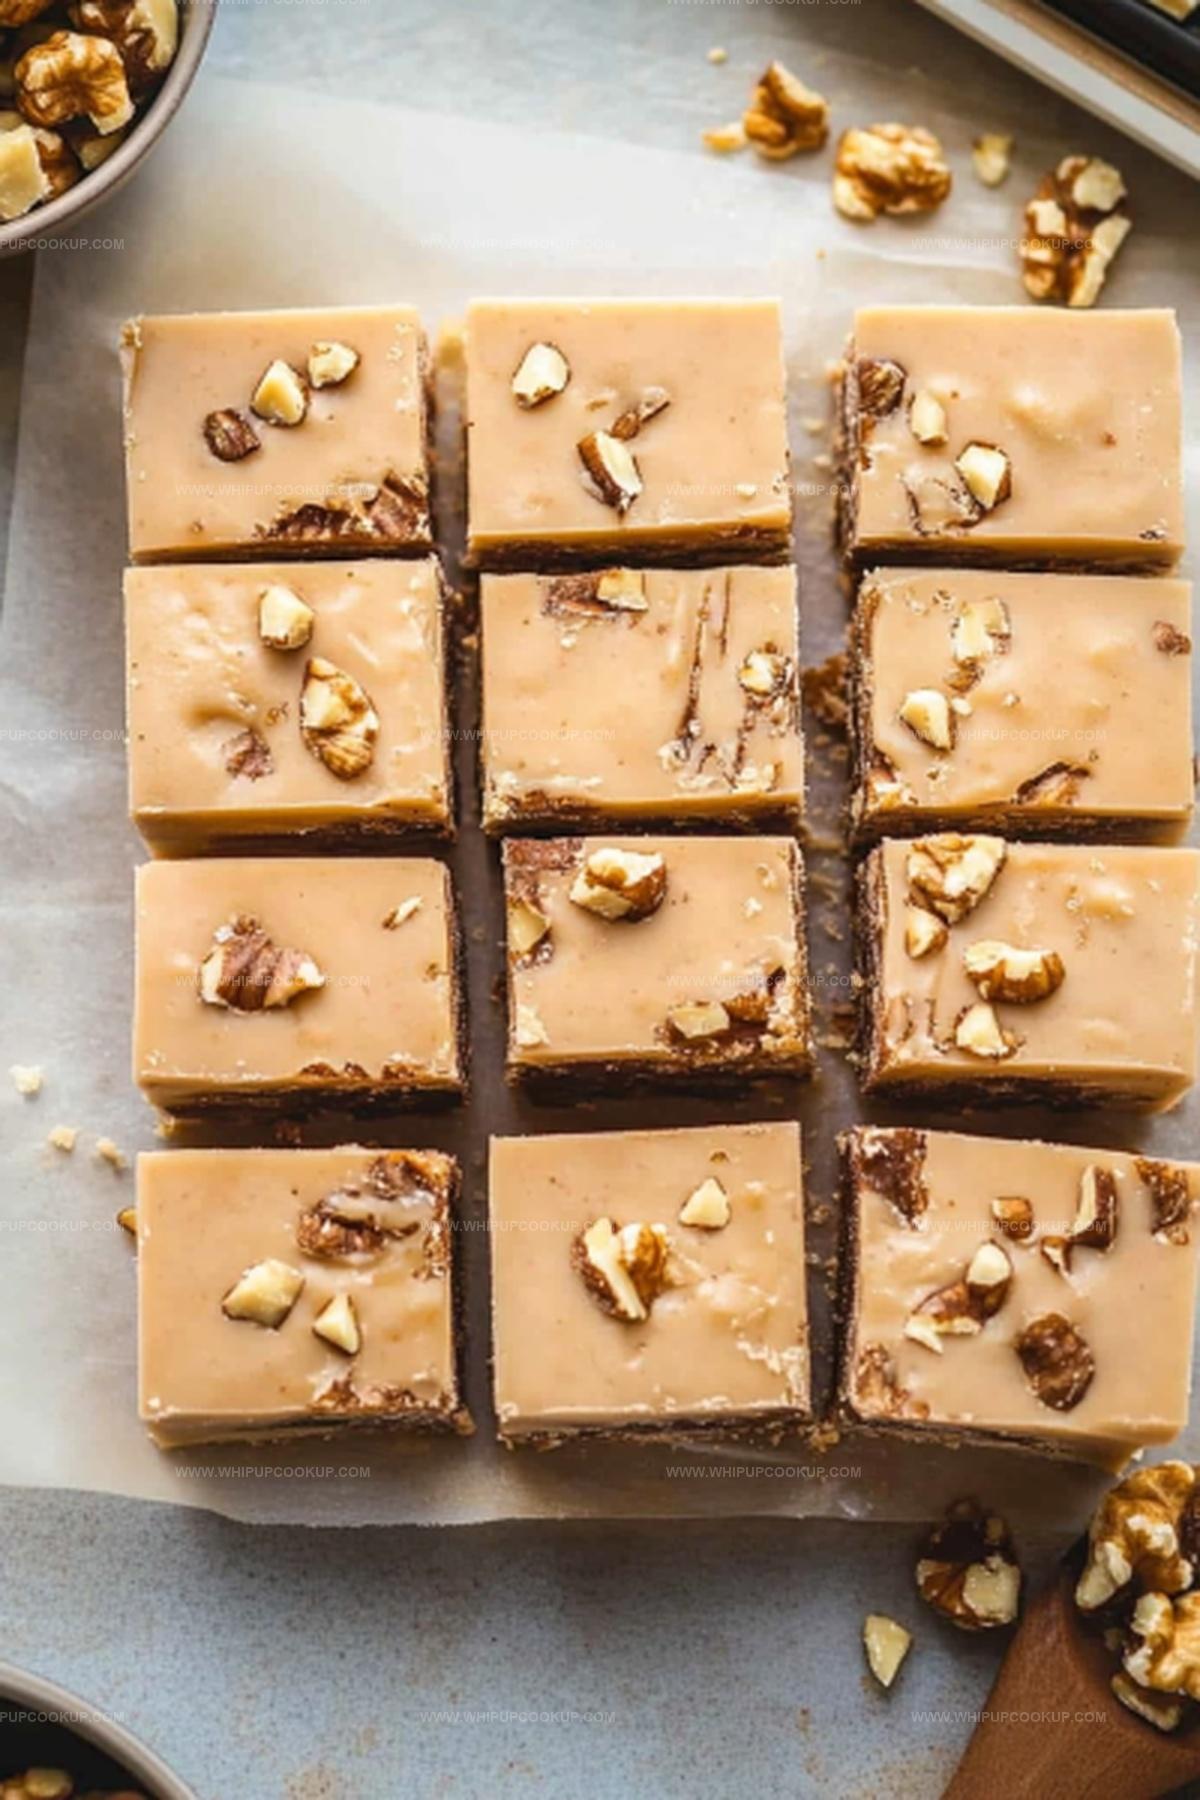
Once fully set, lift the fudge out using the parchment paper handles. Cut into neat squares and serve. Enjoy this decadent treat that blends the richness of maple with the crunch of walnuts.
Fudge Tips for a No-Fuss Maple Nut Treat
Storing And Enjoying Maple Nut Fudge Later
Red Velvet Christmas Cake Match Ideas
Pair Maple Nut Fudge with Rich Beverages:Fireball Caramel Giftable Twists
FAQs
Yes, you can substitute walnuts with pecans, almonds, or macadamia nuts for a different flavor and texture.
When stored in an airtight container in the refrigerator, the fudge will stay fresh for up to 2 weeks.
While maple syrup is key to the flavor, you can use honey or corn syrup as an alternative, though the taste will be slightly different.
Absolutely! Wrap the fudge tightly in plastic wrap and store in a freezer-safe container for up to 3 months. Thaw in the refrigerator before serving.
Print
Maple Nut Fudge Recipe
- Total Time: 4 hours 20 minutes
- Yield: 16 1x
Description
Creamy maple nut fudge delivers a sweet symphony of Canadian-inspired indulgence. Rich maple notes dance with nutty crunch, promising a delightful dessert you’ll savor with pure pleasure.
Ingredients
Main Ingredients:
- 3 cups white chocolate chips
- 1 (14-ounces) sweetened condensed milk
- 1 cup walnuts, chopped
Sweeteners:
- 1/4 cup real maple syrup
Finishing Ingredients:
- 1 tablespoon butter
Instructions
- Prepare a square baking vessel by lining it with parchment paper, ensuring extra material hangs over the edges to facilitate effortless extraction later.
- Combine white chocolate chips, sweetened condensed milk, maple syrup, and butter in a medium saucepan over moderate heat, whisking consistently until the mixture transforms into a silky, luxurious consistency with no visible lumps.
- When the mixture reaches a smooth texture, immediately remove from heat source and gently fold in roughly chopped walnuts, ensuring they are uniformly distributed throughout the creamy base.
- Transfer the fudge mixture into the prepared parchment-lined pan, using a flexible spatula to create an even surface and eliminate potential air pockets by gently tapping the container against the countertop.
- Refrigerate the unbaked fudge for a minimum of four hours, allowing it to solidify completely and develop a firm, sliceable texture.
- Once fully chilled, extract the fudge from the refrigerator and utilize the overhanging parchment paper to lift the entire block onto a cutting surface.
- Slice the fudge into neat, bite-sized squares using a sharp knife, creating uniform pieces perfect for serving and sharing.
Notes
- Ensure parchment paper extends beyond pan edges for effortless lifting and clean cutting of fudge squares.
- Use high-quality maple syrup for intense, authentic flavor that elevates the entire dessert’s taste profile.
- Toast walnuts briefly before chopping to enhance their nutty depth and add delightful crunch to the fudge texture.
- Experiment with alternative nuts like pecans or almonds for personalized variations that suit different taste preferences.
- Prep Time: 20 minutes
- Cook Time: 4 hours
- Category: Desserts, Snacks
- Method: Baking
- Cuisine: American
Nutrition
- Serving Size: 16
- Calories: 265
- Sugar: 23 g
- Sodium: 50 mg
- Fat: 15 g
- Saturated Fat: 6 g
- Unsaturated Fat: 9 g
- Trans Fat: 0 g
- Carbohydrates: 30 g
- Fiber: 1 g
- Protein: 3 g
- Cholesterol: 5 mg
Marcus Hale
Founder & Recipe Storyteller
Expertise
Education
Holyoke Community College – HCC-MGM Culinary Arts Institute
Marcus grew up surrounded by maple trees, farm stands, and the smell of Sunday stew simmering on the stove. After earning his Culinary Arts Certificate from the HCC-MGM Culinary Arts Institute, he knew he didn’t want to work in fancy kitchens, he wanted to cook for real people.
At Whip Up Cook Up, Marcus is the guy turning memories into meals. His recipes are fast, full of flavor, and built for home cooks who want big taste without the drama.