The Coziest Mini Peanut Butter Pies Recipe for Sweet Smiles
Dessert lovers swoon over these irresistible mini peanut butter pies that effortlessly blend creamy richness with decadent charm.
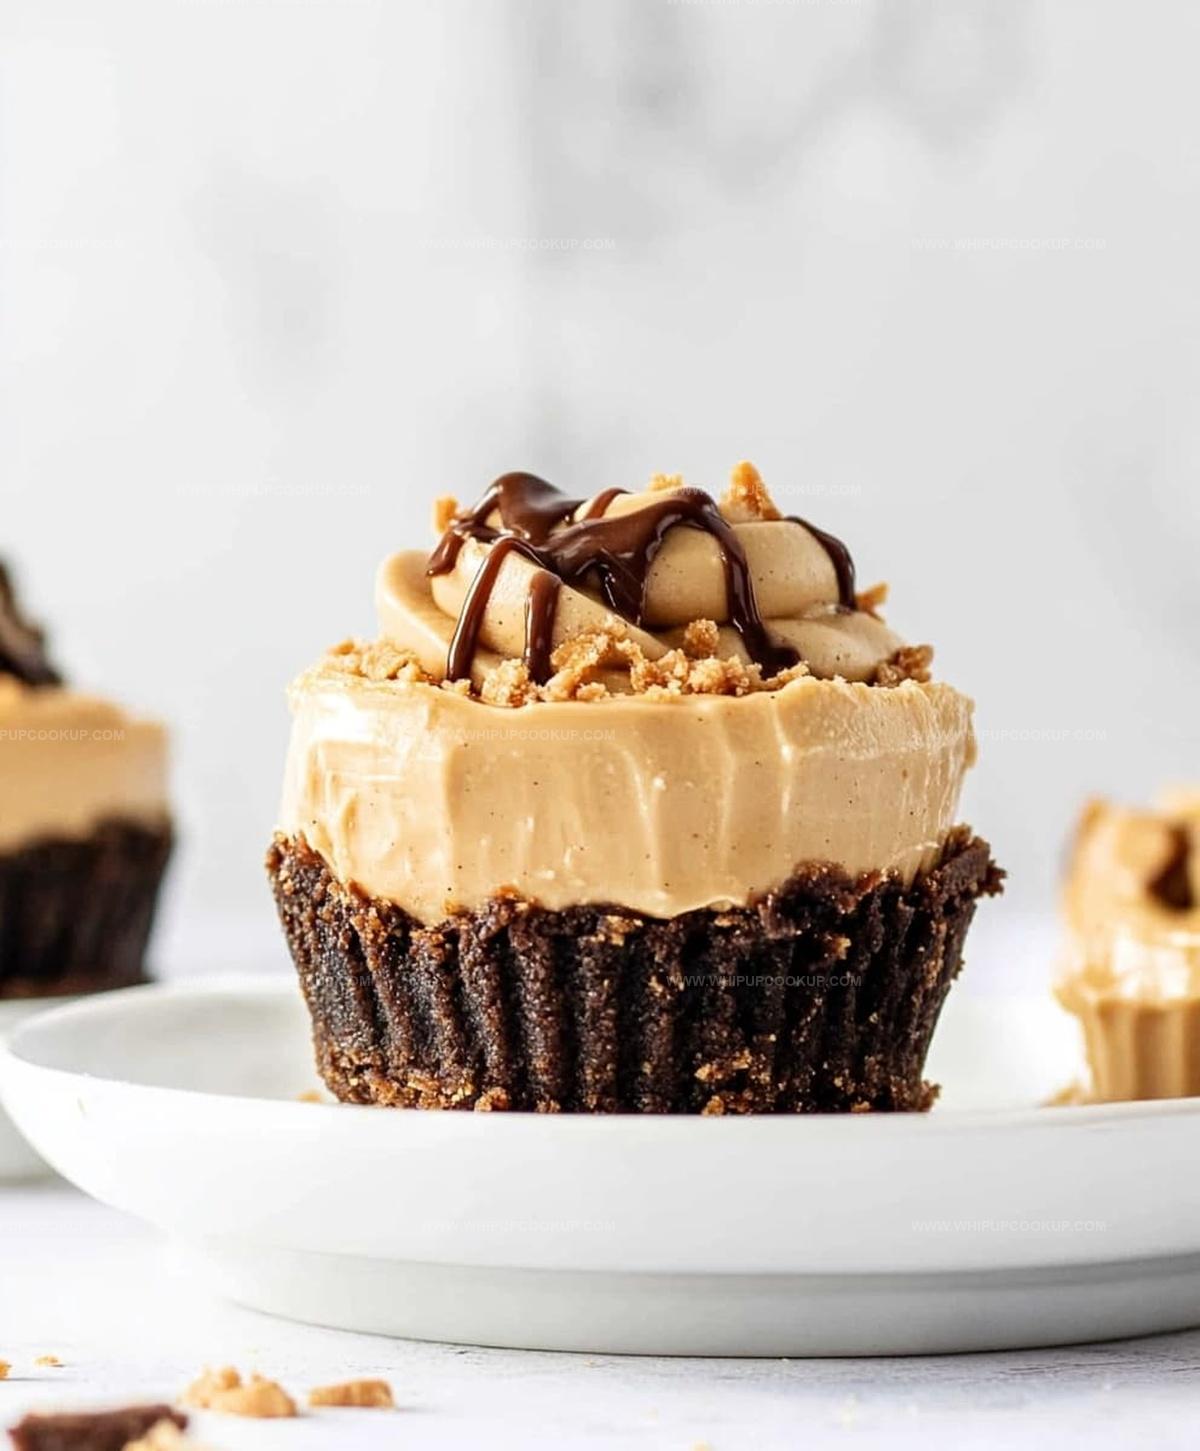
Smooth peanut butter nestles perfectly within a crumbly graham cracker crust, creating a heavenly treat.
Each bite delivers a delightful explosion of nutty sweetness that dances across your palate.
The miniature size makes these pies adorably portable and perfect for any gathering.
Compact yet luxurious, these tiny delights pack an incredible punch of flavor in every single morsel.
Weekend bakers and dessert enthusiasts will fall head over heels for this simple yet spectacular recipe.
Prepare to indulge in a dessert that promises pure bliss with minimal effort.
Why Mini Peanut Butter Pies Are Perfect

Mini Peanut Butter Pie Ingredients
Crust Ingredients:Filling Ingredients:Topping Ingredients:How to Make Mini Peanut Butter Pies

Step 1: Crush Oreo Cookies
Crush Oreo cookies into fine crumbs using a food processor or rolling pin.
Create a smooth, consistent texture for the perfect crust base.
Step 2: Create Crust Mixture
Mix the Oreo cookie crumbs with melted butter in a mixing bowl.
Stir thoroughly until the crumbs are completely coated and hold together when pressed.
Step 3: Form Crust Bases
Carefully press the cookie mixture into each cup of a mini cheesecake pan or muffin liners.
Use the back of a spoon or your fingers to create a compact, even layer that covers the bottom of each cup.
Step 4: Bake Crust Foundation
Place the pan in a preheated oven at 350°F.
Bake for 10 minutes to set the crust and enhance its flavor.
Remove and let cool completely before adding the filling.
Step 5: Prepare Creamy Filling
In a large mixing bowl, blend together:Mix until smooth and free of any lumps, creating a rich and creamy filling.
Step 6: Whip Filling to Perfection
Use an electric mixer to whip the mixture until light and fluffy.
Ensure all ingredients are fully incorporated and the texture is silky.
Step 7: Fill Pie Crusts
Carefully spoon or pipe the peanut butter filling into the cooled crust bases.
Distribute evenly, creating a smooth top surface.
Step 8: Chill and Set
Refrigerate the mini pies for at least 2 hours or overnight.
This allows the filling to firm up and develop a rich, decadent texture.
Step 9: Add Chocolate Drizzle
Optional: Melt chocolate and drizzle over the top of the chilled pies.
Use a spoon or piping bag to create elegant chocolate patterns.
Step 10: Serve and Enjoy
Remove pies from the pan just before serving.
Garnish with a sprinkle of crushed peanuts or a small chocolate chip if desired.
Serve chilled for the best flavor and texture.
Tips for Peanut Butter Pie Success
How to Store Peanut Butter Pies
What to Pair with Peanut Butter Pies
Mini Peanut Butter Pie Flavor Options
FAQs
Yes, graham crackers or chocolate wafer cookies work great as alternatives to Oreo cookies for the crust base.
Absolutely! Use gluten-free sandwich cookies or gluten-free graham crackers to create a gluten-free version of the mini pies.
Use non-stick cooking spray or line the pan with parchment paper cups to ensure easy removal of the mini pies.
Yes, you can prepare these mini pies up to 2 days in advance and store them in the refrigerator until ready to serve.
Print
Mini Peanut Butter Pies Recipe
- Total Time: 25 minutes
- Yield: 12 1x
Description
Irresistible mini peanut butter pies combine creamy richness with a crumbly graham cracker crust, delivering pure dessert bliss. Sweet indulgence meets compact perfection you can savor in just one delightful bite.
Ingredients
Crust:
- 2 cups Oreo cookie crumbs
- 2 tablespoons (30 milliliters) unsalted butter, melted
Filling:
- 8 ounces (226 grams) cream cheese, softened
- 1 cup (240 grams) creamy peanut butter
- 1 cup (120 grams) powdered sugar
- 1 teaspoon (5 milliliters) vanilla extract
- 1 cup (240 milliliters) heavy whipping cream
Instructions
- Heat the oven to 350°F and prepare a mini cheesecake or muffin pan with liners.
- Crush Oreo cookies into fine crumbs and blend thoroughly with melted butter until uniformly moistened.
- Distribute the buttery cookie mixture evenly across each pan cavity, pressing firmly to create a compact base layer.
- Bake the crust for 10 minutes until set, then remove and allow to cool completely at room temperature.
- In a separate mixing bowl, whip cream cheese until smooth and free of lumps.
- Incorporate peanut butter, powdered sugar, and vanilla extract into the cream cheese, blending until the mixture becomes creamy and well-integrated.
- Gently fold whipped cream into the peanut butter mixture, maintaining a light and airy texture.
- Carefully spoon the peanut butter filling over the cooled cookie crusts, smoothing the tops with a spatula.
- Refrigerate the mini pies for at least 2 hours to allow the filling to set and flavors to meld.
- Prior to serving, garnish with a drizzle of melted chocolate or a sprinkle of chopped peanuts for added texture and visual appeal.
Notes
- Crush Oreo cookies thoroughly to ensure a smooth, compact crust that holds together perfectly.
- Use room temperature cream cheese for a silky, lump-free filling that blends seamlessly.
- Opt for natural peanut butter to reduce excess sugar and enhance the authentic nutty flavor profile.
- Customize the recipe by using gluten-free Oreos or alternative cookie crumbs for those with dietary restrictions.
- Prep Time: 15 minutes
- Cook Time: 10 minutes
- Category: Desserts, Snacks
- Method: Baking
- Cuisine: American
Nutrition
- Serving Size: 12
- Calories: 286
- Sugar: 14 g
- Sodium: 160 mg
- Fat: 20 g
- Saturated Fat: 9 g
- Unsaturated Fat: 10 g
- Trans Fat: 0 g
- Carbohydrates: 25 g
- Fiber: 1 g
- Protein: 5 g
- Cholesterol: 30 mg
Olivia Bennett
Recipe Developer & Culinary Educator
Expertise
Education
Schoolcraft College
With an Associate Degree in Culinary Arts from Schoolcraft College and a natural knack for teaching, Olivia Bennett’s all about making home cooking feel possible, even on your busiest day.
Her thing? Recipes that are budget-friendly, season-forward, and full of Southern warmth. Whether it’s a roasted veggie bowl or a five-ingredient skillet bake, Olivia makes sure it’s simple, satisfying, and something you’ll want to make again tomorrow.
When she’s not shooting step-by-step videos or testing spice blends, she’s out foraging, flipping through old cookbooks, or throwing laid-back dinner parties with a BYO-mason-jar theme.