Spooky No-Bake Witch Hat Cookies Recipe – Halloween Magic
Halloween party planners adore this whimsical no-bake witch hat cookies recipe that transforms simple ingredients into magical treats.
Chocolate-covered cookies become perfect cone-shaped hats with minimal kitchen effort.
Kids absolutely love decorating these playful desserts that spark imagination.
Decorative candies and frosting help create spooky character designs with ease.
Minimal baking skills guarantee success for anyone wanting to impress at seasonal gatherings.
Quick assembly means you can craft these enchanting sweets in under fifteen minutes.
Have fun crafting delightful Halloween magic that delights every guest at your festive celebration!
Witch Hat Cookies That Don’t Need an Oven
No-Bake Witch Hat Cookies Ingredient List
Base:Frosting and Decoration:Accent Elements:No Bake Witch Hat Cookies Easy Halloween Treat Instructions
Step 1: Prepare Cookie Base
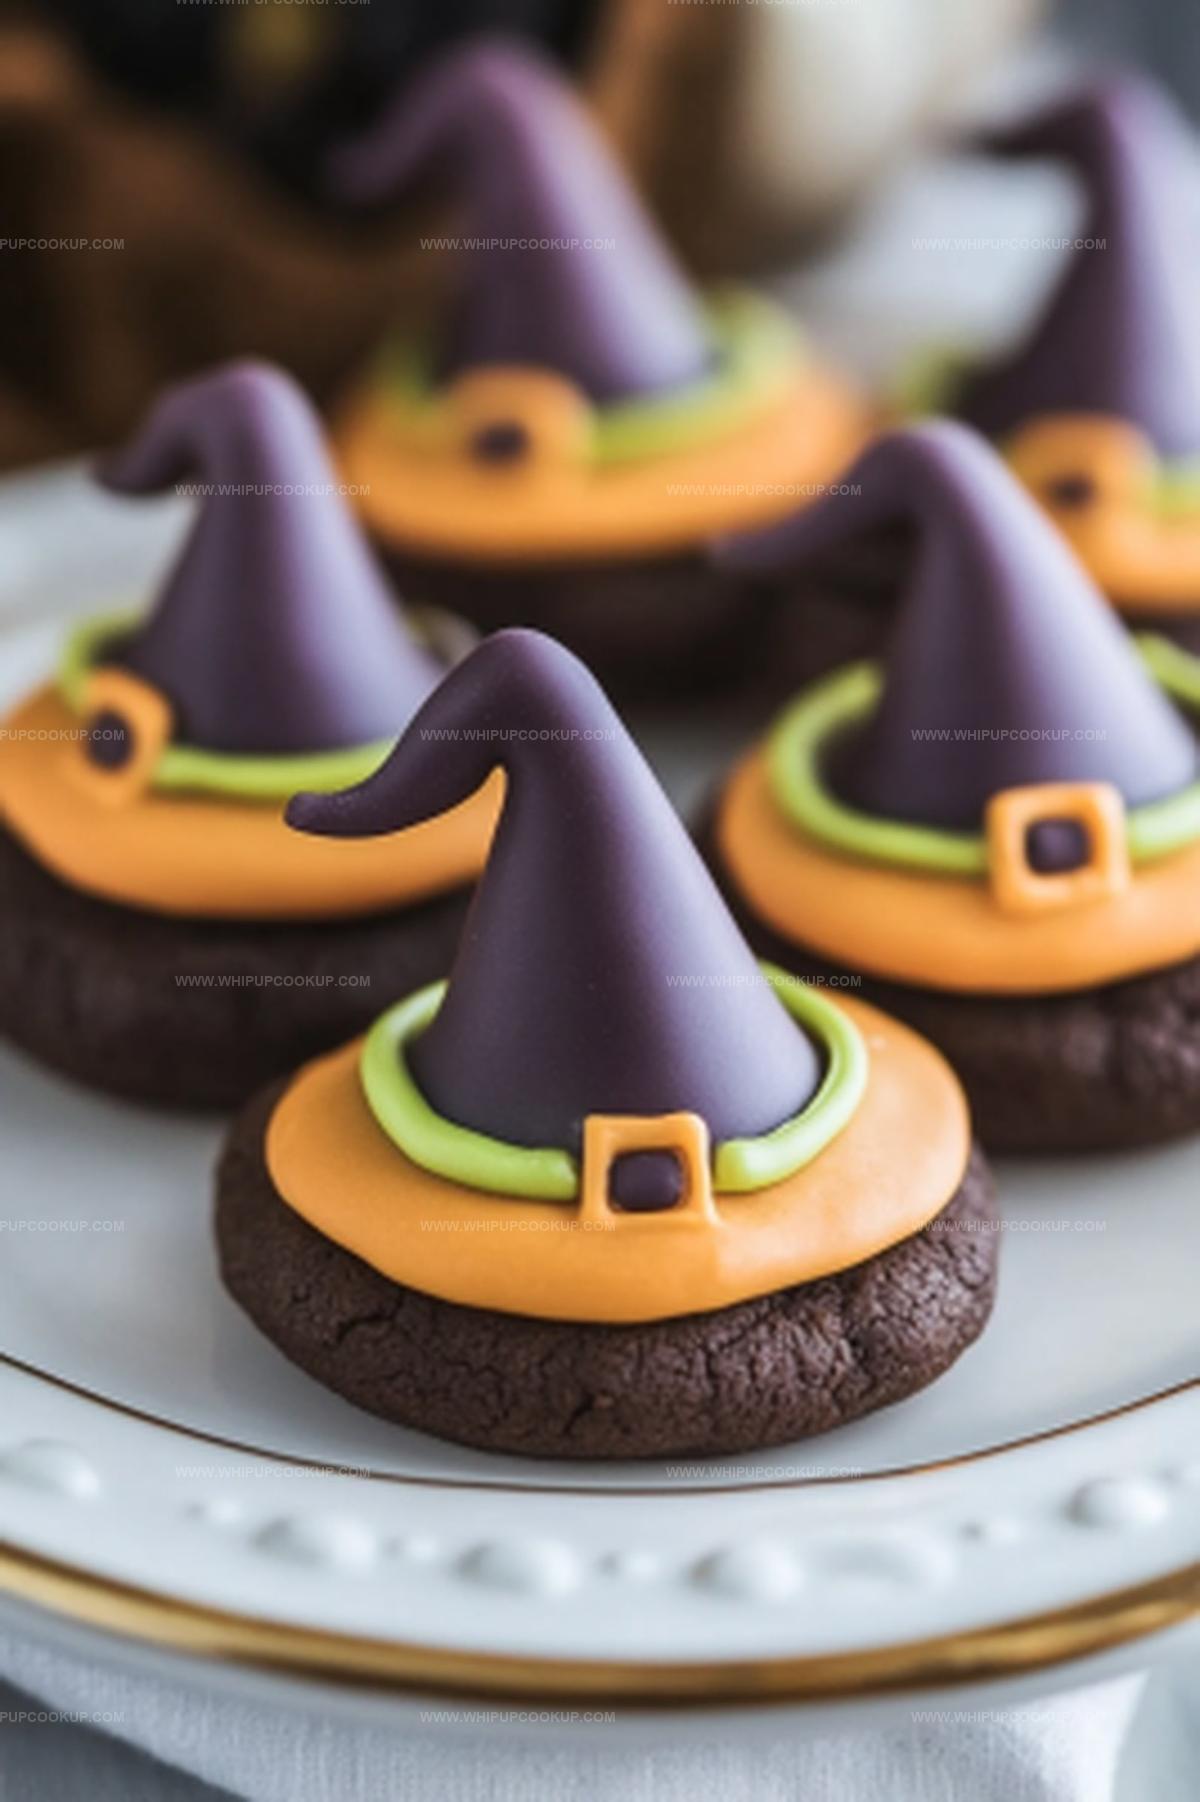
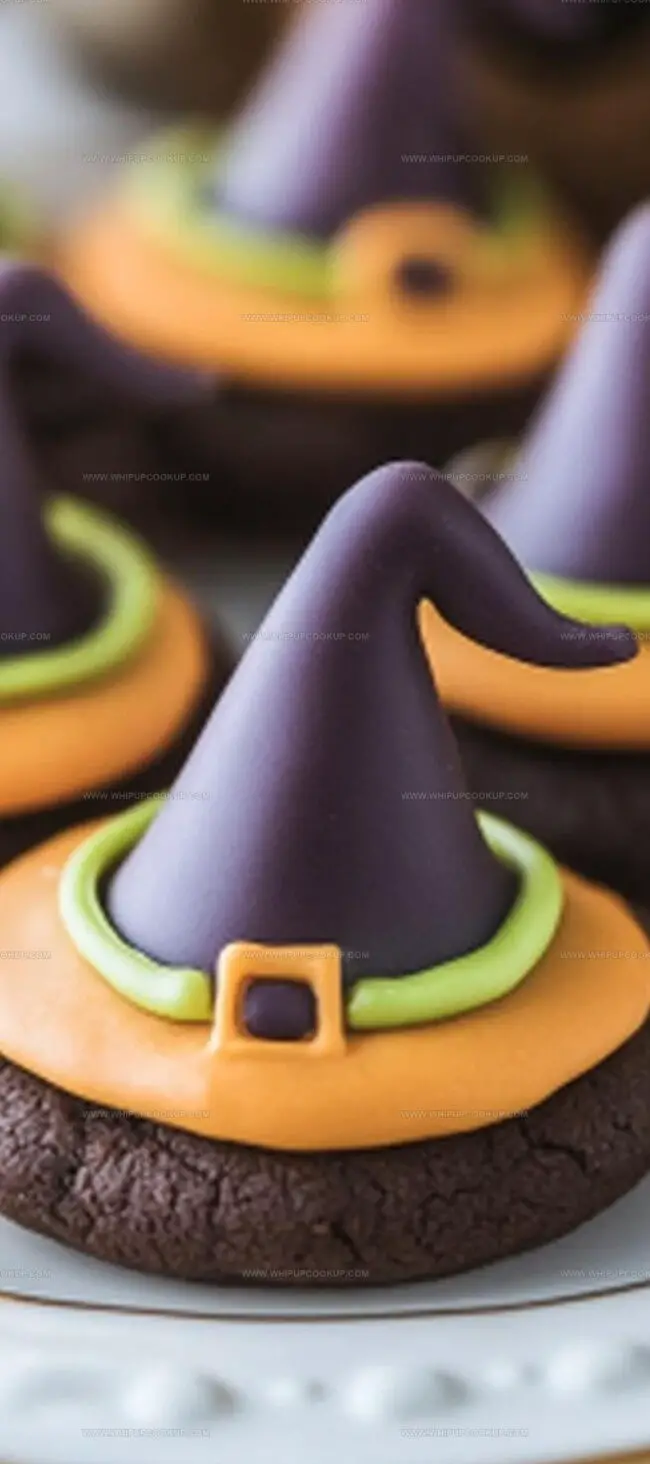
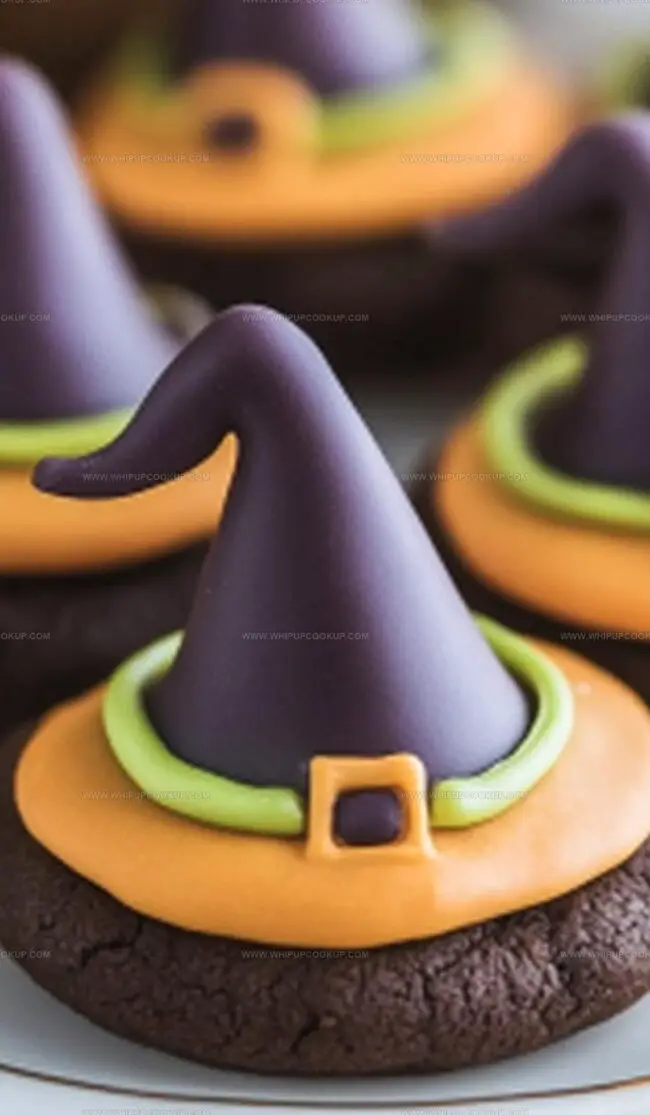
Line a baking tray with fudge-covered cookies in a single, neat layer. Make sure they are not touching each other to give you enough working space for decorating.
Step 2: Create Colorful Frosting
Separate white frosting into multiple small bowls. Experiment with different food coloring shades to craft vibrant and playful witch hat designs. Mix colors thoroughly until you achieve the exact tone you want.
Step 3: Prepare Piping Tools
Transfer colored frostings into piping bags or sandwich bags. If using sandwich bags, carefully snip a tiny corner to create a makeshift piping tool. This will help you control the frosting flow precisely.
Step 4: Add Frosting Centerpiece
Gently pipe a smooth dollop of frosting right in the center of each fudge cookie. Aim for a consistent size and shape to create uniform witch hat bases.
Step 5: Create Hat Tip
Carefully press a chocolate kiss into the frosting center. The kiss will serve as the pointy top of your witch hat. Position it so a ring of frosting surrounds the chocolate base.
Step 6: Decorate Hat Band
Place a mini yellow M&M on the frosting ring, positioning it like a decorative buckle on the witch hat. This adds a whimsical touch to your cookie creation.
Step 7: Let Decorations Set
Allow the frosted cookies to rest at room temperature for 15-20 minutes. This helps the frosting firm up and keeps your decorative elements in place.
No-Bake Cookie Tips for Witch Hats
No Bake Witch Hat Cookies Easy Way to Store Them
Witch Hat Cookies Flavor Matches
No Bake Halloween Fun for Witch Hat Cookies
FAQs
You’ll need fudge-covered cookies, white frosting, food coloring, chocolate kisses, and mini yellow M&Ms.
Absolutely! Kids can help pipe frosting, place chocolate kisses, and add M&M buckles with adult supervision.
This is an easy, no-bake recipe that doesn’t require any cooking, making it perfect for beginners and Halloween parties.
The decorating process takes about 15-20 minutes, with an additional 15-20 minutes for frosting to set.
Print
No-Bake Witch Hat Cookies Recipe
- Total Time: 25 minutes
- Yield: 18 1x
Description
Spooky no-bake witch hat cookies bring Halloween magic to dessert tables with minimal effort. Dark chocolate, crisp cookies, and playful decorations create a wickedly delightful treat you can’t resist.
Ingredients
Primary Structure (Cookies and Chocolate):
- 1 packet fudge-covered cookies
- 18 chocolate kisses, unwrapped
Decorative Components:
- 16 ounces (454 grams) white frosting
- 18 mini yellow M&Ms
Color Additives:
- Food coloring (your choice of colors)
Instructions
- Lay out fudge-covered cookies on a flat surface or baking tray, ensuring they are evenly spaced.
- Separate white frosting into multiple small containers, then carefully blend different food coloring shades to create desired color palette.
- Carefully transfer tinted frosting into piping tools or resealable plastic bags, trimming a small corner for precise application.
- Gently apply a centered frosting dollop onto each cookie, creating a smooth base for decorating.
- Delicately position a chocolate kiss in the center of the frosting, allowing the creamy mixture to create a subtle ring around the candy.
- Position a miniature yellow M&M strategically on the frosting band, mimicking a whimsical buckle design.
- Allow decorated cookies to rest and stabilize for approximately 15-20 minutes, enabling frosting to set and maintain structural integrity.
- Once firmed, arrange witch hat cookies on a serving platter, ready for Halloween festivities or delightful snacking.
Notes
- Chill your work surface to help frosting set faster and maintain crisp decorations.
- Use room temperature ingredients for smoother, easier frosting application and better cookie texture.
- Select chocolate kisses with flat bottoms for more stable witch hat construction.
- Experiment with different colored frostings to create unique, personalized witch hat designs that match your Halloween theme.
- Prep Time: 25 minutes
- Cook Time: 0 minutes
- Category: Desserts, Snacks
- Method: None
- Cuisine: American
Nutrition
- Serving Size: 18
- Calories: 110
- Sugar: 10g
- Sodium: 50mg
- Fat: 5g
- Saturated Fat: 2.5g
- Unsaturated Fat: 1.5g
- Trans Fat: 0g
- Carbohydrates: 15g
- Fiber: 0g
- Protein: 1g
- Cholesterol: 0mg
Marcus Hale
Founder & Recipe Storyteller
Expertise
Education
Holyoke Community College – HCC-MGM Culinary Arts Institute
Marcus grew up surrounded by maple trees, farm stands, and the smell of Sunday stew simmering on the stove. After earning his Culinary Arts Certificate from the HCC-MGM Culinary Arts Institute, he knew he didn’t want to work in fancy kitchens, he wanted to cook for real people.
At Whip Up Cook Up, Marcus is the guy turning memories into meals. His recipes are fast, full of flavor, and built for home cooks who want big taste without the drama.