
Spooky Nutter Butter Ghosts Recipe: Hauntingly Sweet Treats
Crafting these adorable nutter butter ghosts will spark joy during Halloween celebrations!
Playful and spooky, these sweet treats bring delightful memories of festive gatherings.
Minimal ingredients transform simple cookies into hauntingly cute desserts.
White chocolate coating creates ghostly silhouettes that dance across plates.
Decorating becomes a fun activity you can share with little ones.
Kids love designing unique facial expressions on each spectral snack.
A simple yet magical recipe that turns ordinary cookies into supernatural delights will definitely make your Halloween party unforgettable.
No-Bake Ghost Cookies That Are Sweet and Spooky
Nutter Butter Ghosts (No-Bake) Ingredient Guide
Sweet Coating:Cookies:Decorative Accents:Nutter Butter Ghosts Assembly for a No-Bake Halloween Treat
Step 1: Prepare Workspace
Line a baking sheet with parchment paper to create a clean surface for your spooky treats.
Step 2: Melt Candy Coating
Place candy melts in a microwave-safe bowl. Heat in 30-second intervals, stirring between each session until the candy becomes completely smooth and liquid.
Step 3: Dunk Cookies
Carefully submerge each cookie into the melted candy coating, ensuring total coverage. Gently lift and let excess coating drip off before placing on the prepared baking sheet.
Step 4: Create Ghostly Faces
While the candy coating remains wet, quickly add two mini chocolate chips as eyes and one regular chocolate chip to form a spooky mouth. Work swiftly before the coating begins to set.
Step 5: Allow Treats to Set
Let the decorated cookies rest at room temperature until the candy coating becomes completely firm and solid, which typically takes about 10 minutes. The treats are ready when the coating appears glossy and completely hardened.
Halloween No-Bake Tips for Nutter Butter Ghost Treats
Store Nutter Butter Ghosts the Right Way
Nutter Butter Ghosts Treat Companions
Halloween Cookie Dough Combos
FAQs
Yes, you can substitute white chocolate chips, but candy melts provide a smoother, more even coating and are easier to work with for these ghost treats.
Microwave in short 30-second intervals, stirring between each session, and avoid overheating. This helps maintain a smooth, consistent melting process.
You can use small candies like mini M&Ms, or carefully place tiny dots of dark chocolate or black icing to create the ghost eyes.
While Nutter Butter cookies work best due to their shape, you could use similar rectangular sandwich cookies if needed, though the ghost effect might be slightly different.
Print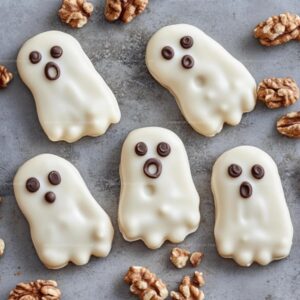
Nutter Butter Ghosts Recipe
- Total Time: 25 minutes
- Yield: 15 1x
Description
Spooky Nutter Butter ghosts float deliciously through Halloween’s playful spirit, offering sweet spectral charm. Crisp white chocolate coating and adorable ghost faces create a haunting dessert perfect for seasonal celebrations you’ll absolutely adore.
Ingredients
Main Ingredients:
- 15 Nutter Butter Cookies
- 1 package (12 ounces / 340 grams) White Candy Melts
Decorative Ingredients:
- 15 Semi-Sweet Chocolate Chips (for mouths)
- 30 Mini Chocolate Chips (for eyes)
Instructions
- Cover a baking sheet with parchment paper, creating a smooth surface for decorating.
- Transfer white candy melts into a microwave-safe bowl, heating in short 30-second bursts and stirring thoroughly between intervals until completely smooth and liquid.
- Carefully submerge each Nutter Butter cookie into the melted white coating, ensuring total coverage by gently turning with a fork, then delicately transfer to the prepared parchment-lined sheet.
- Working quickly before the candy coating solidifies, strategically place two mini chocolate chips as ghostly eyes and one regular chocolate chip to form a spooky mouth on each spectral cookie.
- Allow the decorated treats to rest undisturbed at room temperature, permitting the white candy coating to fully crystallize and harden, which typically takes approximately 10-15 minutes.
- Once completely set, gently lift the ghostly Nutter Butter treats from the parchment paper and arrange on a festive serving platter, ready to delight Halloween party guests.
Notes
- Melt candy coating gently to prevent burning, stirring frequently during microwave intervals for smooth consistency.
- Use room temperature cookies to ensure even candy coating and prevent cracking.
- Position chocolate chips quickly while candy coating remains wet for clean, crisp ghost facial features.
- Store completed ghosts in cool, dry place to maintain crisp white appearance and prevent melting.
- Prep Time: 15 minutes
- Cook Time: 10 minutes
- Category: Desserts, Snacks
- Method: None
- Cuisine: American
Nutrition
- Serving Size: 15
- Calories: 130
- Sugar: 10 g
- Sodium: 50 mg
- Fat: 7 g
- Saturated Fat: 4 g
- Unsaturated Fat: 2 g
- Trans Fat: 0 g
- Carbohydrates: 17 g
- Fiber: 0 g
- Protein: 1 g
- Cholesterol: 0 mg
Marcus Hale
Founder & Recipe Storyteller
Expertise
Education
Holyoke Community College – HCC-MGM Culinary Arts Institute
Marcus grew up surrounded by maple trees, farm stands, and the smell of Sunday stew simmering on the stove. After earning his Culinary Arts Certificate from the HCC-MGM Culinary Arts Institute, he knew he didn’t want to work in fancy kitchens, he wanted to cook for real people.
At Whip Up Cook Up, Marcus is the guy turning memories into meals. His recipes are fast, full of flavor, and built for home cooks who want big taste without the drama.