The Ultimate Old-Fashioned Peanut Butter Balls Recipe
Crafting delightful old-fashioned peanut butter balls can spark joy in your kitchen during holiday preparations.
Memories of grandma’s sweet treats often inspire nostalgic cooking adventures.
Sweet chocolate-coated morsels blend creamy peanut butter with classic ingredients that everyone loves.
Simple pantry staples come together in minutes for this delectable no-bake dessert.
Kids adore helping roll these sweet spheres of happiness while adults reminisce about childhood favorites.
Smooth peanut butter mixed with powdered sugar creates a melt-in-your-mouth texture that feels like pure comfort.
Let’s whip up these irresistible treats that promise to become your new favorite holiday tradition.
Peanut Butter Balls That Bring Back Good Memories
Homemade Tortillas Ingredient List
Peanut Butter Base:Dry Ingredients:Coating:How to Prepare Old-Fashioned Peanut Butter Balls
Step 1: Prepare Peanut Butter Base
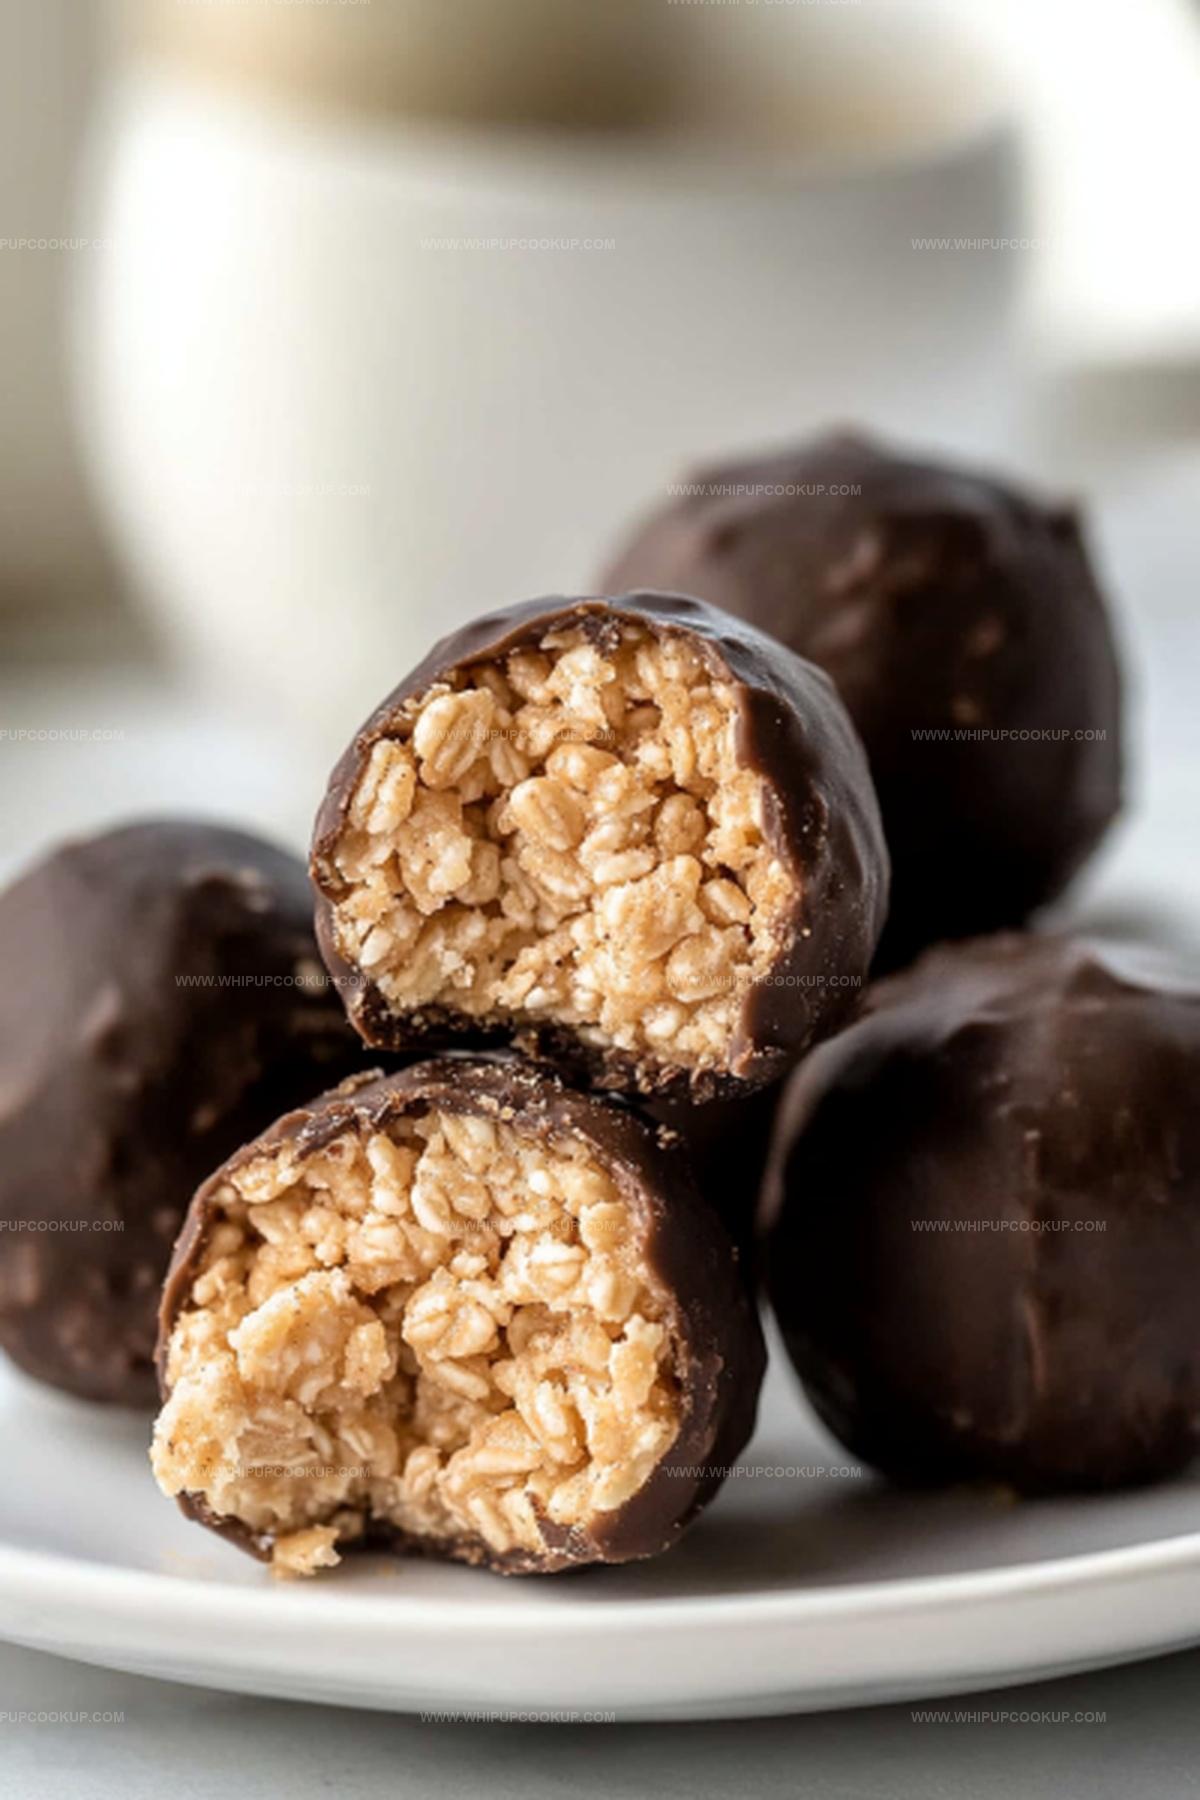
Mix together smooth peanut butter and softened butter in a large mixing bowl. Blend until the mixture becomes completely uniform and silky, creating a rich and creamy foundation for your delectable treats.
Step 2: Create Textured Mixture
Gently fold in crispy rice cereal, ensuring each piece gets evenly coated. Gradually incorporate powdered sugar, stirring continuously until the ingredients transform into a cohesive, moldable dough that holds together perfectly.
Step 3: Shape Delightful Spheres
Lightly grease your hands to prevent sticking. Scoop out small portions of the mixture and roll into smooth, consistent balls. Arrange these spheres on a parchment-lined baking sheet. Chill in the refrigerator for half an hour to firm up the texture.
Step 4: Melt Chocolate Coating
Place chocolate in a microwave-safe bowl. Heat in short bursts, stirring between each interval, until the chocolate becomes completely smooth and glossy. Ensure no solid chunks remain for a perfect dipping consistency.
Step 5: Chocolate Dipping Technique
Remove chilled peanut butter balls from the refrigerator. Using a fork or dipping tool, carefully submerge each ball into the melted chocolate. Ensure complete and even coverage. Gently tap to remove excess chocolate and return to the lined sheet.
Step 6: Final Chilling Process
Transfer the chocolate-covered balls back to the refrigerator. Allow them to set for 15-20 minutes until the chocolate hardens completely. The result will be a smooth, glossy exterior with a creamy interior that’s absolutely irresistible.
Candy Tips That Make Peanut Butter Balls Classic
Chill Peanut Butter Balls to Keep Shape
Bruschetta Dip Flavor Matches
Homemade Tortilla Prep Options
FAQs
Not entirely. While peanut butter and chocolate are gluten-free, Rice Krispies typically contain malt flavoring, which has gluten. Use gluten-free crispy rice cereal to make the recipe completely gluten-free.
Yes, crunchy peanut butter works well. It will add extra texture to the balls and provide more nutty bits throughout the mixture. Just ensure it’s well-blended with other ingredients.
When stored in an airtight container in the refrigerator, these treats will remain fresh for about 1-2 weeks. For best taste and texture, keep them chilled until serving.
Yes, chilling helps the balls hold their shape and prevents them from falling apart during chocolate coating. The 30-minute refrigeration helps the mixture firm up and makes dipping easier.
Print
Old-Fashioned Peanut Butter Balls Recipe
- Total Time: 1 hour 5 minutes
- Yield: 24 1x
Description
Sweet nostalgia meets creamy indulgence with homemade old-fashioned peanut butter balls that dance between chocolate and nutty perfection. Classic comfort wrapped in rich chocolate promises a delightful journey through childhood memories you’ll savor with each delectable bite.
Ingredients
Main Ingredients:
- 1 cup (240 ml) creamy peanut butter
- 2 cups (50 g) Rice Krispies cereal
- 12 ounces (340 g) melting chocolate
Sweeteners and Binding Agents:
- 1 cup (120 g) powdered sugar
Fats and Additional Ingredients:
- 3 tablespoons (45 ml) salted butter, melted
Instructions
- Thoroughly combine peanut butter and melted butter in a spacious mixing vessel, creating a silky, uniform base.
- Gently fold Rice Krispies into the mixture, ensuring complete and even coating of the crispy cereal pieces.
- Incorporate powdered sugar gradually, mixing until the ingredients transform into a cohesive, moldable dough.
- Using clean, lightly greased palms, shape the mixture into uniform spherical bites approximately one tablespoon in size.
- Arrange the formed spheres on a parchment-lined baking sheet, then transfer to the refrigerator for a precise 30-minute chilling period.
- Prepare the chocolate coating by microwaving in brief intervals, stirring between each session to achieve a perfectly smooth, glossy consistency.
- Remove chilled peanut butter spheres and methodically immerse each one into the melted chocolate, ensuring complete and elegant coverage.
- Return chocolate-enrobed treats to the parchment-lined sheet, then reinstall in the refrigerator for 15-20 minutes to solidify the delicate chocolate shell.
- Once set, serve immediately or store in an airtight container for future indulgence, maintaining their delectable texture and flavor.
Notes
- Swap peanut butter for almond or sunflower seed butter to accommodate nut allergies, ensuring everyone can enjoy this sweet treat.
- Use gluten-free Rice Krispies or crushed gluten-free graham crackers to make the recipe celiac-friendly and inclusive.
- Chill hands with cold water before rolling balls to prevent sticking and create smoother, more uniform shapes.
- Sprinkle sea salt, crushed pretzels, or coconut flakes on chocolate coating for added texture and gourmet flair.
- Prep Time: 20 minutes
- Cook Time: 45 minutes
- Category: Snacks, Desserts
- Method: Rolling
- Cuisine: American
Nutrition
- Serving Size: 24
- Calories: 173
- Sugar: 8 g
- Sodium: 70 mg
- Fat: 10 g
- Saturated Fat: 4 g
- Unsaturated Fat: 6 g
- Trans Fat: 0 g
- Carbohydrates: 19 g
- Fiber: 1 g
- Protein: 3 g
- Cholesterol: 3 mg
Marcus Hale
Founder & Recipe Storyteller
Expertise
Education
Holyoke Community College – HCC-MGM Culinary Arts Institute
Marcus grew up surrounded by maple trees, farm stands, and the smell of Sunday stew simmering on the stove. After earning his Culinary Arts Certificate from the HCC-MGM Culinary Arts Institute, he knew he didn’t want to work in fancy kitchens, he wanted to cook for real people.
At Whip Up Cook Up, Marcus is the guy turning memories into meals. His recipes are fast, full of flavor, and built for home cooks who want big taste without the drama.