Heavenly Peanut Butter Balls Recipe: Sweet Bites of Bliss
Sweet memories of childhood snacks dance through my peanut butter balls recipe, connecting generations with one delightful bite.
Grandma’s kitchen always smelled like warmth and comfort when these treats emerged.
Cold winter afternoons feel magical with these simple yet irresistible morsels.
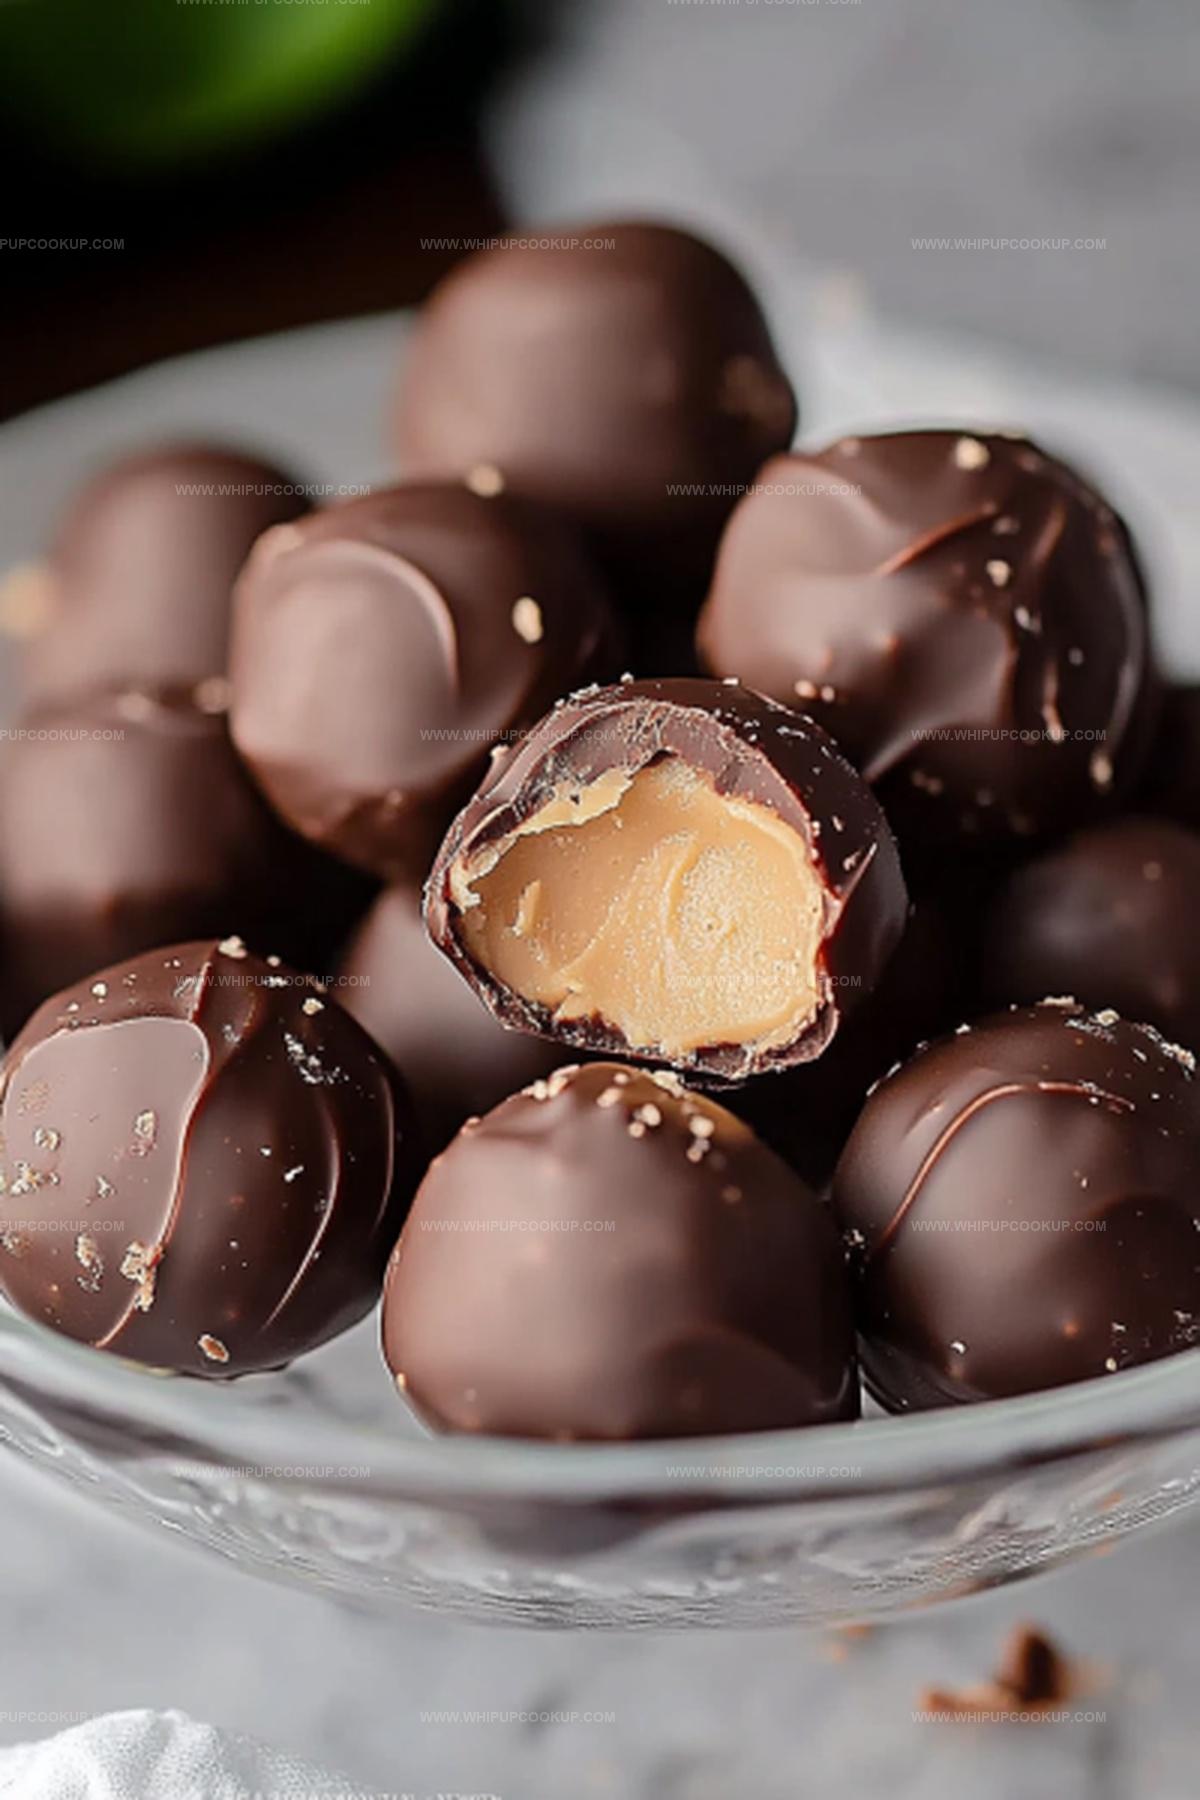
Chocolate and creamy peanut butter create a perfect harmony that melts instantly.
Kids and adults alike cannot resist the tempting combination of smooth and crunchy textures.
Simple ingredients and minimal effort guarantee success every single time.
Come join this delicious adventure and create something everyone will absolutely adore.
Peanut Butter Ball Styles
FAQs
Natural peanut butter can be tricky because it’s more oily. Stick with creamy, processed peanut butter like Jif or Skippy for the best texture and consistency.
When stored in an airtight container in the refrigerator, these treats will remain delicious for up to 2 weeks. Just keep them cool to maintain their quality.
No special tools required! Just a mixing bowl, cookie sheet, and a simple double boiler or microwave for melting chocolate. Basic kitchen items work perfectly.
Absolutely! While chocolate bark works great, you can also use milk chocolate, dark chocolate, or even white chocolate chips for melting and coating the peanut butter balls.
Why Peanut Butter Balls Are Always a Hit
Peanut Butter Balls (No-Bake) Ingredients
Base Ingredients:Coating Ingredients:Preparation Ingredients:How to Make Peanut Butter Balls
Step 1: Whip Up Creamy Peanut Butter Base
In a spacious mixing bowl, combine smooth peanut butter and softened butter. Stir vigorously until the mixture becomes silky and well-blended. Gradually fold in powdered sugar, continuing to mix until a uniform dough forms that holds together perfectly.
Step 2: Chill the Mixture
Cover the bowl with plastic wrap and place in the refrigerator. Let the mixture cool and firm up for several hours, allowing the flavors to meld and the texture to become more manageable.
Step 3: Shape Delightful Peanut Butter Spheres
Remove the chilled mixture from the refrigerator. Using a small scoop or spoon, portion out bite-sized balls. Roll each portion between your palms to create smooth, round spheres. Arrange the balls on a cookie sheet lined with parchment paper. Transfer the sheet to the freezer to help the balls maintain their shape.
Step 4: Prepare Decadent Chocolate Coating
Set up a double boiler by placing a heat-safe bowl over a pot of simmering water. Carefully melt chocolate bark, stirring occasionally to ensure a smooth, glossy finish. Remove from heat once completely melted and smooth.
Step 5: Dunk and Coat with Chocolate
Retrieve the frozen peanut butter balls from the freezer. Using a fork or dipping tool, carefully lower each ball into the melted chocolate. Ensure complete coverage, gently tapping off excess chocolate. Place the chocolate-coated balls on a wax paper-lined surface to set.
Step 6: Allow Chocolate to Harden
Let the chocolate-covered peanut butter balls sit at room temperature until the chocolate coating becomes firm and glossy. Once set, transfer the treats to an airtight container for storage.
No-Bake Tips for Peanut Butter Ball Success
Save Peanut Butter Balls Without Them Sticking
Great Pairings for Peanut Butter Balls
Print
Peanut Butter Balls Recipe
- Total Time: 2 hours 30 minutes
- Yield: 24 1x
Description
Irresistible peanut butter balls invite chocolate lovers on a delightful sweet journey through creamy, nutty bliss. Homemade confections merge classic comfort with simple ingredients, promising a delectable treat you can easily craft in minutes.
Ingredients
Main Ingredients:
- 1 cup (237 ml) creamy peanut butter
- 2 cups (240 g) powdered sugar
- 6 tablespoons (85 g) unsalted butter, softened
Coating Ingredient:
- 16 ounces (454 g) chocolate bark
Instructions
- Combine creamy peanut butter with softened butter in a mixing bowl, blending until the mixture achieves a uniform, silky consistency.
- Gradually incorporate powdered sugar, stirring thoroughly until the ingredients form a cohesive, moldable dough.
- Encase the mixture and refrigerate for 2-3 hours, allowing it to firm up and become easily shapeable.
- Using a small scoop or spoon, portion out uniform rounds of the chilled mixture.
- Gently roll each portion between your palms to create smooth, perfectly spherical peanut butter balls.
- Arrange the formed balls on a parchment-lined cookie sheet and transfer to the freezer to maintain their structure during chocolate coating.
- Set up a double boiler and carefully melt the chocolate bark, stirring occasionally to ensure a smooth, glossy finish.
- Extract the chilled peanut butter balls from the freezer and prepare for dipping.
- Using a fork or dipping tool, submerge each ball completely in the melted chocolate, ensuring full coverage.
- Delicately place the chocolate-coated balls onto fresh wax paper, allowing excess chocolate to drip off.
- Allow the chocolate to set at room temperature or expedite the process by briefly chilling in the refrigerator.
- Once fully hardened, transfer the completed peanut butter balls to an airtight container for storage and enjoyment.
Notes
- Chill the mixture thoroughly to ensure easy rolling and firm texture of the peanut butter balls.
- Experiment with different chocolate coatings like dark, milk, or white chocolate for varied flavor profiles.
- Use natural peanut butter for a less sweet, more intense nutty taste that cuts through the powdered sugar.
- For gluten-free version, verify all ingredients are certified gluten-free, especially chocolate coating and powdered sugar.
- Prep Time: 30 minutes
- Cook Time: 2 hours
- Category: Snacks, Desserts
- Method: Rolling
- Cuisine: American
Nutrition
- Serving Size: 24
- Calories: 158
- Sugar: 9 g
- Sodium: 54 mg
- Fat: 10 g
- Saturated Fat: 4 g
- Unsaturated Fat: 6 g
- Trans Fat: 0 g
- Carbohydrates: 17 g
- Fiber: 0.5 g
- Protein: 3 g
- Cholesterol: 7 mg
Marcus Hale
Founder & Recipe Storyteller
Expertise
Education
Holyoke Community College – HCC-MGM Culinary Arts Institute
Marcus grew up surrounded by maple trees, farm stands, and the smell of Sunday stew simmering on the stove. After earning his Culinary Arts Certificate from the HCC-MGM Culinary Arts Institute, he knew he didn’t want to work in fancy kitchens, he wanted to cook for real people.
At Whip Up Cook Up, Marcus is the guy turning memories into meals. His recipes are fast, full of flavor, and built for home cooks who want big taste without the drama.