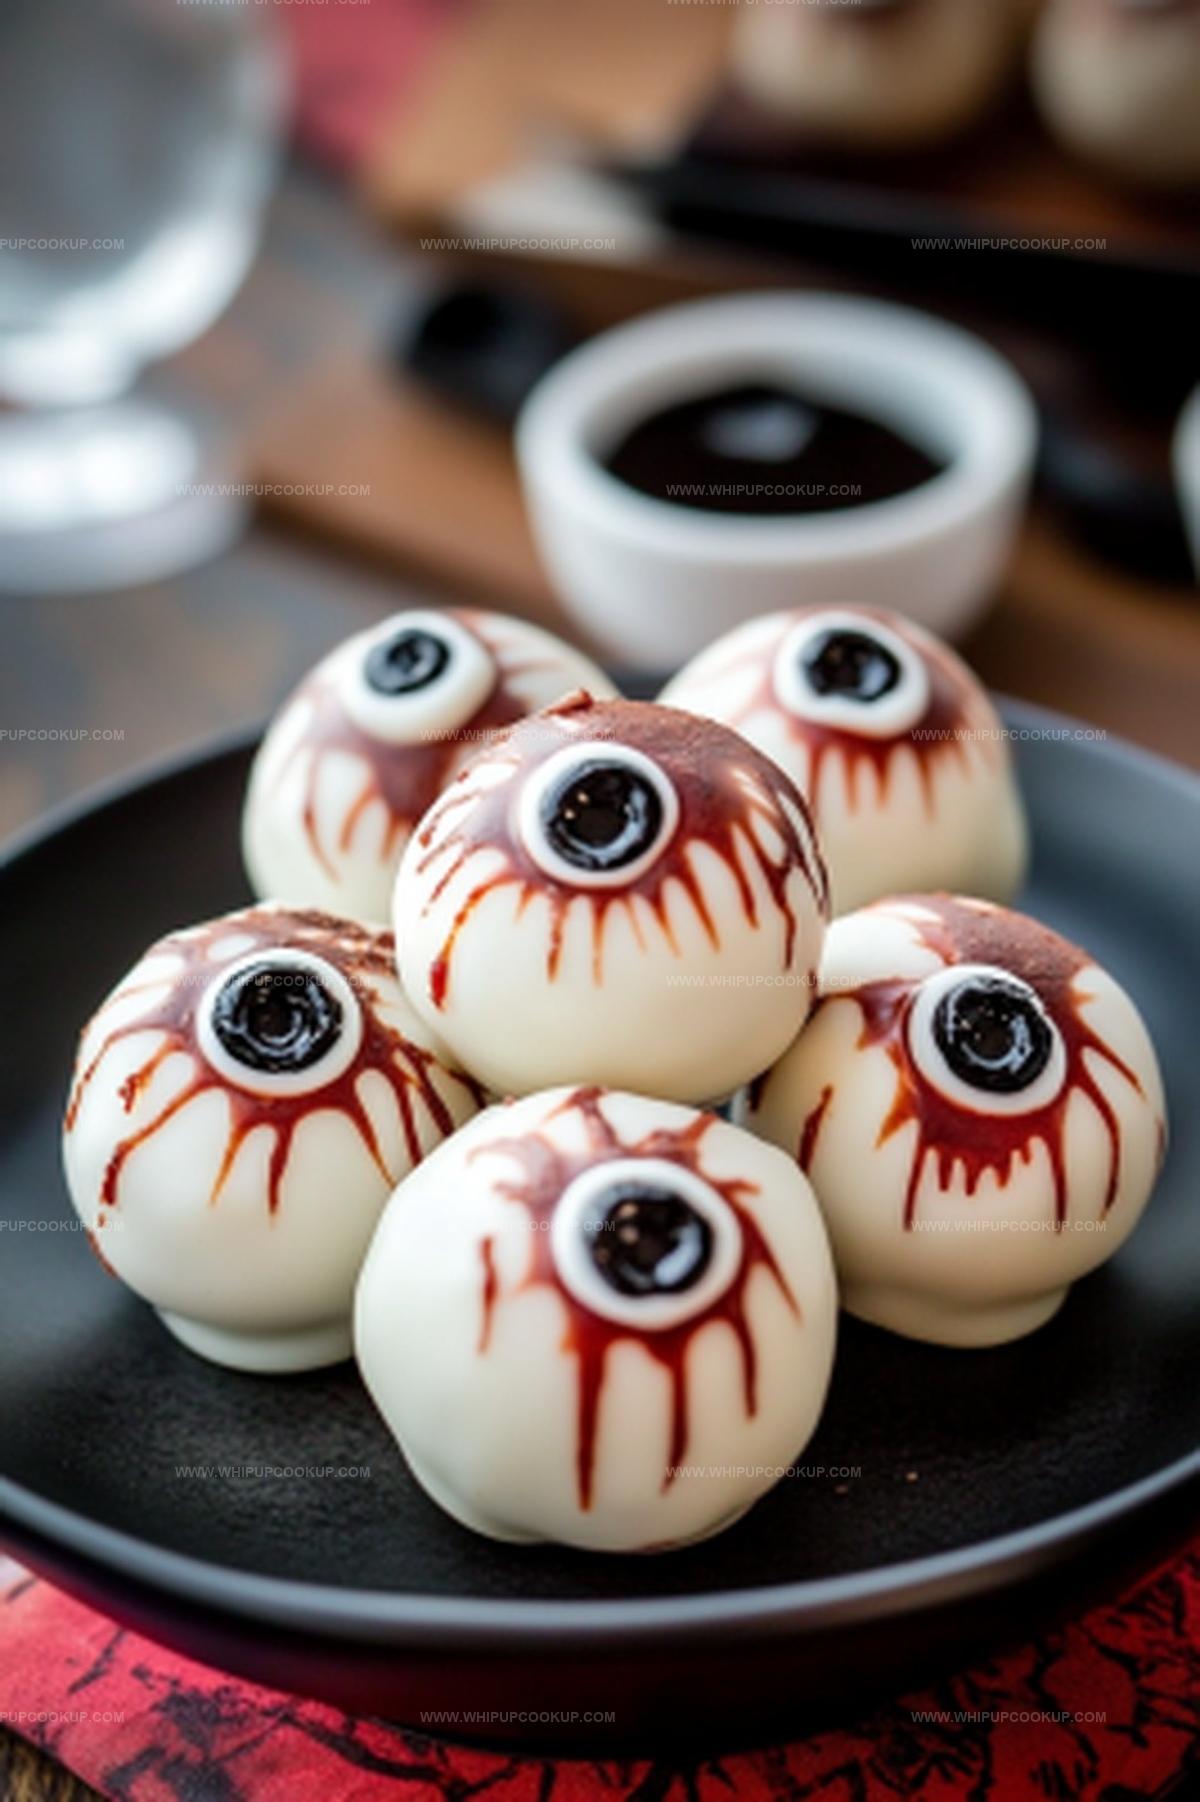
Spooky Peanut Butter Halloween Eyeballs Recipe That Kids Adore
Spooky halloween peanut butter eyeballs might sound creepy, but they’re actually a delightful treat that will make everyone smile.
Ghoulish desserts can be surprisingly sweet and fun to create.
Kids absolutely adore these playful confections with their googly candy-coated centers.
Crafting these edible monsters requires minimal ingredients and simple techniques anyone can master.
Chocolate coating adds a rich depth that makes each bite irresistible.
Mixed textures of smooth peanut butter and crisp chocolate shell create a memorable snack.
Eyeball Treats That Turn Halloween into Sweet Fun
Peanut Butter Halloween Eyeballs Ingredient Breakdown
Main Ingredients:Coating and Decorative Ingredients:Additional Flavor Ingredients:Peanut Butter Halloween Eyeballs Spooky Fun Recipe
Step 1: Whip the Creamy Base
Combine softened butter, peanut butter, marshmallow creme, vanilla, and a pinch of salt in a mixing bowl. Beat these ingredients until they transform into a silky, smooth mixture.
Step 2: Create the Dough
Gradually fold in powdered sugar, mixing until a soft, pliable dough comes together. The consistency should be easy to shape and handle.
Step 3: Shape Spooky Spheres
Roll the dough into 36 uniform balls, ensuring each one is roughly the same size. Place these potential eyeballs on a tray and chill in the refrigerator for half an hour to firm up.
Step 4: Prepare the Ghoulish Coating
Melt white candy melts following the package instructions. Ensure the melted chocolate is smooth and free of lumps.
Step 5: Dunk and Coat
Using a toothpick, carefully dip each chilled peanut butter ball into the melted white chocolate. Allow excess coating to drip off before placing on a wax paper-lined tray.
Step 6: Add Bloodshot Details
Squeeze a circular pattern of red sparkle gel on top of each white-coated ball. Gently press a candy eyeball into the center of the gel.
Step 7: Create Gruesome Veins
Take a toothpick and drag the red gel downward along the sides of each eyeball. This technique creates a horrifyingly realistic bloodshot effect.
Step 8: Set and Serve
Allow the eyeballs to set completely at room temperature. Store these creepy treats in a loosely covered container until ready to terrify and delight your guests.
Halloween Eyeball Treat Tips for PB Fans
Halloween Eyeball Treats With Peanut Butter Storage Guide
Halloween Eyeballs Treat Matches
Spooky Treat Adjustments for Peanut Butter Eyeballs
FAQs
Yes! Kids can help roll the peanut butter balls, press the candy eyeballs, and add red gel decorations. Adult supervision is recommended for melting chocolate and handling hot candy melts.
These spooky treats will stay fresh for about 5-7 days when stored in an airtight container in the refrigerator. The cold temperature helps maintain their shape and texture.
Wilton or similar round candy eyeballs in white and black work perfectly. You can find these at craft stores, baking supply shops, or online retailers during Halloween season.
For a nut-free version, replace peanut butter with sunflower seed butter or cookie butter. This keeps the recipe safe for those with peanut allergies while maintaining a similar creamy texture.
Print
Peanut Butter Halloween Eyeballs Recipe
- Total Time: 45 minutes
- Yield: 12 1x
Description
Spooky “Peanut Butter Halloween Eyeballs” blend creamy peanut butter treats with playful monster-inspired decoration. Ghoulish guests will devour these wickedly delightful homemade sweets that bring Halloween spirit to any festive gathering.
Ingredients
Main Ingredients:
- 1/2 cup creamy peanut butter
- 2 cups powdered sugar
- 1/2 cup marshmallow creme
Supporting Ingredients:
- 6 tablespoons (3 ounces) unsalted butter, softened
- 1/2 teaspoon vanilla extract
- Pinch of salt
Decorative Ingredients:
- 1 (10-ounce) bag white candy melts
- 36 large candy eyes
- 1 (2-ounce) tube red sparkle gel
Instructions
- Whip softened butter, peanut butter, marshmallow creme, vanilla extract, and salt into a silky, uniform mixture using an electric mixer.
- Incorporate powdered sugar gradually, blending until a cohesive, moldable dough emerges.
- Craft uniform spheres by rolling the mixture into precisely sized orbs, ensuring consistent shape and size.
- Chill the formed spheres in the refrigerator for half an hour to firm up their structure.
- Melt white candy coating using recommended temperature and technique to achieve smooth, glossy consistency.
- Carefully submerge each chilled peanut butter sphere into the melted coating, using a toothpick for precise dipping and minimal handling.
- Transfer dipped treats onto a wax paper-lined surface, allowing excess coating to drip off.
- Create a vivid, bloodshot effect by applying red sparkle gel in circular patterns across the surface.
- Strategically place candy eyeballs at the center of each gel-decorated sphere, pressing gently to secure.
- Utilize a toothpick to artfully drag the red gel, enhancing the eerie, realistic appearance.
- Allow treats to set completely at room temperature before transferring to a loosely sealed storage container.
Notes
- Precision matters when rolling the peanut butter balls to ensure uniform size and consistent coating.
- Keep ingredients at room temperature for smoother mixing and easier dough formation.
- Chill the balls thoroughly before dipping to prevent them from falling apart in the melted candy coating.
- For gluten-free option, verify all ingredients are certified gluten-free, especially marshmallow creme and candy melts.
- Swap traditional candy eyeballs with dairy-free alternatives for vegan-friendly treat adaptations.
- Use a fork instead of a toothpick for more stable dipping and cleaner chocolate coverage.
- Store in refrigerator to maintain shape and prevent chocolate from melting, especially during warmer seasons.
- Prep Time: 30 minutes
- Cook Time: 15 minutes
- Category: Snacks, Desserts
- Method: Rolling
- Cuisine: American
Nutrition
- Serving Size: 12
- Calories: 150
- Sugar: 15g
- Sodium: 50mg
- Fat: 7g
- Saturated Fat: 3g
- Unsaturated Fat: 4g
- Trans Fat: 0g
- Carbohydrates: 20g
- Fiber: 0g
- Protein: 2g
- Cholesterol: 10mg
Marcus Hale
Founder & Recipe Storyteller
Expertise
Education
Holyoke Community College – HCC-MGM Culinary Arts Institute
Marcus grew up surrounded by maple trees, farm stands, and the smell of Sunday stew simmering on the stove. After earning his Culinary Arts Certificate from the HCC-MGM Culinary Arts Institute, he knew he didn’t want to work in fancy kitchens, he wanted to cook for real people.
At Whip Up Cook Up, Marcus is the guy turning memories into meals. His recipes are fast, full of flavor, and built for home cooks who want big taste without the drama.