The Best Peanut Butter Kiss Cookies Recipe You’ll Ever Make
Sweet memories dance through kitchens when classic peanut butter kiss cookies arrive on the scene.
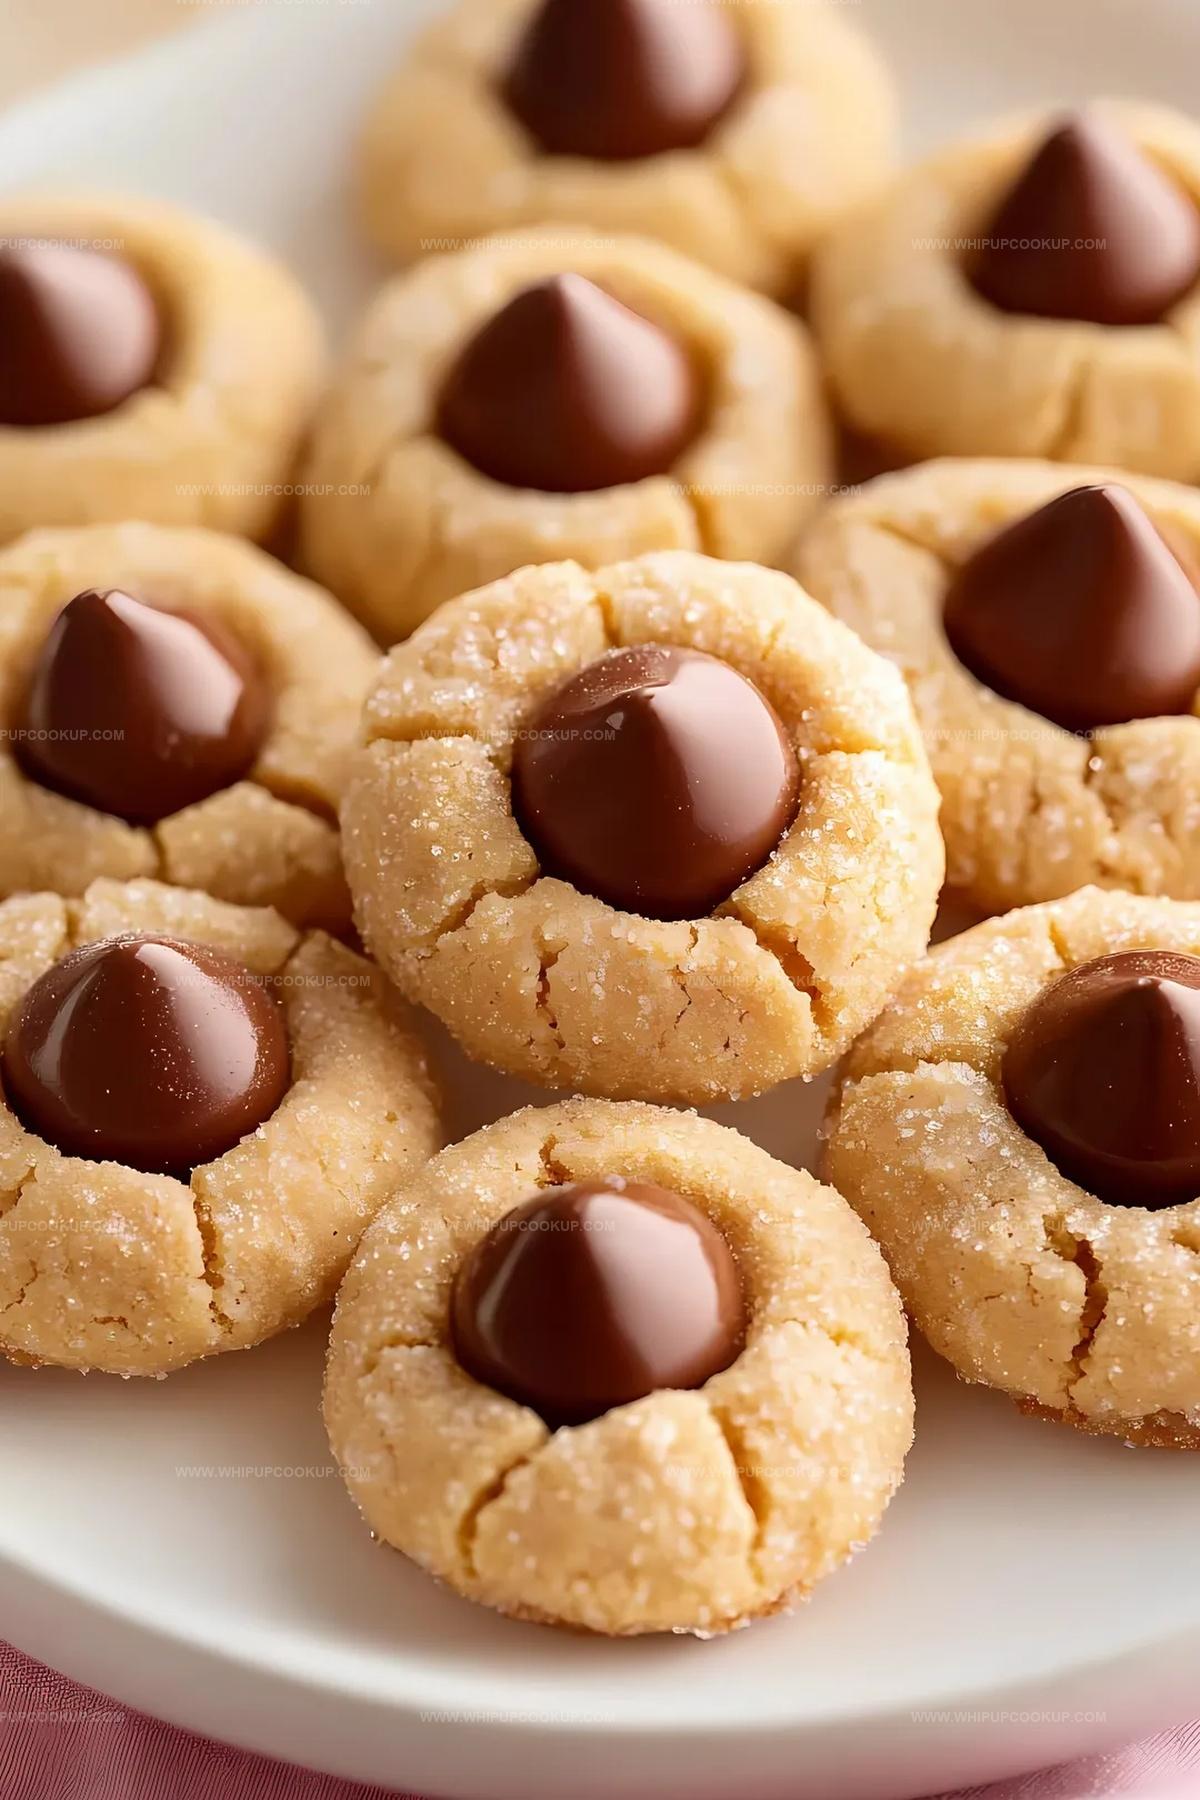
Chocolate drops nestled atop soft, pillowy dough create instant excitement for anyone who loves simple desserts.
Warm aromas will drift through your home, promising delectable treats that spark joy.
Classic ingredients combine effortlessly in this nostalgic recipe that connects generations of bakers.
Soft centers mingle with rich chocolate kisses, creating perfect bite-sized delights.
Crisp edges and tender middles make these cookies irresistible for everyone from kids to grandparents.
You can whip up this charming treat in less than an hour and become the star baker of your household.
Peanut Butter Kiss Cookie Highlights You’ll Notice
Peanut Butter Kiss Cookies (6-Ingredient) Ingredients
Main Ingredients:Binding Ingredients:Topping Ingredient:Peanut Butter Kiss Cookies: Follow These Steps
Step 1: Prepare Baking Setup
Preheat the oven to 350°F. Cover a baking sheet with a silicone mat or parchment paper. This ensures your cookies won’t stick and bake evenly.
Step 2: Create Cookie Base
Grab a large mixing bowl and combine:Beat these ingredients with an electric mixer until the mixture becomes smooth and creamy, which takes about 2-3 minutes.
Step 3: Add Binding Ingredients
Pour in the egg and vanilla extract. Mix thoroughly until all ingredients are perfectly blended and create a uniform dough.
Step 4: Shape Cookie Dough
Use a tablespoon to scoop heaping portions of dough. Roll each portion into small balls, approximately 1¼ inches in diameter. Place these dough balls on the prepared baking sheet, leaving 2-3 inches of space between each cookie.
Step 5: Initial Baking Process
Place the baking sheet in the preheated oven. Bake for 8 minutes, watching for the edges to become firm and slightly set.
Step 6: Add Chocolate Kisses
Remove the cookies from the oven. Immediately press a Hershey Kiss into the center of each warm cookie. This creates a delightful chocolate center.
Step 7: Cool and Serve
Allow the cookies to cool completely at room temperature. The chocolate kiss will set, creating a perfect sweet finish to your homemade treats.
Cookie Tips That Make Peanut Butter Kisses Shine
Tips for Storing Peanut Butter Kiss Cookies Properly
What Goes with Peanut Butter Kiss Cookies
Recipe Takes for Peanut Butter Kiss Cookies (6-Ingredient)
FAQs
Yes, but you might need to adjust the sugar slightly. Natural peanut butter tends to be less sweet and can make cookies slightly drier, so consider adding a bit more sugar or using a stabilized version.
After baking, let cookies cool for 1-2 minutes before gently pressing Kisses into the center. The residual heat will slightly soften the chocolate without completely liquefying it.
The basic ingredients are gluten-free, but always check your specific peanut butter and vanilla extract labels to confirm no gluten-containing additives are present.
Absolutely! You can refrigerate the dough for up to 3 days or freeze it for up to 2 weeks. Just bring it to room temperature before baking and rolling into balls.
Print
Peanut Butter Kiss Cookies Recipe
- Total Time: 23 minutes
- Yield: 24 1x
Description
Irresistible peanut butter kiss cookies bring classic comfort with a sweet chocolate twist, blending creamy nutty goodness and rich Hershey’s kisses. Bakers discover pure delight in this simple, nostalgic treat that melts hearts and satisfies cookie cravings.
Ingredients
Cookies Base:
- 1 cup (240 ml) creamy peanut butter
- 1/2 cup (100 g) granulated sugar
- 1/2 cup (110 g) brown sugar
- 1 egg
Flavor Enhancers:
- 1 teaspoon (5 ml) vanilla extract
Topping:
- 24 unwrapped Hershey Kisses
Instructions
- Prepare the oven environment by heating to 350°F and arranging a silicone mat or parchment paper on a baking sheet for optimal cookie performance.
- Utilize an electric mixer to create a smooth, homogeneous blend of peanut butter, granulated sugar, and brown sugar, whipping until the mixture reaches a creamy consistency.
- Incorporate the egg and vanilla extract, thoroughly integrating these liquid components to develop a unified dough structure.
- Craft uniform cookie portions by scooping and rolling the mixture into perfectly rounded 1 ¼-inch spheres, strategically positioning them on the prepared baking surface with generous spacing.
- Transfer the cookie-laden sheet into the preheated oven, allowing the edges to set and develop a delicate golden perimeter through an 8-minute baking cycle.
- Execute a precise finishing touch by gently nestling a Hershey Kiss into the center of each warm cookie, creating a chocolate focal point.
- Exercise patience by permitting the cookies to cool completely, enabling the chocolate to stabilize and the cookie texture to solidify before indulging in these delectable treats.
Notes
- Swap peanut butter with sunflower seed butter for a nut-free version perfect for school lunches or allergic individuals.
- Chill dough for 15-30 minutes before rolling to prevent spreading and create more uniform, prettier cookies.
- For gluten-sensitive friends, confirm your peanut butter is certified gluten-free, as some brands might have cross-contamination risks.
- Use room temperature egg and kiss chocolates to ensure even baking and smooth chocolate melting into cookie center.
- Prep Time: 15 minutes
- Cook Time: 8 minutes
- Category: Desserts, Snacks
- Method: Baking
- Cuisine: American
Nutrition
- Serving Size: 24
- Calories: 139
- Sugar: 7 g
- Sodium: 78 mg
- Fat: 6 g
- Saturated Fat: 2 g
- Unsaturated Fat: 4 g
- Trans Fat: 0 g
- Carbohydrates: 19 g
- Fiber: 1 g
- Protein: 3 g
- Cholesterol: 10 mg
Marcus Hale
Founder & Recipe Storyteller
Expertise
Education
Holyoke Community College – HCC-MGM Culinary Arts Institute
Marcus grew up surrounded by maple trees, farm stands, and the smell of Sunday stew simmering on the stove. After earning his Culinary Arts Certificate from the HCC-MGM Culinary Arts Institute, he knew he didn’t want to work in fancy kitchens, he wanted to cook for real people.
At Whip Up Cook Up, Marcus is the guy turning memories into meals. His recipes are fast, full of flavor, and built for home cooks who want big taste without the drama.