The Best Peppermint Bark Recipe for Holiday Magic
Crafting delectable peppermint bark during holiday celebrations brings pure joy to kitchen adventures.
Sweet memories dance through festive kitchens with this simple treat.
Chocolate lovers understand the magic of combining rich cocoa with cool mint flavors.
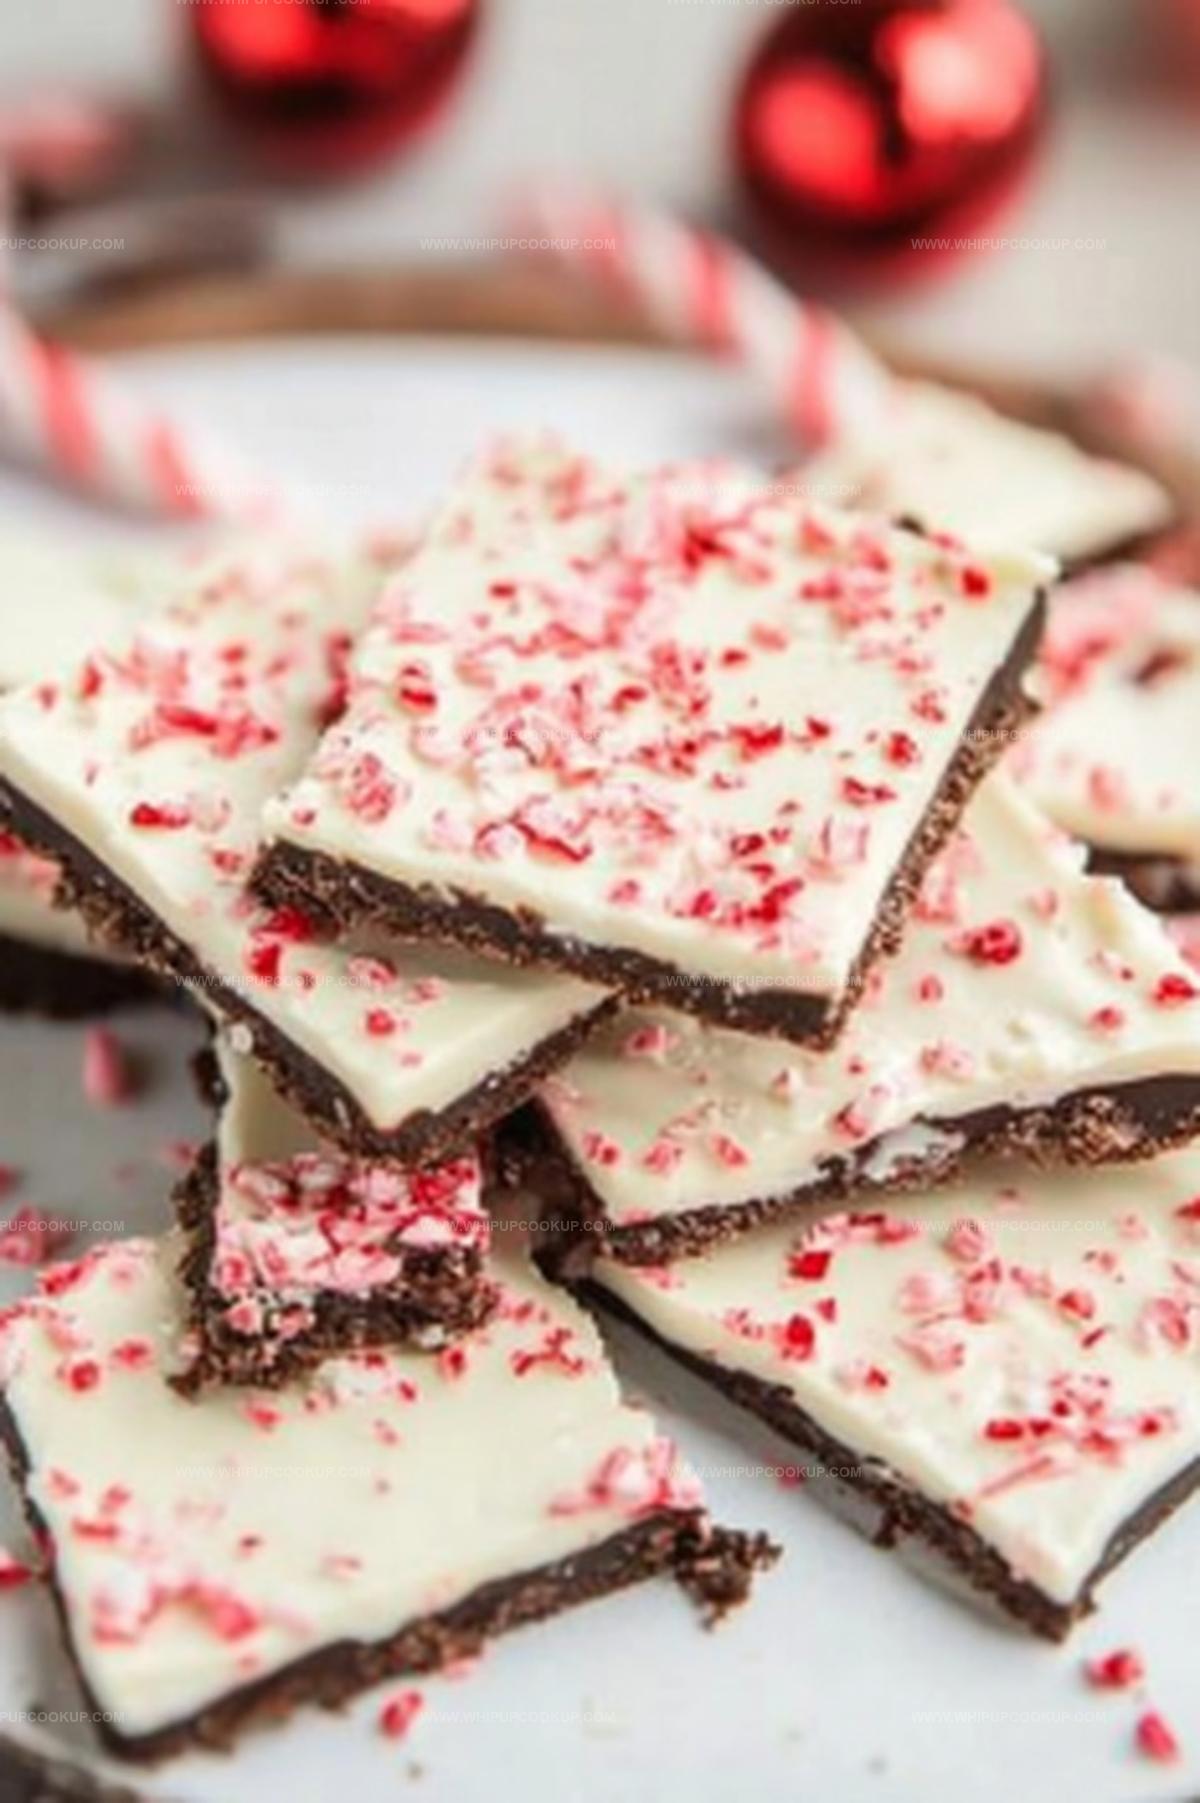
Layers of smooth dark chocolate and creamy white chocolate create a stunning dessert.
Crisp candy cane pieces add delightful crunch and seasonal spirit.
Minimal ingredients and quick preparation make this recipe perfect for spontaneous baking moments.
Get ready to impress everyone with a classic confection that sparkles with peppermint cheer.
Peppermint Bark That Delivers Holiday Chocolate Mint Bliss
Peppermint Bark Holiday Treat Ingredients
Chocolate Base:Chocolate Topping:Peppermint Elements:Preparation Essentials:Preparing Peppermint Bark That’s Festive and Delicious
Step 1: Prepare Baking Surface
Cover a baking sheet completely with parchment paper, ensuring the entire surface is smooth and flat.
Step 2: Craft Dark Chocolate Base
Melt dark chocolate chips in a microwave-safe bowl using short intervals, stirring between each heating cycle until completely smooth and glossy.
Step 3: Spread Chocolate Layer
Pour melted dark chocolate onto the lined baking sheet, using a spatula to create an even layer approximately ¼-inch thick across the surface.
Step 4: Melt White Chocolate
Heat white chocolate chips in a separate microwave-safe bowl, stirring frequently to prevent burning and achieve a silky consistency.
Step 5: Blend Peppermint Pieces
Mix a portion of crushed peppermint candies directly into the melted white chocolate, creating a festive and flavorful blend.
Step 6: Create Layered Topping
Gently spread the peppermint-infused white chocolate over the dark chocolate base, ensuring a uniform coverage.
Step 7: Decorate With Peppermint
Sprinkle the remaining crushed peppermint candies across the top of the white chocolate layer for added crunch and visual appeal.
Step 8: Chill and Set
Place the baking sheet in the refrigerator for approximately 10 minutes, allowing the chocolate to firm up completely.
Step 9: Break Into Pieces
Remove the bark from the refrigerator and use a sharp knife to cut or break into irregular, rustic pieces ready for enjoying.
Bark Tips That Capture Festive Peppermint Joy
Melt Chocolate Strategically: Use short microwave bursts and stir between intervals to prevent burning and ensure smooth, glossy chocolate layers.
Select Quality Ingredients: Choose high-quality dark and white chocolate chips for richer flavor and better melting consistency.
Control Candy Crunch: Crush peppermint candies to different sizes for varied texture – some fine powder, some small chunks for interesting mouthfeel.
Chill Completely: Refrigerate bark until totally firm to create a clean, crisp break when cutting or snapping into pieces.
Store Smartly: Keep peppermint bark in an airtight container between wax paper layers in the refrigerator for up to two weeks to maintain freshness.
Best Way to Store Peppermint Bark for Later
Peppermint Bark Match Ideas
Peppermint Bark Holiday Style Options
FAQs
Yes, you can chop chocolate bars into small pieces to melt them evenly. Just ensure they are of good quality baking chocolate for the best results.
Crush them into small, varied pieces – some fine powder and some small chunks. This creates a more interesting texture and helps the candies stick better to the chocolate.
Candy canes or round peppermint hard candies work perfectly. Choose bright red and white striped candies for a classic holiday look and crisp peppermint flavor.
Let the dark chocolate layer partially set in the refrigerator for 5-10 minutes before adding the white chocolate layer. This helps the layers bond together more effectively and prevents them from sliding apart.
Print
Peppermint Bark Recipe
- Total Time: 27 minutes
- Yield: 12 1x
Description
Sweet holiday magic meets chocolate bliss in this classic Peppermint Bark, where rich dark chocolate and creamy white chocolate create a festive crunch. Crushed candy canes sprinkled across smooth layers deliver a cool, minty celebration perfect for winter gatherings.
Ingredients
Main Chocolate Ingredients:
- 18 ounces (510 grams) dark chocolate chips
- 18 ounces (510 grams) white chocolate chips
Topping:
- 1/2 cup (120 milliliters) crushed candy canes or peppermint candies
Instructions
- Prepare a rimmed baking tray with parchment paper, ensuring complete coverage of the surface.
- Gently melt dark chocolate in a microwave-safe vessel, stirring periodically to achieve a smooth, glossy consistency.
- Pour the molten dark chocolate onto the lined tray, using a spatula to create an even, uniform layer approximately quarter-inch thick.
- Clean the previous microwave vessel and repeat the melting process with white chocolate chips, maintaining careful temperature control.
- Incorporate a portion of crushed peppermint candies directly into the warm white chocolate, stirring until evenly distributed.
- Delicately cascade the white chocolate mixture over the dark chocolate foundation, using smooth, gentle motions to prevent mixing.
- Generously dust the remaining peppermint candy fragments across the surface, ensuring complete and decorative coverage.
- Transfer the chocolate creation to the refrigerator, allowing it to solidify and set for approximately 10-12 minutes.
- Once completely hardened, utilize a sharp chef’s knife to slice or strategically fracture the bark into rustic, irregular pieces.
- Serve immediately or store in an airtight container to preserve freshness and crispness.
Notes
- Ensure chocolate melts smoothly by using low microwave heat and stirring frequently to prevent burning or seizing.
- Add extra flavor complexity by using high-quality dark and white chocolate with at least 60% cocoa content for richer taste.
- Create gluten-free version by verifying all chocolate brands are certified gluten-free before preparation.
- Customize bark texture by experimenting with different peppermint candy sizes for varied crunch and visual appeal.
- Prep Time: 15 minutes
- Cook Time: 12 minutes
- Category: Desserts, Snacks
- Method: Baking
- Cuisine: American
Nutrition
- Serving Size: 12
- Calories: 245
- Sugar: 24 g
- Sodium: 30 mg
- Fat: 14 g
- Saturated Fat: 8 g
- Unsaturated Fat: 6 g
- Trans Fat: 0 g
- Carbohydrates: 28 g
- Fiber: 1 g
- Protein: 2 g
- Cholesterol: 0 mg
Marcus Hale
Founder & Recipe Storyteller
Expertise
Education
Holyoke Community College – HCC-MGM Culinary Arts Institute
Marcus grew up surrounded by maple trees, farm stands, and the smell of Sunday stew simmering on the stove. After earning his Culinary Arts Certificate from the HCC-MGM Culinary Arts Institute, he knew he didn’t want to work in fancy kitchens, he wanted to cook for real people.
At Whip Up Cook Up, Marcus is the guy turning memories into meals. His recipes are fast, full of flavor, and built for home cooks who want big taste without the drama.