
Hearty Pierogie & Kielbasa Casserole Recipe for Cozy Dinners
Crafting a hearty pierogie and kielbasa casserole brings comfort straight to your dinner table.
Eastern European flavors dance together in this simple yet satisfying dish.
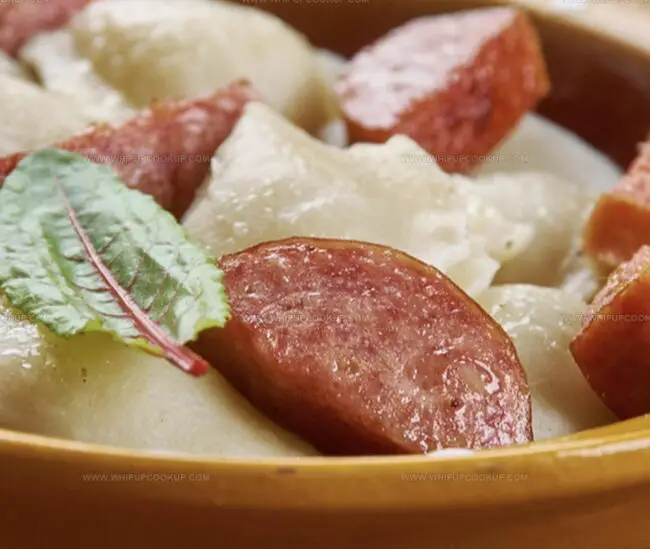
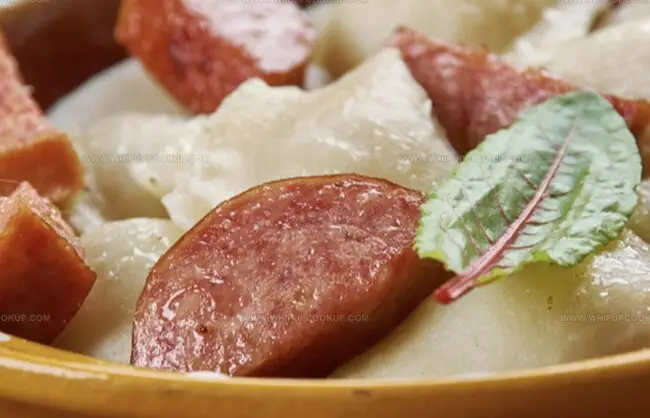
Layers of soft potato dumplings mingle with smoky sausage chunks.
Cheese melts into every delicious corner, creating a warm embrace of flavor.
Quick preparation means you can have this meal ready in under an hour.
Crispy edges and creamy center promise a delightful experience for everyone gathering around the plate.
Dive into this classic Polish-inspired comfort food that will leave you wanting seconds.
Why Pierogie & Kielbasa Casserole Is So Comforting
Pierogie & Kielbasa Casserole Ingredients
Main Ingredients:Optional Vegetable:Cheese and Seasoning:Preparation Ingredients:Pierogie Kielbasa Casserole Cooking Guide
Step 1: Fire Up the Oven
Crank your oven to a toasty 400°F. Grab a 9×13-inch baking dish and give it a quick spray of cooking oil or rub it down with butter to prevent sticking.
Step 2: Layer the Deliciousness
Spread out those frozen pierogies across the bottom of the dish in an even layer. Slice up the kielbasa and scatter it over the pierogies. If you’re feeling green, toss in some fresh green beans for extra nutrition. Pour half a can of chicken broth over everything to keep things moist and flavorful.
Step 3: Bake to Perfection
Slide the dish into the hot oven and let it cook for about 30 minutes. You’ll know it’s ready when the pierogies are tender and the kielbasa is heated through and looking deliciously golden.
Step 4: Cheese It Up
Grab your favorite shredded cheese and sprinkle it generously over the top of the casserole. Pop it back in the oven for another 5 minutes until the cheese melts into a bubbling, gooey blanket.
Step 5: Season and Serve
Dust the casserole with a sprinkle of garlic salt to amp up the flavor. Grab a big serving spoon and dish out this comfort food classic while it’s hot. Get ready for a meal that’ll make everyone at the table smile!
Casserole Tips That Bring Out the Best in Pierogie & Kielbasa
How to Keep Pierogie & Kielbasa Casserole Fresh
Comfort Food Companions for Pierogie Casserole
Pierogie Kielbasa Bake Spins
FAQs
Yes, pierogies originated in Poland and are a beloved staple of Polish cuisine. They are dumplings typically filled with potato, cheese, sauerkraut, or meat.
Fresh pierogies work great, but you’ll need to adjust cooking time. Frozen pierogies are more convenient and hold up better in casserole dishes.
Polish kielbasa or smoked kielbasa work perfectly. Stick with a high-quality sausage that has good flavor and will complement the pierogies.
Absolutely! The combination of pierogies, kielbasa, and optional green beans provides protein, carbohydrates, and vegetables, making it a balanced one-dish meal.
Print
Pierogie & Kielbasa Casserole Recipe
- Total Time: 45 minutes
- Yield: 6 1x
Description
Polish comfort meets hearty satisfaction in this Pierogi & Kielbasa Casserole, blending traditional Eastern European flavors into a single satisfying dish. Creamy potatoes, savory sausage, and pillowy pierogies create a warming meal you’ll crave during chilly evenings.
Ingredients
Main Ingredients:
- 2 boxes (16 ounces / 454 grams) frozen pierogies
- 1 package (14 ounces / 397 grams) smoked sausage (kielbasa), sliced into rounds
- 1 bag (2 cups / 226 grams) shredded cheese (cheddar, Colby Jack, or your favorite blend)
Liquid Ingredients:
- 1/2 can (about 1 cup / 240 milliliters) chicken broth
Optional Ingredients:
- 1 can (14.5 ounces / 411 grams) green beans (optional, drained)
- Garlic salt (to taste)
Instructions
- Heat the oven to a robust 400°F, creating an ideal environment for baking the casserole.
- Generously coat a 9×13-inch baking vessel with cooking spray or butter to prevent sticking.
- Arrange frozen pierogies in a uniform layer across the bottom of the prepared dish, creating a foundational base.
- Distribute kielbasa slices and green beans evenly over the pierogies, ensuring balanced coverage.
- Gently cascade half a can of chicken broth across the ingredients, infusing moisture and enhancing flavor profile.
- Transfer the assembled casserole into the preheated oven, allowing it to bake for approximately 30 minutes until pierogies reach a tender consistency and kielbasa becomes thoroughly heated.
- Delicately blanket the casserole with a generous layer of shredded cheese, covering the entire surface.
- Return the dish to the oven for an additional 5 minutes, permitting the cheese to melt into a luscious, bubbling topping.
- Finish by sprinkling garlic salt across the surface, tailoring the seasoning to personal taste preferences.
- Serve immediately while piping hot, inviting diners to savor this comforting Polish-inspired meal.
Notes
- Swap frozen pierogies with homemade or fresh versions for a more authentic taste and texture.
- Experiment with different cheese varieties like sharp cheddar, smoked gouda, or pepper jack to add unique flavor profiles.
- Reduce sodium by using low-sodium chicken broth and skipping additional salt, making this dish friendlier for heart-healthy diets.
- Incorporate extra vegetables like roasted bell peppers, diced onions, or sautéed mushrooms to boost nutritional value and add complexity to the dish.
- Prep Time: 10 minutes
- Cook Time: 35 minutes
- Category: Dinner, Lunch
- Method: Baking
- Cuisine: Polish
Nutrition
- Serving Size: 6
- Calories: 480
- Sugar: 3 g
- Sodium: 950 mg
- Fat: 24 g
- Saturated Fat: 10 g
- Unsaturated Fat: 12 g
- Trans Fat: 0 g
- Carbohydrates: 48 g
- Fiber: 2 g
- Protein: 20 g
- Cholesterol: 60 mg
Marcus Hale
Founder & Recipe Storyteller
Expertise
Education
Holyoke Community College – HCC-MGM Culinary Arts Institute
Marcus grew up surrounded by maple trees, farm stands, and the smell of Sunday stew simmering on the stove. After earning his Culinary Arts Certificate from the HCC-MGM Culinary Arts Institute, he knew he didn’t want to work in fancy kitchens, he wanted to cook for real people.
At Whip Up Cook Up, Marcus is the guy turning memories into meals. His recipes are fast, full of flavor, and built for home cooks who want big taste without the drama.