
Melt-in-Your-Mouth Roast Beef Tenderloin Reverse Sear Recipe
My culinary adventure with roast beef tenderloin reverse sear technique promises an extraordinary dining experience that will revolutionize your cooking approach.
Precision matters when preparing this luxurious cut of meat.
Professional chefs swear by this method to achieve perfectly cooked, tender results every single time.
Minimal ingredients and careful temperature control unlock incredible flavors and textures.
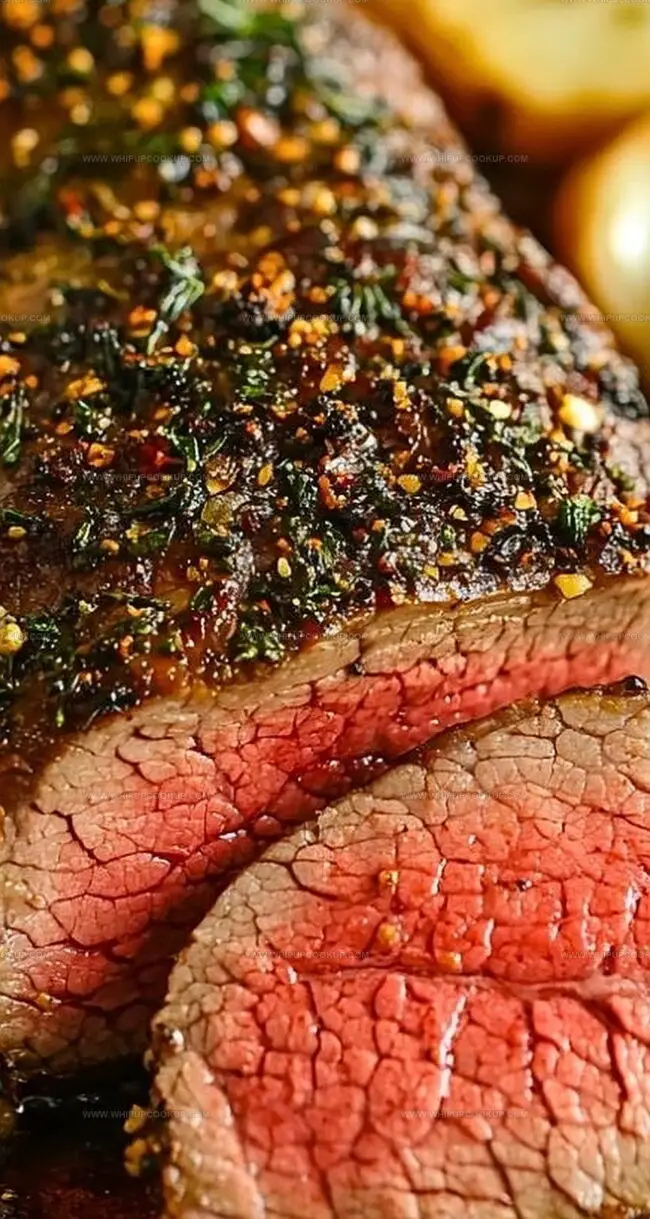
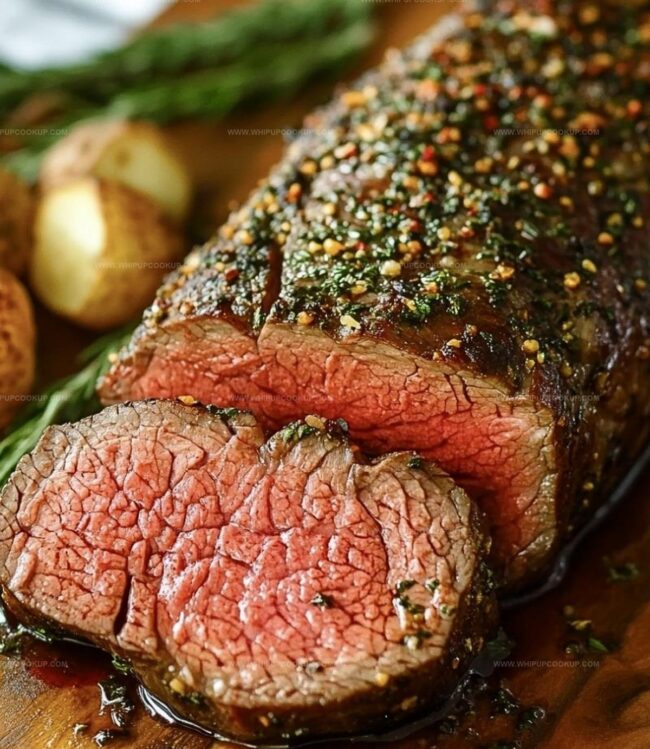
Succulent slices emerge with a gorgeous golden-brown exterior and a melt-in-your-mouth interior that impresses even the most discerning palates.
Mastering this technique requires patience and attention to detail.
Let’s transform an ordinary dinner into an unforgettable gourmet moment that celebrates simplicity and skill.
Why This Beef Tenderloin Is a Showstopper
Ingredients for Reverse Sear Tenderloin
Main Protein:Seasoning and Herbs:Cooking Enhancers:How to Make Perfect Reverse Sear Tenderloin
Step 1: Prepare the Beef Tenderloin
Carefully trim any excess fat or silver skin from the beef tenderloin.
If needed, tie the roast with kitchen twine to ensure even cooking.
Use paper towels to pat the meat completely dry, which helps create an amazing crust.
Step 2: Season the Roast
Create a flavor-packed coating by rubbing the tenderloin with:Massage the seasonings thoroughly into every inch of the meat.
Step 3: Dry Brine the Beef
Place the seasoned tenderloin on a plate and refrigerate uncovered for 4-12 hours.
This technique allows the seasonings to penetrate deeply and helps develop a spectacular exterior crust.
Step 4: Bring Meat to Room Temperature
Remove the tenderloin from the refrigerator 45 minutes before cooking.
Allowing the meat to warm up ensures more even cooking throughout.
Step 5: Prepare for Slow Roasting
Preheat the oven to 225°F.
Position a wire rack inside a rimmed baking sheet.
Gently place the beef tenderloin on the rack, ensuring space around the meat for air circulation.
Step 6: Monitor Internal Temperature
Insert a meat thermometer into the thickest part of the roast.
This will help you track the cooking progress precisely.
Step 7: Slow Roast the Beef
Cook the tenderloin until the internal temperature reaches 120-125°F for medium-rare.
This typically takes 45-60 minutes, depending on the roast’s size.
Step 8: Rest the Roast
Remove the beef from the oven and let it rest while preparing the skillet.
This allows the juices to redistribute throughout the meat.
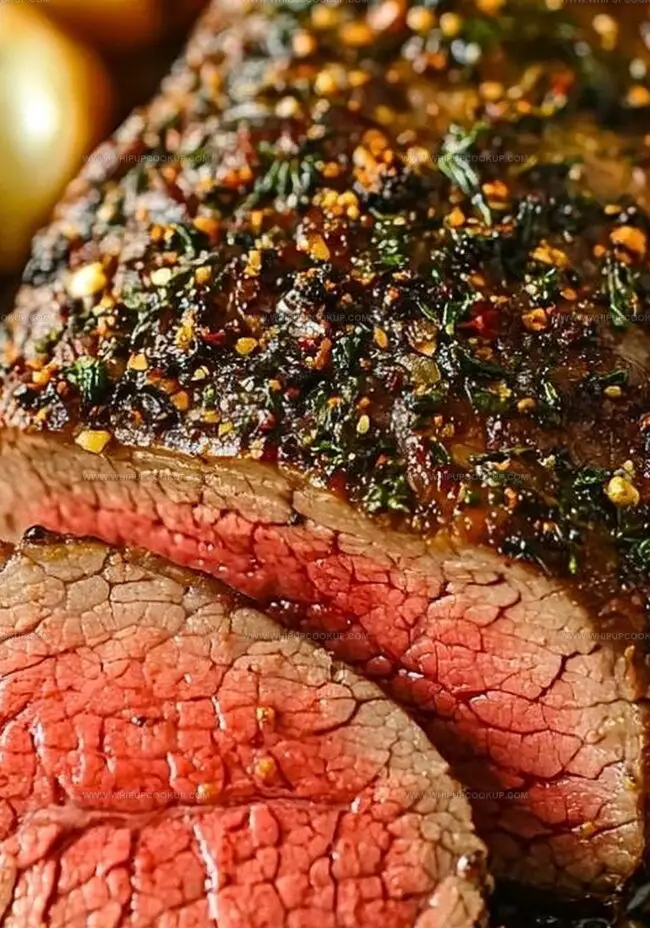
Step 9: Create a Golden Crust
Heat a cast iron skillet over high heat.
Add:Sear the tenderloin for 1-2 minutes on each side until a beautiful golden-brown crust forms.
Step 10: Final Rest and Serve
Let the roast rest for 10 minutes before slicing.
This ensures maximum juiciness.
Slice against the grain and serve immediately to enjoy the most tender, flavorful beef tenderloin.
Tips for Juicy Roast Beef Every Time
How to Store and Warm Up Tenderloin Leftovers
Great Pairings for Roast Beef Tenderloin
Bold Beef Tenderloin Style Ideas
FAQs
The reverse sear ensures even cooking throughout the meat, produces a perfectly consistent internal temperature, and creates a beautiful golden crust without overcooking the interior. It allows for precise temperature control and results in a more tender, juicy roast.
Absolutely! While rosemary and thyme are classic choices, you can experiment with herbs like oregano, sage, or herbes de Provence. The key is to use fresh or dried herbs that complement beef’s rich flavor and create a delicious aromatic crust.
Use a meat thermometer inserted into the thickest part of the roast. For medium-rare, aim for an internal temperature of 120–125°F before searing. After resting, the temperature will rise slightly, ensuring a perfectly cooked, juicy tenderloin.
Kosher salt or sea salt are ideal for seasoning beef tenderloin. They provide better flavor distribution and adhere well to the meat’s surface. Avoid table salt, as it can make the roast too salty and lacks the same texture for even coating.
Print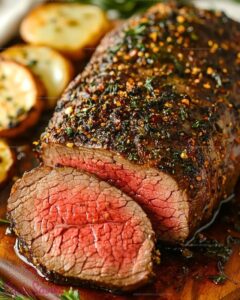
Roast Beef Tenderloin Reverse Sear Recipe
- Total Time: 5 hours
- Yield: 8 1x
Description
Succulent roast beef tenderloin reverse sear elevates classic comfort to gourmet heights with precise temperature control and rich, tender results. Culinary enthusiasts discover a foolproof method for achieving perfect medium-rare doneness that impresses dinner guests with minimal effort.
Ingredients
Main Protein:
- 1 whole beef tenderloin roast (3–4 lbs), trimmed and tied
Spices and Seasonings:
- 2 teaspoons kosher salt
- 1 1/2 teaspoons freshly ground black pepper
- 1 teaspoon garlic powder
- 1 teaspoon fresh rosemary, finely chopped (or 1/2 teaspoon dried)
- 1 teaspoon fresh thyme, finely chopped (or 1/2 teaspoon dried)
Cooking Ingredients:
- 2 tablespoons olive oil
- 2 tablespoons unsalted butter
- 2–3 garlic cloves, smashed
- Fresh rosemary or thyme sprigs (optional, for searing/garnish)
Instructions
- Meticulously prepare the beef tenderloin by trimming excess fat and securing with kitchen twine if necessary. Thoroughly blot the meat surface using clean paper towels to ensure optimal seasoning adherence.
- Generously massage the entire roast with olive oil, creating an even coating that will help spices cling perfectly.
- Create a robust seasoning blend using salt, freshly ground black pepper, garlic powder, crushed rosemary, and crumbled thyme, massaging the mixture deeply into the meat’s surface.
- Allow the seasoned roast to rest uncovered in the refrigerator for a minimum of 4 hours, permitting flavors to penetrate and develop a remarkable crust.
- Remove the tenderloin from refrigeration approximately 45 minutes before cooking, allowing the meat to gradually approach room temperature.
- Position oven rack in lower-middle section and preheat to a precise 225°F, creating an ideal low-and-slow environment for even cooking.
- Arrange a wire cooling rack atop a rimmed baking sheet, positioning the roast centrally to promote uniform heat circulation.
- Insert a reliable meat thermometer into the roast’s thickest region, ensuring accurate internal temperature monitoring.
- Roast the tenderloin until internal temperature reaches 120–125°F for a perfect medium-rare, which typically requires 45–60 minutes of gentle cooking.
- Once desired temperature is achieved, transfer the roast to a cutting board and allow it to rest, preserving internal juices.
- While meat rests, heat a cast iron skillet until smoking hot, preparing for a quick, intense sear.
- Introduce butter, smashed garlic cloves, and fresh herb sprigs to the scorching skillet, creating a fragrant cooking environment.
- Sear the tenderloin swiftly, rotating to develop a rich, golden-brown crust on all sides—approximately 1–2 minutes per surface.
- After searing, let the roast rest an additional 10 minutes to redistribute internal moisture, ensuring each slice remains succulently tender.
- Slice against the grain into elegant, uniform portions and serve immediately while piping hot.
Notes
- Ensure the beef is completely dry before seasoning to achieve a perfect golden-brown crust that seals in all the delicious juices.
- Refrigerating uncovered helps dry out the surface, creating an incredibly crispy exterior when seared.
- Use a reliable meat thermometer for precise doneness, as cooking times can vary based on roast size and individual oven characteristics.
- For a low-carb or keto-friendly option, pair this tender roast with roasted vegetables instead of starchy sides.
- Prep Time: 4 hours
- Cook Time: 1 hour
- Category: Dinner
- Method: Roasting
- Cuisine: American
Nutrition
- Serving Size: 8
- Calories: 350
- Sugar: 0 g
- Sodium: 750 mg
- Fat: 22 g
- Saturated Fat: 9 g
- Unsaturated Fat: 11 g
- Trans Fat: 0 g
- Carbohydrates: 1 g
- Fiber: 0 g
- Protein: 32 g
- Cholesterol: 100 mg
Olivia Bennett
Recipe Developer & Culinary Educator
Expertise
Education
Schoolcraft College
With an Associate Degree in Culinary Arts from Schoolcraft College and a natural knack for teaching, Olivia Bennett’s all about making home cooking feel possible, even on your busiest day.
Her thing? Recipes that are budget-friendly, season-forward, and full of Southern warmth. Whether it’s a roasted veggie bowl or a five-ingredient skillet bake, Olivia makes sure it’s simple, satisfying, and something you’ll want to make again tomorrow.
When she’s not shooting step-by-step videos or testing spice blends, she’s out foraging, flipping through old cookbooks, or throwing laid-back dinner parties with a BYO-mason-jar theme.