Magical Snowflake Sugar Cookies Recipe for Winter Sweetness
Sweet winter magic happens when snowflake sugar cookies dance onto your holiday plate, bringing delicate frosted charm to festive gatherings.
Delicate patterns emerge from simple ingredients and careful crafting.
Powdered sugar and intricate designs transform basic cookie dough into elegant edible art.
Crisp edges and soft centers create perfect texture contrasts that delight every sweet tooth.
Decorating becomes a playful experience of creativity and precision.
Guests will marvel at these stunning treats that look almost too beautiful to consume.
Bake these cookies and watch winter wonder unfold right in your kitchen.
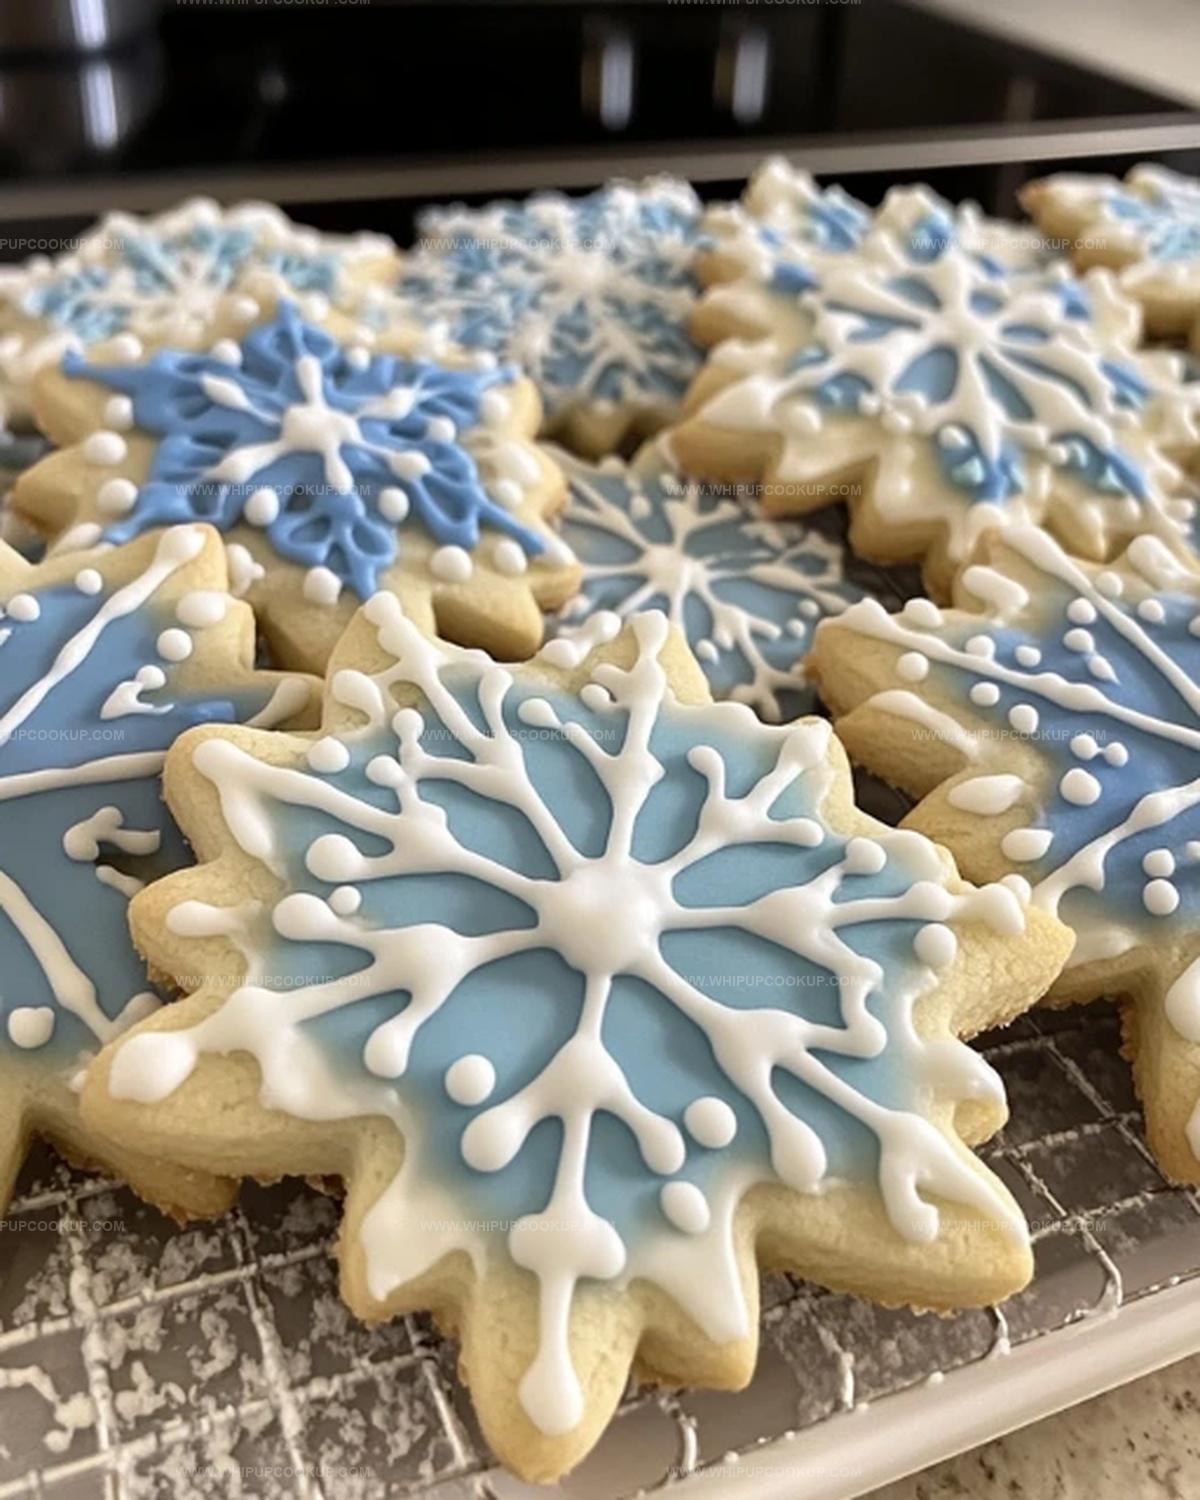
Snowflake Cookies That Look as Magical as They Taste
Snowflake Sugar Cookies What Goes In
Dry Ingredients:Wet Ingredients:Icing Ingredients:Baking Snowflake Sugar Cookies That Sparkle with Style
Step 1: Prepare Cookie Dough Base
Grab a medium bowl and whisk together flour, baking powder, and salt until perfectly blended. In a separate large bowl, cream butter and sugar until they transform into a light, fluffy mixture. Drop in the egg, vanilla, and optional almond extract, mixing until everything combines smoothly. Gradually fold in the flour mixture, stirring gently until just incorporated. Split the dough into two equal portions, wrap each in plastic wrap, and chill in the refrigerator for a minimum of one hour to firm up.
Step 2: Roll and Shape Delicate Snowflakes
Warm up your oven to 350°F and line baking sheets with parchment paper. Dust your work surface with flour and roll out the chilled dough to a delicate quarter-inch thickness. Use a beautiful snowflake-shaped cookie cutter to create intricate shapes. Carefully transfer the cookies to prepared baking sheets, spacing them about an inch apart. Bake for 8-10 minutes until the edges turn a gentle golden color. Transfer to a wire rack and let cool completely.
Step 3: Craft Royal Icing Magic
In a clean bowl, combine:Slowly introduce warm water, mixing until the icing reaches a smooth, pipeable consistency. Divide the icing into two separate bowls. Transform one portion into a soft blue shade using food coloring, leaving the other pristine white.
Step 4: Create Stunning Snowflake Decorations
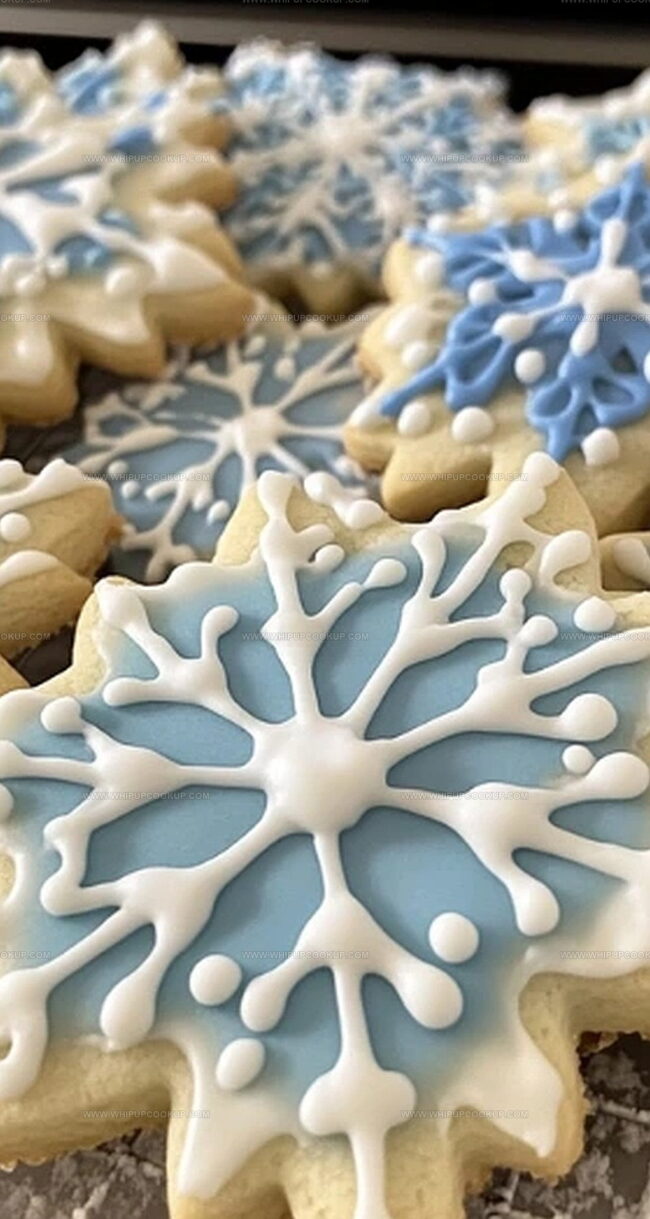
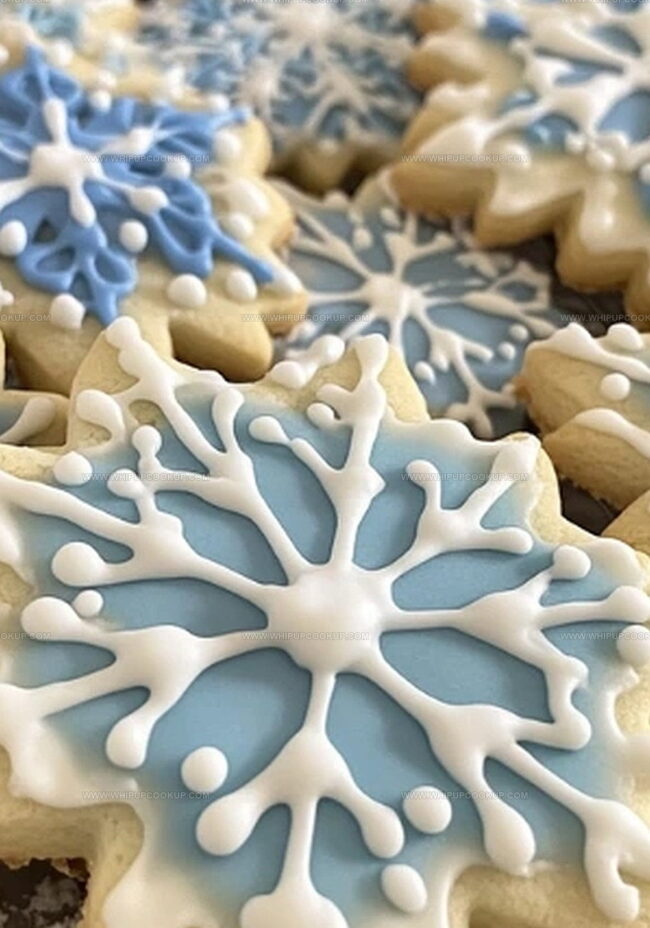
Begin by outlining each cookie with the blue icing, then flood the center to create a smooth base. Allow the base layer to dry for approximately 15 minutes. Pipe delicate white snowflake patterns across the surface. For an extra touch of winter wonder, add tiny dots or sprinkle edible glitter for a magical finish. Let the decorated cookies dry completely before serving or packaging.
Sugar Cookie Tips for Perfect Snowflake Designs
Store Snowflake Sugar Cookies for Holiday Delight
Snowflake Cookies Holiday Matches
Snowflake Cookie Decorating Options
FAQs
Chilling helps prevent spreading during baking and makes the dough easier to handle. It allows butter to firm up, ensuring cookies maintain their crisp snowflake shape.
Yes, you can skip almond extract or replace it with vanilla extract. The cookies will still taste delicious and have a classic sugar cookie flavor.
Add water or powdered sugar gradually while mixing. For a perfect consistency, the icing should flow smoothly but hold its shape when piped. Test by lifting the whisk and observing how the icing falls back into the bowl.
Gel food coloring is recommended because it provides vibrant color without changing the icing’s consistency. Liquid food coloring can make the icing too thin and affect its ability to set properly.
Print
Snowflake Sugar Cookies Recipe
- Total Time: 1 hour 40 minutes
- Yield: 24 1x
Description
Sweet holiday magic sparkles in these snowflake sugar cookies, perfectly crafted for winter celebrations. Delicate royal icing designs and crisp, buttery edges make these festive treats irresistible for seasonal gatherings where you’ll delight guests with elegant winter-inspired confections.
Ingredients
Dry Ingredients:
- 2 3/4 cups (343 grams) all-purpose flour
- 1 teaspoon (5 grams) baking powder
- 1/2 teaspoon (3 grams) salt
Wet Ingredients:
- 1 cup (227 grams) unsalted butter, softened
- 1 cup (200 grams) granulated sugar
- 1 large egg
Flavor Enhancers:
- 1 1/2 teaspoons (7 ml) vanilla extract
- 1/4 teaspoon (1 ml) almond extract (optional)
Instructions
- Prepare the foundational mixture by whisking together dry ingredients in a medium mixing vessel, ensuring even distribution of flour, leavening agent, and seasoning.
- In a separate larger container, cream butter and sugar until the texture becomes airy and voluminous, creating a smooth, pale base.
- Incorporate liquid elements including egg, vanilla essence, and optional almond extract, blending thoroughly until the mixture appears uniform and glossy.
- Gradually fold in the dry ingredient blend, stirring gently to prevent overmixing and maintain a tender cookie texture.
- Segment the dough into two equal portions, encase each in protective film, and chill within refrigerator for a minimum of 60 minutes to enhance flavor and facilitate easier handling.
- Heat culinary appliance to 350°F, positioning rack in central position and lining baking surfaces with parchment protection.
- On a lightly dusted work surface, roll dough to approximately quarter-inch thickness, ensuring consistent evenness.
- Utilize specialized snowflake-shaped cutting tool to extract delicate cookie silhouettes, positioning shapes with slight separation on prepared trays.
- Thermal processing requires 8-10 minutes, watching for subtle golden edges indicating perfect doneness. Transfer to cooling platform immediately after extraction.
- Construct decorative coating by combining powdered sugar with meringue powder, gradually introducing warm liquid to achieve optimal consistency.
- Separate icing into dual containers, reserving one for pristine white application and tinting alternative portion with azure pigmentation.
- Apply initial blue layer as precise outline, flooding interior surface for smooth foundation and allowing brief setting period.
- Embellish with intricate white snowflake detailing, enhancing with optional crystalline accents or delicate dotwork.
- Permit complete atmospheric drying before presentation or storage to maintain intricate decorative elements.
Notes
- Chill dough thoroughly to prevent spreading and maintain intricate snowflake shapes during baking.
- Use a light hand when rolling out dough to keep cookies tender and prevent tough texture.
- Calibrate oven temperature with an independent thermometer to ensure precise, even baking for delicate cookies.
- Adjust royal icing consistency by adding water drop-by-drop for perfect piping and smooth decorating technique.
- Swap almond extract with vanilla if nut allergies are a concern, maintaining the same delightful flavor profile.
- Store decorated cookies in single layers between parchment paper to preserve delicate snowflake designs.
- Create gluten-free version by substituting all-purpose flour with a high-quality 1:1 gluten-free baking blend.
- Reduce sugar content slightly for a less sweet cookie without compromising overall texture and taste.
- Prep Time: 1 hour 30 minutes
- Cook Time: 10 minutes
- Category: Desserts, Snacks
- Method: Baking
- Cuisine: American
Nutrition
- Serving Size: 24
- Calories: 150
- Sugar: 7 g
- Sodium: 60 mg
- Fat: 8 g
- Saturated Fat: 5 g
- Unsaturated Fat: 2 g
- Trans Fat: 0 g
- Carbohydrates: 20 g
- Fiber: 0 g
- Protein: 1 g
- Cholesterol: 30 mg
Marcus Hale
Founder & Recipe Storyteller
Expertise
Education
Holyoke Community College – HCC-MGM Culinary Arts Institute
Marcus grew up surrounded by maple trees, farm stands, and the smell of Sunday stew simmering on the stove. After earning his Culinary Arts Certificate from the HCC-MGM Culinary Arts Institute, he knew he didn’t want to work in fancy kitchens, he wanted to cook for real people.
At Whip Up Cook Up, Marcus is the guy turning memories into meals. His recipes are fast, full of flavor, and built for home cooks who want big taste without the drama.